
Upgrade Your Drupal Skills
We trained 1,000+ Drupal Developers over the last decade.
See Advanced Courses NAH, I know EnoughQuick Tip: Up and Running with Drupal 8 in Under Five Minutes
In this quick tip, we’ll be installing a local instance of Drupal 8, beta 1. By the end, you’ll have a copy of Drupal that’s not only ready to be extended with Symfony bundles and other packages, but also ready to accept content and display it to end users.
Step 1: Prepare Environment
In order for everyone to have the same starting point, we’ll be using our trusty old Homestead Improved vagrant box. It’s important to note that even if this tip will be installing Drupal 8 into the Vagrant box, the procedure is absolutely identical for any Ubuntu based environment.
So, somewhat optional, please clone a new Homestead Improved instance as per instructions in this tip. Then, add a new site and make sure you add the entry to your host machine’s hosts file. In my case, it’s test.app and Homestead.yaml looks like this:
---
ip: "192.168.10.10"
memory: 2048
cpus: 1

folders:
    - map: .
      to: /home/vagrant/Code

sites:
    - map: homestead.app
      to: /home/vagrant/Code/Laravel/public
    - map: test.app
      to: /home/vagrant/Code/drupal

variables:
    - key: APP_ENV
      value: local
Step 2: Download and extract Drupal 8 b1
If you’re using a VM, log into it and enter the folder where you keep your projects. In the case of the Homestead Improved installation above, that’ll be /home/vagrant/Code. If you’re using your own LAMP stack or whatever, just go into your projects folder.
wget http://ftp.drupal.org/files/projects/drupal-8.0.0-beta1.tar.gz
When downloading finishes, extract the archive and rename the resulting folder to drupal.
tar -xvzf drupal-8.0.0-beta1.tar.gz
mv drupal-8.0.0-beta1 drupal
Step 3: Create the DB
In this case we’ll be using MySQL. We’ll also be using Homestead-specific user/pass defaults. If you’ve got your own environment, adapt as needed. For PostgreSQL see here.
mysqladmin -u homestead -psecret create drupaltest
mysql -u homestead -psecret
Once in the MySQL console, execute the following:
GRANT SELECT, INSERT, UPDATE, DELETE, CREATE, DROP, INDEX, ALTER, CREATE TEMPORARY TABLES ON drupaltest.* TO 'homestead'@'localhost' IDENTIFIED BY 'secret';

exit
Step 4: Settings
In this step, we create a settings and services file from the provided templates, and let the Drupal installer edit them by altering permissions.
cd drupal
cp sites/default/default.settings.php sites/default/settings.php
cp sites/default/default.services.yml sites/default/services.yml
chmod a+w sites/default/settings.php
chmod a+w sites/default/services.yml
chmod a+w sites/default
Step 5: Install
In your host’s browser, enter the URL test.app:8000/install.php and follow the instructions of the wizard.
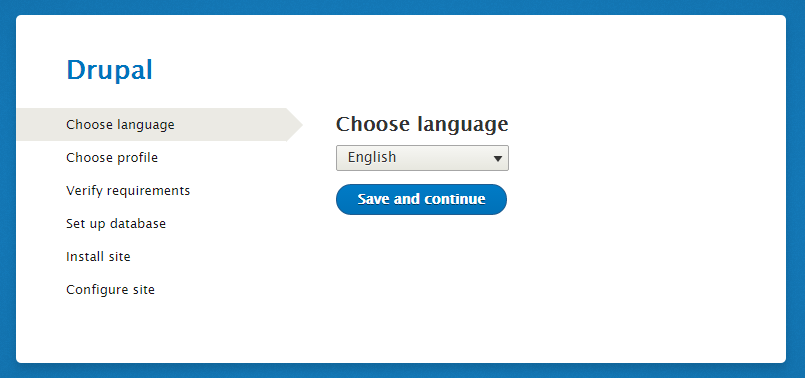
Choose a standard installation profile for the quickest setup. You can find out more about these profiles here, if interested.
Optional Cleanup and Tweaks
Optional but recommended:
- Remove the original downloaded archive to free up disk space
- Activate the cron
-
Change the permissions back:
chmod 644 sites/default/settings.php
chmod 644 sites/default/services.yml
chmod 755 sites/default
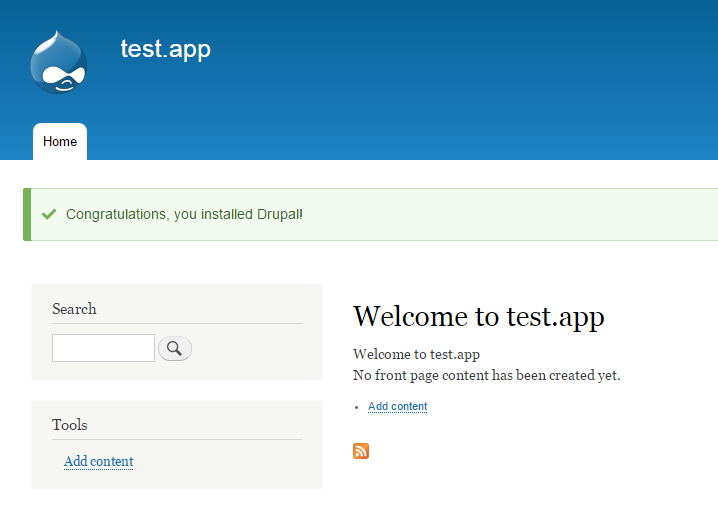
Conclusion
As you can see, adding a new Drupal installation onto your server can be done in minutes from total zero to fully functional CMS. For more information on other aspects and edge cases of Drupal installation, see their installation guide.
Bruno is a coder from Croatia with Master’s Degrees in Computer Science and English Language and Literature. He’s the editor of SitePoint’s PHP channel and a developer evangelist for Diffbot.com. He avoids legacy code like the plague and when picking projects makes sure they’re as cutting edge as possible. He’s a treadmill desk enthusiast and active (board)gamer who sometimes blogs.
About Drupal Sun
Drupal Sun is an Evolving Web project. It allows you to:
- Do full-text search on all the articles in Drupal Planet (thanks to Apache Solr)
- Facet based on tags, author, or feed
- Flip through articles quickly (with j/k or arrow keys) to find what you're interested in
- View the entire article text inline, or in the context of the site where it was created
See the blog post at Evolving Web