
Upgrade Your Drupal Skills
We trained 1,000+ Drupal Developers over the last decade.
See Advanced Courses NAH, I know Enough
Headless websites have taken the industry by storm, promising to deliver unique brand experiences that enable customer loyalty. Using a headless approach for your project allows you to combine technologies that would normally be siloed due to language or server constraints.
Typically when we talk about a headless Drupal architecture, we are referring to using Drupal for its strength as a content management system (CMS), but using a framework like React or Vue to drive the frontend. This separation of concerns allows your teams to focus on using the tools they know best—ultimately delivering a better product.
The single most important metric in commerce implementations is response time. A website’s overall responsiveness can directly affect the conversion rate and the bottom line. According to a study by Porent in 2019, "The highest e-commerce conversion rates occur between 0 and 2 seconds, spanning an average of 8.11% e-commerce conversion rate at less than 1 second, down to a 2.20% e-commerce conversion rate at a 5 second load time." Let's explore why traditional commerce implementations are so slow and why headless might just be the solution.
Why Use Drupal as a Commerce Platform?
Before we consider the frontend, we need a robust, secure backend platform to deliver our data and business logic. One of the many reasons Drupal is a great candidate for headless, or really any CMS build, is its inherent flexibility and security. Drupal's fieldable entities mean you can structure your CMS to fit your data. Drupal is regularly screened for vulnerabilities and has a robust process to identify and fix security issues. This is especially important in commerce implementations where proprietary data is often pulled from a Product Information Management (PIM) system like Akeneo.
Drupal's true power comes in the form of a massive library of community-contributed and maintained modules. A great example of this is the Drupal Commerce suite maintained by Centarro. Drupal Commerce out-of-the-box provides a robust set of entities and plugins that provide a complete commerce experience. Commerce can be further customized by Contrib modules that provide everything from payment processors (like Stripe or Paypal) to shipping integrations (like UPS or FedEx). Community-contributed modules are the cornerstone of the Drupal platform, and the projects we build make them possible.
Customizing Your Drupal Commerce Forms
Why Is Traditional Commerce Slow?
In a traditional Magento or Drupal Commerce implementation, we often create frontend markup on the backend before delivering the page to the user. As we generate this markup, we make calls to various APIs like shipping rate calculators. Once we have this complete HTML document, we send it to the browser. The browser then parses this markup and scans it for additional documents like CSS, Javascript, and images. Once it gathers all of this data, it turns it into an interactable web page. All of these things make the average page load speed roughly 7 seconds on desktop. That's quite the gap between our target of <2 seconds.
To alleviate the work the backend has to do to render a page, we've come up with some pretty clever tricks. One example is using Edge Side Includes (ESIs). ESIs work by loading the majority of page content from cache, then replacing specific placeholders with dynamic calls to the server. Since the server doesn't need to render the complete markup, we can often achieve faster load times. Drupal Core offers BigPipe, a module that similarly renders the majority of a page from cache, then replaces placeholders with dynamic content. Oftentimes these solutions come at a high complexity and frequently cause problems related to caching. They also don't work for content that is highly dynamic like category pages with facets and filters.
How Does Headless Help?
When we implement a headless website, we can think of the frontend as less like a web page and more as an application. A properly designed React (or other JS frontend framework) app can be lightweight and heavily cacheable. On initial page load, we load our entire application into working memory. This means that as a user navigates through the site, they are actually interacting with a single-page application that does not require a page reload to show new content.
The reason we can get away with not reloading the page is that data can be asynchronously fed to the frontend. This means that as a user is browsing the site we can preload resources like images and linked pages. When we can run expensive operations independently of a user's browsing experience, we can make website response times appear to be instantaneous—or more within our targeted 0-2 second range.
How Do We Get There?
On the backend, you still need a robust, secure CMS to feed data to the frontend and handle complex or session actions (add to cart/checkout validation). This is where Drupal is an easy choice. One of the easiest ways to feed data to a frontend is via JSON data. Drupal Core provides the JSON:API module which allows you to easily expose your content as filterable JSON objects. This means you can leverage the strength of the Drupal Community while giving your frontend room to prefetch and asynchronously validate data.
Building a world-class commerce website necessitates a world-class toolset, but even more so a world-class team. Drupal has proven to be a reliable CMS capable of delivering highly custom experiences. When this is paired with a well-built frontend, load times become instantaneous, and conversion rates increase!
Moving between hosting providers is never an easy task, but it can be done in a way that doesn’t have to be painful. One of our clients recently recognized the value of a hosting provider like Acquia. We were tasked with moving their site from custom AWS hosting to the Acquia Cloud Platform.
Acquia is the only Drupal hosting platform that's built for Drupal developers by Drupal developers. Acquia Cloud Platform is also the only web hosting solution for Drupal designed to scale to meet the demands of enterprise-class business challenges. With Drupal managed hosting from Acquia, you can create, scale, and manage your digital experiences knowing you’re leveraging the best that Drupal has to offer.
Acquia Cloud Platform provides secure and compliant web hosting for Drupal that delivers everything your teams need to build and manage Drupal-based digital experiences, including fully managed Drupal hosting, robust development tools, enterprise-grade security, and world-class support.
When migrating your site to a new platform, we want to ensure we’re still following best practices. There are many caveats to moving websites between hosting providers that can arise. We will discuss a few common ones throughout this article; however, every situation is unique. This means that your migration should be well documented, predictable, and repeatable. You should expect to perform the steps multiple times as these issues are uncovered and resolved. If we follow best practices and develop iteratively, we can prevent problems from making it to our live site.
Codebase
Our first step is to evaluate the codebase and make sure it is following best practices for Drupal development. This includes things like ensuring we are properly using version control, dependency management, and the config system. Most Drupal 8 sites should already be using these basic concepts, but this is a great point to perform some basic checks.
Next, we want to prepare the codebase to take advantage of all of Acquia Cloud Platform’s features. At the very least, we will want the Acquia Connector module which will allow our site to send metrics and other data to the Acquia subscription. This gives us access to tools like Insights and also helps Acquia maximize uptime. Another module we want to install is Acquia Purge for clearing varnish as well as the Cloud Platform CDN.
Once our code is ready, we need to get the code into Acquia’s repository so that we can deploy it to our new pre-production environment. This is a great opportunity to evaluate our CI/CD pipeline and make adjustments that aligned us with best practices. Fortunately, this project was already based on Acquia’s Build and Launch Tool (BLT), which gave us a plethora of commands to easily plug into our CI system. Using BLT also meant pushing the code was simple as changing the git.remotes configuration setting and running the artifact:deploy command.
Database
With our codebase in place, it’s time to get the fun started and transfer the database to the new environment. Using our friendly neighborhood Drush CLI Tool, backing up and restoring the database is extremely easy. To use Drush, we need to download aliases that are conveniently provided under the credentials tab within our Acquia account settings. The aliases are simply dropped into the drush/sites directory within our codebase.
To create a backup of the database we use the following command:
drush @client_legacy.prod sql:dump \
     --result-file /tmp/client.sql --gzip \
     --structure-tables-list="watchdog,cache_*,search_api_db_*,migrate_message_*"
The results-file parameter tells Drush to store the file in a consistent place. This helps us maintain that predictability and consistency that is so crucial to our success. We also want to make sure we’re passing the gzip flag to compress the resulting backup file. It is important to note that this flag will add .gz to the end of your results-file path. Thus our resulting backup is actually located at /tmp/client.sql.gz.
The structured-tables-list option tells Drush to skip backing up the data for any tables matching the list. In the case of Drupal, we can safely ignore any cache as well as any module-specific tables that are generated dynamically or do not need to be preserved. This is extremely helpful in cutting down on database backup sizes.
Once the database backup has been created, we need to transfer it to the Acquia server. There are many ways to accomplish this, and my preference is to use sftp or scp. This is also a good point to take some notes on how long the transfer takes!
sftp [email protected]
sftp> get /tmp/client.sql.gz
    # /tmp/client.sql.gz. 100%  500MB   4.2MB/s   02:00

sftp [email protected]
sftp> put client.sql.gz
    # /tmp/client.sql.gz. 100%  500MB   2.1MB/s   04:00
Our last step with the database is to import it into the Acquia site. One significant problem with this migration in particular was that the client’s database backup was roughly 2GB when uncompressed. Importing a larger database can present many problems such as the server running out of resources or the ssh connection timing out. Our solution for these issues was to run the import process as a fork and monitor the server until the import finished. To minimize the problem surface, we ran each command in an atomic way—avoiding unix pipes and logic where possible. This made our lives easier as we debugged the issue we encountered.
The commands we ran to import the database were as follows:
drush @client.prod ssh --ssh-options="-o ServerAliveInterval=60"# SSH into acquia server
    cd ~ # Go to default upload location
    rm -f client.sql # Remove any existing unzipped backups
    gunzip client.sql.gz # Unzip our backup
    cd /var/www/html/client.prod # Navigate back to our codebase.
    drush sql-drop # Delete any existing
    drush sqlc < ~/client.sql & # Import the database
    free -h; ps -aux; top; # etc... Wait for database import to complete
At this point, we should be able to visit our temporary Acquia production URL and see a version of our site without any images.
Files
The next step in the migration is to sync the files which is easily achievable via the Drush rsync command. However, to keep in the spirit of optimization, we grabbed the rsync command executed by Drush and added a couple of options to make it more performant. This was especially helpful as the client had dozens of gigs worth of files.
The rsync command we used to sync the files were as follows:
rsync -e 'ssh ' -akzv --ignore-existing \
    --exclude "styles" --stats --progress \
    /efsmount/client.com/files/  \
[email protected]:/var/www/html/client.prod/docroot/sites/default/files
The ignore-existing flag tells rsync skip copying files that already exist, which is helpful if your files tend not to be changed. We also want to exclude the styles directory as it can be dynamically generated (similar to cache tables).
Test and Launch!
Now that you have your complete site copied over, you can begin testing and validate that the site was properly copied. As issues are uncovered in QA and UAT, you will likely want to recopy the database and files to your Acquia Cloud Platform. Good thing we clearly documented our steps! Client data constantly changes and we want to do our best to ensure the success of our migration.
Once your site is stable and has been thoroughly tested on Acquia, it’s time to launch! Using the timings from our notes we can work with the client to schedule a maintenance period. It’s during this period that we will perform one final migration before cutting over our DNS. On launch day, we review our documentation with the entire team to ensure all members of the team (including the client) are on the same page.
As the work begins, you should be able to copy and paste all commands that you need to run and easily notify your team as you progress through the steps. Once your migration is complete, all that's left is to flip the DNS and decommission our old servers. Congratulations on your new Acquia Cloud Platform site!

Every iteration of Drupal brings a multitude of security improvements, accessibility improvements, and a host of new features created by the Drupal community. Drupal 10, released in December 2022, brings impressive UI improvements that give a beautiful refresh to the admin interface and default theme.
Since the launch of Drupal 8 in August 2015, Drupal has continued to evolve and add new features that keep it in lock-step with modern development practices. One of the biggest changes that took root in Drupal 8 is the integration of Composer, a PHP-based dependency manager. Composer is a powerful tool that can be used to install modules, upgrade Drupal, and even check compatibility between modules and dependencies used across your project. Understanding how to leverage Composer to upgrade your Drupal codebase is an absolute necessity. Fortunately, Composer is easy to master.
In this article, we will give a brief overview of how Composer tracks your project’s dependencies in composer.json and composer.lock. We will then discuss leveraging Composer and community-built tools to ensure compatibility between your code and the latest updates. Finally, we will cover using Composer commands to upgrade Drupal and address conflicts.
If you are running an older version of Drupal such as Drupal 7, check out this article for tips on upgrading your website from Drupal 7 to Drupal 8+.
Key Composer Principles
Composer is a PHP-based dependency manager that is used to track and download things like Drupal modules, Symphony libraries, and even Drupal core itself. Composer uses semantic versioning to communicate compatibility between different package versions. A change in the major version (such as from Drupal 9.x to 10.x) means that there are potential incompatibilities that developers may need to address when upgrading a project.
Composer uses a composer.json file to track our project’s explicit dependencies as semantic version ranges. For example, your project may require drupal/core:>=9.4 which tells Composer to install Drupal core version 9.4 or greater. Each one of the modules and themes used by your project will have a corresponding line in composer.json.
Each one of our project’s dependencies will have its own dependencies. For example, the Drupal Commerce module requires the Address module as well as a non-Drupal PHP library used for currency formatting. When we download the commerce module, Composer will also download the Address module and Currency formatting library.
As Composer resolves each of these dependencies recursively, it builds a full list of 3rd party dependencies used across your project (including dependencies of dependencies). The fully resolved dependency tree is then stored in the composer.lock file. This file contains the metadata of each dependency, including the location the package is downloaded from, any PSR-4 autoloading information, and a hash that references the exact version of a dependency. When other developers and CI pipelines run the composer install command, Composer reviews the composer.lock file and downloads all of the listed dependencies to your project.
Assessing Upgrade Compatibility
Incompatibilities can take a few different forms. In the case of Drupal 10, there were 8 modules, and a theme removed from core (some were moved to the contrib space, others deleted). We also see various deprecated functions removed from the core completely. If your project relied on any of these you will need to take action to resolve the incompatibilities.
The Drupal community maintains a module called “Upgrade Status” which can be used to give you a full picture of your upgrade path. This module gives you a series of tools that can be used to scan a Drupal installation for deprecated module usage. It also scans your codebase for calls to deprecated functions, or incompatibilities in info.yml and composer.json files.
# Install the latest dev version of Upgrade Status
composer require drupal/upgrade_status:4.x-dev --dev
One of the most powerful tools that comes with Upgrade Status is called “Drupal Check”. Drupal Check uses static analysis with PHPStan under the hood to find calls to deprecated functions. Drupal-check is a great tool to help find errors in code in a performant manner, and is the type of tool you should have built into your CI pipeline. I would be remiss if I didn’t call out Acquia BLT, which has Drupal Check built in!
Upgrade Status has a dependency on Drupal Check. This means Composer will automatically install Drupal Check alongside Upgrade Status during the composer require command. We can also explicitly require just Drupal Check via a similar composer require command.
# Require Drupal Check explicitly
composer require mglaman/drupal-check
# Run drupal-check
php vendor/bin/drupal-check
Running Drupal Check will output a list of potential code issues for you to check and resolve before performing the upgrade. Any calls to deprecated code can be resolved using Drupal’s change records. Drupal’s codebase will also usually emit PHP notices containing details on how to resolve the deprecation moving forward.
PHP Version Upgrades
Drupal 10 requires a minimum of PHP 8.1, which is a far cry from the minimum of 7.4 required for Drupal 9. PHP 8 brings impressive optimizations and changes to language constructs. Composer allows us to specify PHP version as a project dependency in the same way we require other dependencies. This forces Composer to check whether our packages are compatible with PHP 8.
composer require php:"^8.1" --no-updateWe are also able to require a specific version of PHP to be running on the host machine. This will give developers a heads-up if the PHP version running on their system hasn’t been upgraded to the appropriate version.
composer config platform.php 8.1Most PHP 7.4 code is compatible with 8.x, but it is always a good idea to review backwards compatibility via change notices and the tools outlined above.
Upgrading Drupal Core With Composer
Finally, it's time to upgrade Drupal! Using Composer, we can explicitly require Drupal 10 using the composer require command. This will update our composer.json and add Drupal 10 as an explicit dependency. We also pass the --no-update flag to prevent the full dependency resolution process from running. This gives us a good spot to “save our work” before we embark on the upgrade process.
composer require drupal/core:"^10.0" --no-update This require command tells Composer that the minimum acceptable version of Drupal core is 10.0. The package to place an explicit version requirement on will vary from project to project. If your project was set up using the instructions on Drupal.org, this version requirement would go on the drupal/core-recommended package. You can find the package to place the version constraint on by inspecting your composer.json file.
composer require drupal/core-recommended:"^10.0" --no-update Finally, we can upgrade all of our dependencies by running the command:
composer updateThis command takes the information in our composer.json file and attempts to resolve the dependency tree. As it does this, it will analyze all your project’s dependencies, including PHP version, and determine if there is a way to satisfy all of your dependencies. This process usually isn’t straightforward, and you may end up with conflicts. This is ok! In fact, this means Composer is doing its job properly in spotting conflicts.
The conflict output will be something like the following:
- Root composer.json requires drupal/devel ^4.0 -> satisfiable by drupal/devel[4.0.0-rc1, ..., 4.x-dev].
- drupal/core-recommended[10.0.0-alpha4, ..., 10.0.0-alpha5] require symfony/var-dumper v6.0.8 -> satisfiable by symfony/var-dumper[v6.0.8].
- Conclusion: don't install symfony/var-dumper v6.0.8 (conflict analysis result)
In this case, Composer is telling us devel is causing a conflict with Drupal core on one of their mutual dependencies - symfony/var-dumper. After visiting the Devel module page we can see there is a newer version of devel that is compatible with Drupal 10. We can require the new version of this module, then re-run the update process.
composer require drupal/devel:^5.0 --no-update
composer update
This resolves the version incompatibility for the devel module, and we would continue on to resolve other conflicts posed in the update process. Resolving these conflicts may require a few different approaches. Sometimes it requires using the dev version of a module, other times it might require submitting your own patch to Drupal.org. The Upgrade Status module does a lot of this legwork for us, but understanding and resolving Composer conflicts is an important skill in modern Drupal development.
From here the process is rinse and repeat - run Composer update, analyze conflicts, and resolve with the appropriate approach.
Historically, upgrading between Drupal versions has been fraught with challenges that require extensive development and testing. Since the introduction of Composer and community tools like Upgrade Status and Drupal Check, upgrading has become near trivial. With a little bit of configuration and know-how, Composer can be used to upgrade everything from PHP versions and contrib modules, to Drupal core itself,all while finding incompatibilities and potential issues.
Understanding and using Composer appropriately is the key to successful upgrades and maintenance of modern Drupal projects.
Building the best Drupal websites starts with the best Drupal tooling. Nearly all modern Drupal websites are built using a “local environment” which gives developers a place to create exciting new features without affecting the production environment.
Getting a local environment configured and using it to perform daily tasks often requires a plethora of custom scripts and tools built by a DevOps guru. Tools like Drush and Lando make this process exponentially easier, but there is often still a need for custom scripts to simplify the lives of developers. The less time a developer spends on maintaining a local, the more time they can spend developing world-class web experiences.
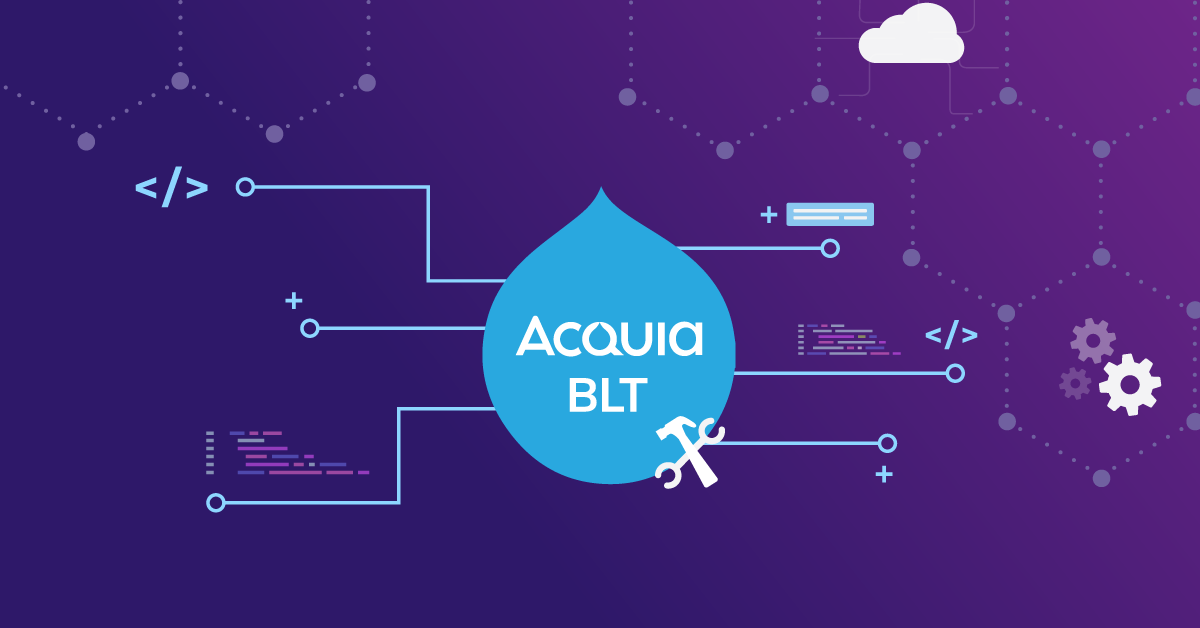
As the Drupal practice at Bounteous has grown, so has our tooling. What was once a hodgepodge of custom, client-specific bash scripts, have evolved into reusable, pluggable tooling that can transfer from project to project - all built on Acquia’s Build and Launch Tool (BLT).
BLT is a Drupal-specific extensible toolset designed to help you build, test, and deploy your code. It provides a vast array of commands to get you up and running quickly, including commands to configure your local, sync databases, or even run post-deployment tasks like config import. The majority of the BLT can be configured via a single YAML file, allowing you to hit the ground running on any sized Drupal project.
Compatibility with Drupal Sites
BLT can be installed via composer (a tool used to manage 3rd party PHP libraries) and it operates in a similar fashion to Drush. When installed, you are provided a new CLI tool at vendor/bin/blt which is used to trigger BLT commands. This CLI tool requires that your system be able to run PHP scripts, which is also needed for Composer and Drush commands. BLT frequently invokes Drush commands to complete its tasks.
BLT comes configured “for Acquia” out of the box, but it doesn’t require an Acquia subscription to be used. At Bounteous, we use BLT for various clients and side projects, including Drupal sites hosted on custom infrastructure or by other Drupal providers like Pantheon. BLT’s flexibility and pluggability make it the perfect tool for any Drupal site hosted on any platform.
However, where BLT really shines is when it is used in conjunction with Acquia hosting. BLT’s default settings.php file comes baked with Drupal hosting best practices - including memcache and config split settings. It will also recognize when the tool is being used on Acquia hosting and automatically include the appropriate settings needed to connect to the platform. This means configuring your Drupal site for Acquia is as simple as configuring BLT!
Acquia BLT Plugins
BLT is built on Robo, a customizable and extensible PHP task runner. New commands can be easily installed via 3rd party packages, or through your own project’s configuration - blt recipes:blt:command:init will configure this for you. We have implemented custom BLT commands for everything from Acquia Cloud Site Factory (ACSF) management to Acquia Cloud IDE configuration.
Acquia and the larger Drupal community maintain a plethora of plugins that extend and enhance the BLT toolset. There are numerous integrations with local environment tools such as Lando, DDEV, and DrupalVM. Acquia also provides a number of plugins that offer better integrations with Acquia products. For example, there is a plugin for ACSF which provides commands to initialize and validate required settings files.
Acquia keeps a list of plugins in their knowledge base which you can find here.
Installation & Configuration of Acquia Build and Launch Tool
Installing BLT is as simple and easy as installing Drupal’s contrib modules. We won’t cover the initial set-up of a new Drupal codebase (drupal.org has helpful guides on this), but assuming you have an existing codebase, BLT can be easily installed via composer.
composer require acquia/blt
During the initial installation of BLT, a YAML configuration file will be generated in your project root at blt/blt.yml. This file contains important metadata about the project and options that drive much of the behavior of the tool. The following is a snippet from the BLT configuration that drives the bounteous.com website. These settings are used in many places throughout the tool, and give us some basic information about the name of the project.
project:
 machine_name: bounteous
 human_name: 'Bounteous.com'
 # Used for enforcing correct git commit msg syntax.
 prefix: BCE
BLT Local Environment Setup
To work on a Drupal website, most developers use a “local environment” such as Lando or DrupalVm. Most of the common local environments in use by the Drupal community have a corresponding BLT plugin that can be leveraged to quickly configure and boot your local. These plugins are optional but are often handy when working on the initial configuration of a process. In the case of Lando, Mike Madison maintains a composer package that will perform the configuration (including adding a lando blt command) for us.
composer require --dev mikemadison13/blt-lando -W
blt recipes:vm:lando
Once your local environment is configured and booted, you can begin the setup of your Drupal site. There are a few different strategies we can take to set up Drupal with BLT. For existing sites, we typically sync the database from our staging environment to our local environment. BLT also supports installing a fresh site from existing config or from an install profile. The following is the local environment configuration for bounteous.com which we use to sync the database from our dev environment (the @bounteous.dev drush alias) to a local Lando environment.
# This will be used as the local domain for all developers.
 local:
   hostname: '${project.machine_name}.lndo.site'

# Sync db strategy
# drush sql-sync @bounteous.dev @self
# Valid values are install, sync, import.
setup:
  strategy: sync
drush:
# Set our source db.
  aliases:
    remote: 'bounteous.dev'
# optionally disable sanitizing data.
  sanitize: false
This configuration is used during the blt setup and blt sync commands.
BLT Frontend Compilation
No Drupal setup is complete without a frontend build process! BLT offers command hooks that allow you to execute custom commands at various points in the setup process. In the case of frontend hooks, they offer a way to execute our npm commands inside of our theme directly. Bounteous.com uses npm to compile the theme, but we can also use any other CLI tool here such as gulp. We can also specify the directory to run these commands in so that we don’t need to worry about execution context.
command-hooks:
 frontend-reqs:
   dir: ${docroot}/themes/custom/bounteous
   command: 'npm ci'
 frontend-assets:
   dir: ${docroot}/themes/custom/bounteous
   command: 'npm run build'
This configuration is triggered during the blt frontend command.
Drupal Setup
Once you have your local environment running and your blt.yml configuration set, it’s time to run the setup process! This will make any final tweaks to the codebase needed to bootstrap and install Drupal including:
- Running composer install.
- Creating a local settings.php file that points drupal to the appropriate database.
- Running frontend tasks via
blt frontend. - Running a database sync or running a site:install command.
This process can be triggered via the setup command:
blt setupOnce setup has been successfully run, a developer will have a functioning local Drupal site!
Quick & Painless
Acquia BLT offers a quick, painless way to run and maintain a Drupal environment.
What was once the wild west of Drupal DevOps scripts has settled and matured into Acquia’s Build and Launch Tool. BLT offers many commands out of the box that allow us to get up and running quickly on a project. Its configuration and installation are dead simple, its internals are well thought out and easily customizable. BLT has been an integral part of many Bounteous Drupal builds.
For more information on BLT, check out the following:
As the Drupal landscape continues to evolve, we have seen some great advancements in how we build and maintain Drupal websites. From the powerhouse of DrupalVM with Vagrant to the agile world of Lando and Docker, each solution has its own strengths—as well as some tradeoffs that can require some level of technical expertise to navigate. Here at Bounteous, we typically use a Sprint 0 to define and implement the toolset that will be used for the project. During this time, we evaluate the needs of the project, as well as any client requirements that may dictate one solution over another.
As we evaluate these options we consider things like maintainability and flexibility. In some cases, client restrictions prevent us from running any type of virtualization. With any solution, there will be some amount of overhead as we onboard developers and support ongoing development. When faced with virtualization restrictions, a natural solution is to create a custom LAMP or MAMP stack on each developer’s machine. This is often costly to maintain and requires a high investment to get started. Fortunately, there is a new option available, designed to give developers the flexibility of a virtualized environment without the technical cost or restrictions.
Enter Acquia Cloud IDE—a web-based development environment designed for Drupal. Depending on your Acquia subscription, your development team will be allocated a specific number of environments that can be created and destroyed on demand. When you create a new IDE, Acquia provides a container-based environment on cloud infrastructure that matches a standard Acquia Cloud server. Each IDE comes allocated with 4GB of memory, two CPUs, and 60GB of disk space. It also comes preinstalled with all the development tools you need for high-grade Drupal—including Composer, Drush, npm, and even ChromeDriver for running automated tests.
Once the environment has been provisioned, a developer is given a link to open their IDE and begin working. The IDE itself is based on Theia, an open-source web-based IDE developed by the Eclipse Foundation. The project is extremely active, with over 5000 commits, 90 pull requests, and five releases this year alone. These are all great signals of a strong project with great backing. The IDE itself is modular, highly customizable, and feels a lot like Visual Studio. It even allows you to load some of the Visual Studio code extensions you are familiar with (in .vsx form). Though you likely won’t need to add anything, Acquia does a good job of preconfiguring the IDE with all the things you need for a Drupal build.
On the first launch of your IDE, you are greeted with a “getting started” page that gives you multiple one-click setup buttons to make your life easier. The first button creates an SSH key in the IDE environment and associates the key with your Acquia account. This key can also be manually added to any external repositories such as Bitbucket or GitHub. Once your key has been added, you can use a second button to clone your Drupal codebase and database directly from your Acquia subscription. From here you have a fully functional, personal development environment and you are ready to write some code! The IDE gives you direct access to the CLI, and even provides a command to enable Xdebug.
Thoughts and Impressions
It’s pretty easy (and warranted) to be skeptical of a solution like this for a development environment. New IDEs and environments mean new ways of working and ultimately friction when it comes to accomplishing work. It’s extremely important for developers to have complete control over their development experience in order to maximize efficiency. I personally rely heavily on keybindings and shortcut commands to deal with some of the limitations my disability creates.
All things considered, I’ve found transitioning to cloud IDE to be mostly painless. I have been able to customize various shortcuts to match the keybindings I typically use (Shoutout to my dotfiles). I do miss some of the more intelligent features PHPStorm offers me like comment generation and fast file switching, but there is nothing that prevents me from writing solid code.
Skepticism included, I am extremely excited about this product and wish I could use it on some of my personal projects. The ability to have an on-demand development environment that takes little to no setup time is a game-changer. Even as someone with deep Unix and DevOps knowledge, I constantly find myself in battles with getting local environments to "just work." As much as I enjoy investigating and resolving issues that come up with Lando or DrupalVm, I’d much rather spend my time building amazing websites. Acquia Cloud IDE makes that possible.
Opportunities for Improvement
No solution is perfect, and running an IDE in a browser runs into some pretty expected problems. Some of the more complicated tasks like file browsing and terminal interaction require communication with the server. This can cause problems like console input lag or slow/finicky code completion. These problems can be exacerbated by unstable internet connections, leading to warranted frustration. This has been a pretty serious and ongoing issue that Acquia is working on fixing.
The other part I wish I had more control over is the setup process. While the IDE makes it easy to clone code directly from your Acquia environment, it doesn't easily allow you to clone from a BitBucket or GitHub repository. It would be great if there were some way to customize the welcome screen and button actions. My goal is to onboard developers as quickly and painlessly as possible, and it would be nice to have greater control over this process.
Final Thoughts
Acquia Cloud IDE has amazing potential and has already proven to be a valuable tool. We are a couple of weeks into using it on one of my clients, and we were able to successfully onboard 12 developers—for many of whom it was their first Drupal project. The ease of onboarding and consistency of environments across both Windows and OSX was a breath of fresh air. I’m excited to continue to use this tool on future projects!
About Drupal Sun
Drupal Sun is an Evolving Web project. It allows you to:
- Do full-text search on all the articles in Drupal Planet (thanks to Apache Solr)
- Facet based on tags, author, or feed
- Flip through articles quickly (with j/k or arrow keys) to find what you're interested in
- View the entire article text inline, or in the context of the site where it was created
See the blog post at Evolving Web