
Upgrade Your Drupal Skills
We trained 1,000+ Drupal Developers over the last decade.
See Advanced Courses NAH, I know EnoughDrupal 7 reaches its end of life on January 5, 2025, creating an urgent need to upgrade to Drupal 10 to ensure your business success. Discover the benefits of migrating to Drupal 10, the challenges it presents, and a unique alternative to costly and labour-intensive traditional Drupal upgrades!
Trivia Night judges Hilmar Hallbjörnsson, John Cook, Anthony Lindsay, Tony Barker and Tom Bamford applaud the volunteers (including themselves). Photo by Philippe von Bergen
A special thank you to Marine Gandy, who co-MCd; Hilmar Hallbjörnsson, Anthony Lindsay, Tony Barker, Tom Bamford and John Cook who judged the answers; and to runners Alison Visser, Ricardo Galán, Karen Leech and Stella Power, who kept the answer sheets flowing.
Thank you to everyone who volunteered and attended. It was a great way to bid farewell to DrupalCon Europe.
Conclusion
DrupalCon Barcelona 2024 was a great one and besides DrupalCon Dublin, which we helped organise in 2016, was one of our busiest.
Having said that, we’re looking ahead to DrupalCon Vienna 2025 and can’t wait to reconnect with the Drupal community again.
Upgrading from Drupal 7 to the latest version opens up a range of benefits, allowing you to leverage a modern CMS. By enhancing areas like content structure, SEO, and security during migration, you can maximize the impact of your investment.
But, without Drupal expertise, deciding what to change and improve can be overwhelming during the migration process.
Our free checklist, built on Droptica’s experience with clients, helps you explore common migration improvements and decide which ones fit your needs.
Migration Options
During your Drupal 7 to 10/11 migration, there are three primary strategies to choose from. Your decision will shape the timeline, budget, and overall migration success. Here’s a look at the options:
1. Migrate Without Changes
This is the quickest and simplest approach, where you upgrade to Drupal 10/11 without changes. It’s ideal if you’re focused on compatibility and keeping the site operational. However, it may bypass opportunities for SEO, security, or content improvements.
Recommendation: Choose this option if you’re on a tight budget, need a quick upgrade, and are planning to address improvements later.
2. Migrate with Small Changes and Improve Later
This option involves upgrading while making essential adjustments to enhance performance, fix urgent issues, or implement minor improvements. For example, you could address outdated content types, enhance SEO configurations, or clean up old fields.
Recommendation: If you’re looking for immediate improvements while staying within budget, this approach strikes a good balance. You can tackle more complex updates later, spreading out costs and efforts.
3. Migrate and Overhaul All Aspects at Once
This option offers a full-scale transformation, tackling everything from redesigning the user experience to fixing issues like content structure, user permissions, SEO, and security.
Recommendation: This is the best route for businesses aiming to modernize their site to align with updated buyer personas and current audience expectations. If you have the budget and want a comprehensive solution, this approach ensures long-term success, though it requires more investment upfront.
How We Created This Document
We built this guide by analyzing our last 10 Drupal migration projects, which ranged from small (200 hours) to large (thousands of hours). Simple migrations focused on quick fixes, while larger ones involved redesigns, performance improvements, and content restructuring.
By combining insights from these projects, we’ve created a document that highlights key improvements to consider during migration. No matter the size of your project, this guide will help you make informed decisions and focus on impactful changes.
Scope of the Document
This document provides a comprehensive guide to the key areas you should consider when migrating from Drupal 7 to Drupal 10/11. It covers essential aspects of the migration process, helping you identify potential improvements in various areas of your website. The document includes recommendations for:
- Content Structure: Optimizing nodes, taxonomy, and other data types.
- User Management: Enhancing user profiles, roles, and permissions.
- Design and Theme: Updating the look and feel of your website, including frontend and framework choices.
- SEO Optimization: Improving your website’s search engine visibility with better structure, URL management, and content optimization.
- Security Enhancements: Implementing security best practices, such as two-factor authentication and role-based access control.
- Performance Optimization: Speeding up your site by optimizing media, caching, and database queries.
- Editorial Workflow: Improving content creation and publishing processes through better workflows and automation.
- Integrations and APIs: Connecting your website to third-party tools, such as CRMs and marketing platforms.
- Hosting and CI/CD Automation: Streamlining deployments, backups, and updates for more efficient website management.
This guide offers practical insights based on real-world experience, helping you decide which areas to prioritize for your migration. Whether you’re looking for a basic update or a full site overhaul, this document will help you navigate the complexities of the migration process.
How to Use This Document
This document is available in Google Docs format, making it easy to copy and use as a checklist during your migration process. Simply go through each section, and if certain recommendations don’t apply to your project, feel free to remove them. For any features or improvements you want to implement, just describe them in the corresponding table cells.
Once you've finalized your version of the document, you can share it with your Drupal development company. To make the estimation process even smoother, we recommend providing it alongside the text file generated by the tool described in the blog post Curious about Drupal 7 to 11 migration costs? Collect all the info for estimation in 5 minutes.
If you'd like to send the document to us at Droptica, you can reach out using our contact form, and we’ll provide you with a tailored estimation for your migration from Drupal 7 to the newest version.
Where to Get This Document
You can download the Drupal 7 to 10/11 Migration: Features and Enhancements to Consider document for free on our Drupal 7 to Drupal 11 Migration Services page.
Summary
Migrating from Drupal 7 to Drupal 10/11 is a chance to update your system and improve your site's performance, security, and user experience. Whether you opt for a simple migration or a complete overhaul, our Drupal 7 to 10/11 Migration: Features and Enhancements to Consider document will guide your decisions.
Use it as a checklist to evaluate your current setup, plan improvements, and collaborate with your development team. You can download the document for free, and if you need help, Droptica is available to provide expert advice and a tailored migration plan.
Series Overview & ToC | Previous Article | Next Article
In this article, we are completing field-related migrations by importing formatter settings. This step builds on our previous work with view modes and field groups, bringing us closer to a functional Drupal 10 site. As we go through the process we will also identify other configuration elements used by field formatters that don’t have an automatic migration.
Remember, if you have been following our series, you have already migrated view modes—a prerequisite for field formatters. The Migrate Skip Fields module will also be used to handle content model changes in the new site.
Before we begin
Familiarity with site building concepts related to fields is assumed. Refer to article 16 for a high level overview. Today's article also touches on view modes and date formats.
Field formatter migrations
A formatter determines how field data is rendered by Drupal. Each field type can be supported by one or more field formatters. For example, an entity reference field can print only the entity ID, its label as plain text or as a link, or the representation of the entity as specified by a view mode. Some field configuration might affect which formatters are available. For example, entity reference fields that point to taxonomy terms can use the RSS category formatter.
Technical note: The FormatterInterface interface includes a isApplicable method that determines if a formatter can be used for a field taking into account its configuration.
We use upgrade_d7_field_formatter_settings to migrate field formatter settings. Copy it from the reference folder into our custom module and rebuild caches for the migration to be detected.
cd drupal10
cp ref_migrations/migrate_plus.migration.upgrade_d7_field_formatter_settings.yml web/modules/custom/tag1_migration/tag1_migration_config/migrations/upgrade_d7_field_formatter_settings.yml
ddev drush cache:rebuild
Note that while copying the file, we also changed its name and placed it in a migrations folder inside our custom module. After copying the file, make the following changes:
- Remove the following keys:
uuid,langcode,status,dependencies,cck_plugin_method, andmigration_group. Notice that for field migrations, we preserve thefield_plugin_methodkey. - Add two migration tags:
component_entity_displayandtag1_configuration. - Add
key: migrateunder the source section. - Update the required
migration_dependenciesto includeupgrade_d7_field,upgrade_d7_field_instance,upgrade_d7_view_modes, and the migrations that create configuration entities.
In addition to the updates above, remember that the Migrate Skip Fields module is installed on the site. Via hook_migration_plugins_alter, it modifies the field formatter migration to prevent some fields being imported. In particular, those excluded by the migrate_skip_fields_by_name setting as explained in article 17.
For field formatters, the module does not act on the migrate_skip_fields_by_type setting. The original migration already accounts for not importing formatter data for a field whose storage setting was not migrated. This happens in the field_type_exists pipeline of the process section.
We are going to make a small addition here. The last process plugin in this pipeline is skip_on_empty. We will add a message configuration to log when a field is skipped because its storage setting is missing. The logs are added to the migration tables and can be viewed from the command line or the migration messages admin interface.
After the modifications, the upgrade_d7_field_formatter_settings.yml file should look like this:
id: upgrade_d7_field_formatter_settings
class: Drupal\migrate_drupal\Plugin\migrate\FieldMigration
field_plugin_method: alterFieldFormatterMigration
migration_tags:
 - 'Drupal 7'
 - Configuration
 - component_entity_display
 - tag1_configuration
label: 'Field formatter configuration'
source:
 key: migrate
 plugin: d7_field_instance_per_view_mode
 constants:
   third_party_settings: {  }
process:
 # @modified
 field_type_exists:
   -
     plugin: migration_lookup
     migration: upgrade_d7_field
     source:
       - field_name
       - entity_type
   -
     plugin: extract
     index:
       - 0
   -
     plugin: skip_on_empty
     method: row
     message: "Field storage configuration does not exist."
 entity_type:
   -
     plugin: get
     source: entity_type
   -
     plugin: static_map
     map:
       field_collection_item: paragraph
       paragraphs_item: paragraph
     bypass: true
 bundle:
   -
     plugin: migration_lookup
     migration: upgrade_d7_field_instance
     source:
       - entity_type
       - bundle
       - field_name
   -
     plugin: extract
     index:
       - 1
 view_mode:
   -
     plugin: migration_lookup
     migration: upgrade_d7_view_modes
     source:
       - entity_type
       - view_mode
   -
     plugin: extract
     index:
       - 1
   -
     plugin: static_map
     bypass: true
     map:
       full: default
 field_name:
   -
     plugin: get
     source: field_name
 options/label:
   -
     plugin: get
     source: formatter/label
 options/weight:
   -
     plugin: get
     source: formatter/weight
 plugin_id:
   -
     plugin: process_field
     source: type
     method: getPluginId
 formatter_type:
   -
     plugin: process_field
     source: type
     method: getFieldFormatterType
 options/type:
   -
     plugin: static_map
     bypass: true
     source:
       - '@plugin_id'
       - '@formatter_type'
     map:
       taxonomy_term_reference:
         taxonomy_term_reference_link: entity_reference_label
         taxonomy_term_reference_plain: entity_reference_label
         taxonomy_term_reference_rss_category: entity_reference_label
         i18n_taxonomy_term_reference_link: entity_reference_label
         i18n_taxonomy_term_reference_plain: entity_reference_label
         entityreference_entity_view: entity_reference_entity_view
       email:
         email_formatter_default: email_mailto
         email_formatter_contact: basic_string
         email_formatter_plain: basic_string
         email_formatter_spamspan: basic_string
         email_default: email_mailto
         email_contact: basic_string
         email_plain: basic_string
         email_spamspan: basic_string
       field_url:
         url_default: link
         url_plain: link
       field_collection:
         field_collection_view: entity_reference_revisions_entity_view
       addressfield:
         addressfield_default: address_default
       telephone:
         text_plain: string
         telephone_link: telephone_link
       entityreference:
         entityreference_label: entity_reference_label
         entityreference_entity_id: entity_reference_entity_id
         entityreference_entity_view: entity_reference_entity_view
       file:
         default: file_default
         url_plain: file_url_plain
         path_plain: file_url_plain
         image_plain: image
         image_nodelink: image
         image_imagelink: image
       datetime:
         date_default: datetime_default
         format_interval: datetime_time_ago
         date_plain: datetime_plain
   -
     plugin: d7_field_type_defaults
   -
     plugin: skip_on_empty
     method: row
 hidden:
   -
     plugin: static_map
     source: '@options/type'
     map:
       hidden: true
     default_value: false
 options/settings:
   -
     plugin: default_value
     source: formatter/settings
     default_value: {  }
 options/third_party_settings:
   -
     plugin: get
     source: constants/third_party_settings
 options/settings/view_mode:
   field_collection:
     plugin: paragraphs_process_on_value
     source_value: type
     expected_value: field_collection
     process:
       plugin: get
       source: formatter/settings/view_mode
destination:
 plugin: component_entity_display
migration_dependencies:
 required:
   - upgrade_d7_field
   - upgrade_d7_field_collection_type
   - upgrade_d7_field_instance
   - upgrade_d7_node_type
   - upgrade_d7_taxonomy_vocabulary
   - upgrade_d7_view_modes
 optional: { }
Now, rebuild caches for our changes to be detected and execute the migration. Run migrate:status to make sure we can connect to Drupal 7. Then, run migrate:import to perform the import operations.
ddev drush cache:rebuild
ddev drush migrate:status upgrade_d7_field_formatter_settings
ddev drush migrate:import upgrade_d7_field_formatter_settings
No errors after running the migration. Great! Feel free to have a look at the logs using the drush migrate:messages command.
Similar to other field-related migrations, we should confirm that the result of migrating field formatter settings is correct. There are two places you should look at. Using the Event content type as an example, go to:
- The manage display page where you can make adjustments to the migrated field formatter configuration.
- The view page for a session node where you can see the current state of the field formatter configuration. At the moment, we have not migrated nodes nor other content entities. Feel free to create some content to see how it is rendered.
This is where having familiarity with site building concepts and past experience will help. Below is a screenshot of an Event node comparing how some of the fields attached to the content type are rendered.
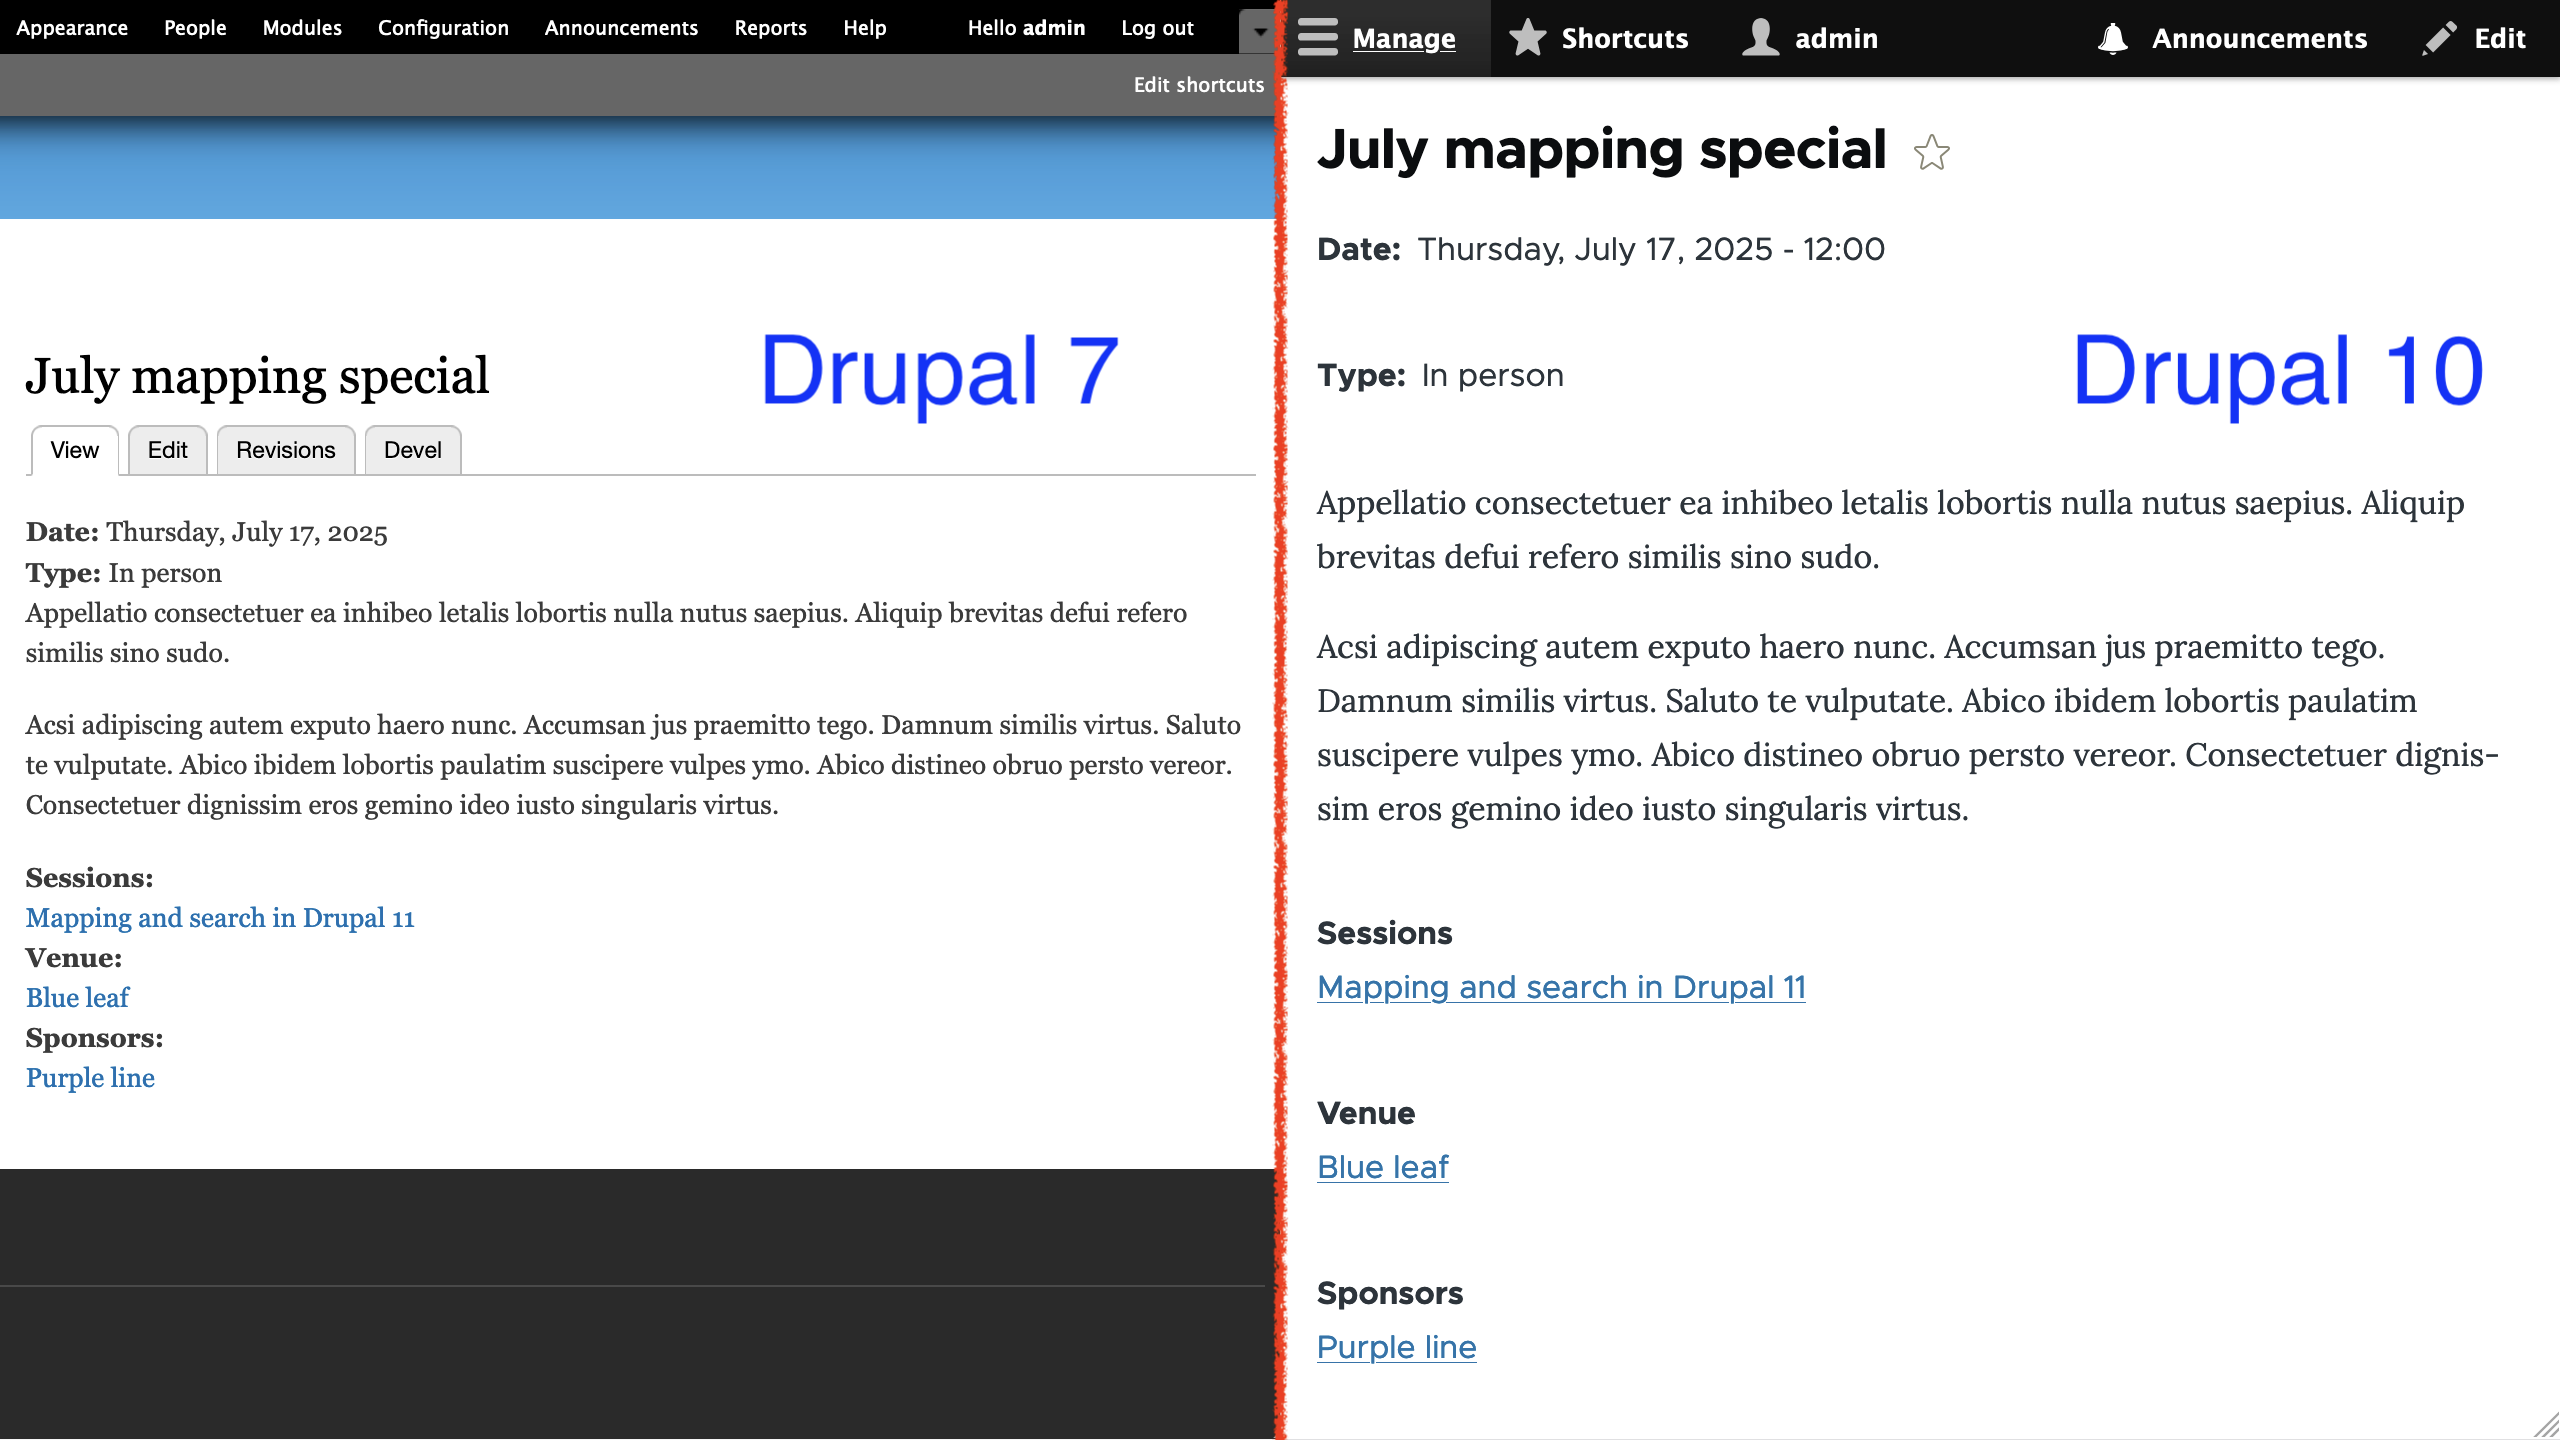
Notice that the Date field in Drupal 10 shows the time even though the field type is supposed to store a date value only. This is because the Default long date format used to render the field is configured to render a time component. In Drupal 7, the Date field is configured to use Long date format, which can also render a time component; however, it is hidden when the date field is configured to store a date value only. This highlights how formatters can behave differently between Drupal versions and the importance of carefully reviewing the migrated configuration.
For the example above, we could hide the time component for the Date field in multiple ways. One option is to create a new date format which does not print the time. Another option is the Custom date formatter for the date field and use a PHP datetime pattern that does not print the time like l, F j, Y. The first option is recommended if you plan to reuse the same date format in multiple places. The second option can be used if you are certain that there is no need to reuse the pattern.
For the purpose of this example, we are going to go with a third option: use a different date format. Because we are using the Olivero theme, we can use the Olivero Medium date format which will hide the time and the day of the week. An acceptable compromise for the example.
Technical note: Drupal 10 does not provide an automated upgrade path for custom date types and formats from Drupal 7. They are stored in the date_format_type and date_formats tables respectively. You can write a custom migration to read from those Drupal 7 tables and create DateFormat configuration entities in Drupal 10. Or you can recreate them manually on the new site. In either case, you will have to identify where the custom date formats were used in Drupal 7 and manually update the corresponding configuration in Drupal 10. At the time of this writing, this issue contains a patch for migrating custom date formats, but no date types.
Below is a screenshot of an Session node comparing how some of the fields attached to the content type are rendered.
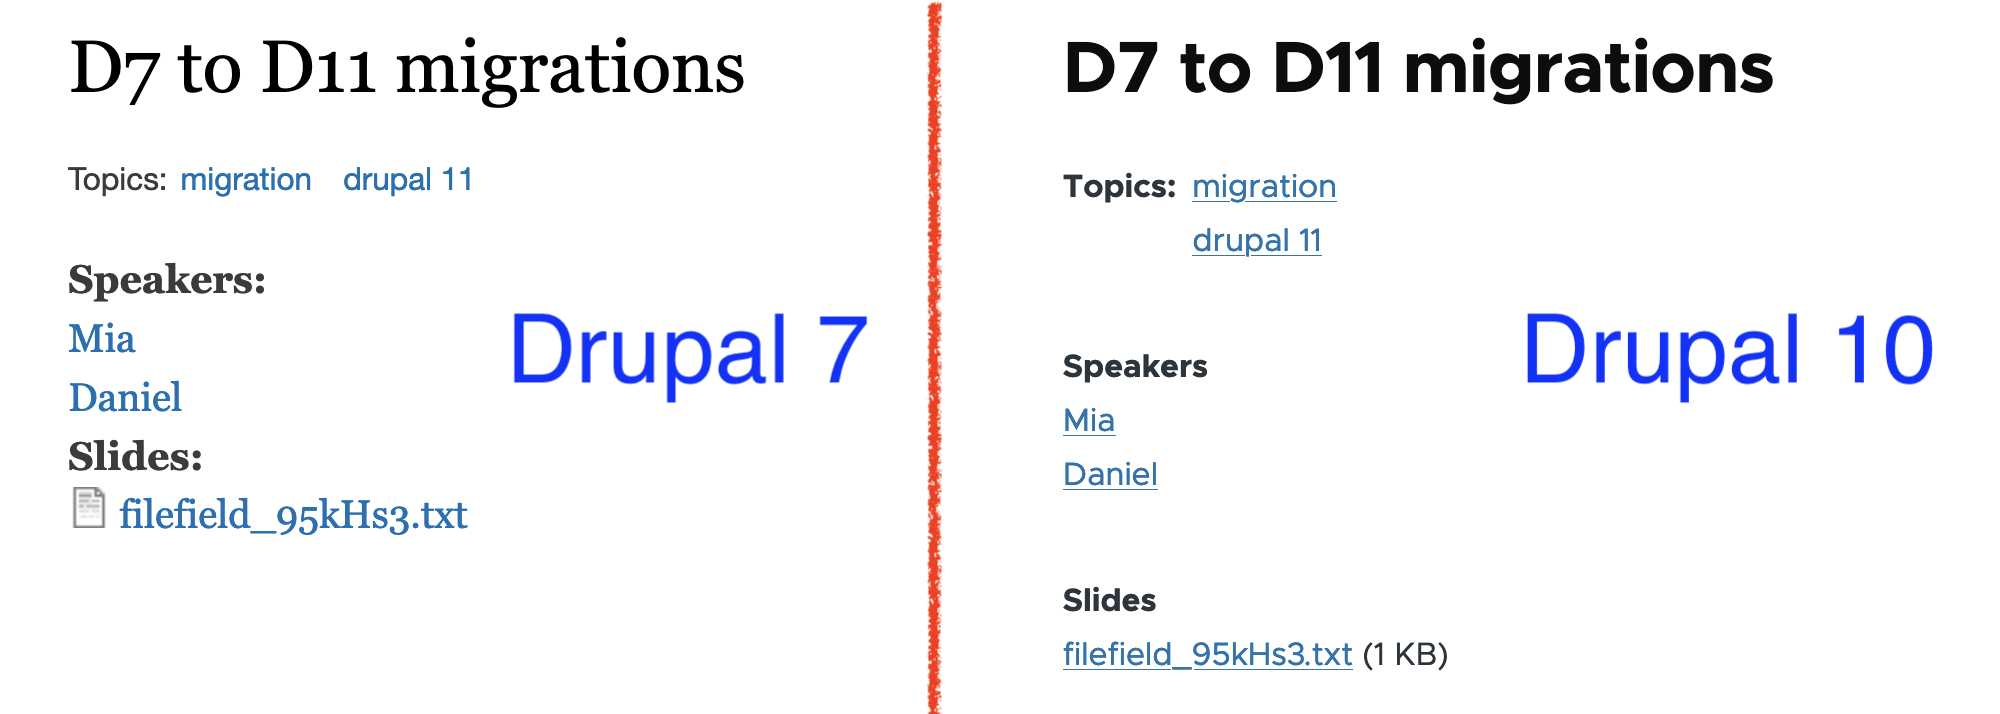
Notice that for the Topics field, the label is rendered in bold in Drupal 10, but not in Drupal 7. As for the terms themselves, in Drupal 10 they appear stacked on top of each other and, in Drupal 7, they are listed next to one another. For the Slides field, Drupal 10 shows the file size in parenthesis and not the file icon. In Drupal 7, you see an icon that varies per file type and there is no reference to the file size. These differences are a combination of changes to how formatters are implemented in different versions of Drupal and how themes decide to render some user interface elements.
For our example project, we are not going to take any action here. In real life projects, you are likely going to use a custom theme that will control how interface elements are rendered. Contributed modules like Fences can also manipulate the output of fields. As a rule of thumb, before adding any module to your project, evaluate if the functionality provided outweighs the extra configuration and maintenance required to use it.
Below is a screenshot of a Venue node rendered in Drupal 10.

The Venue content type has a Phone field that is rendered as plain text. This matches the configuration from Drupal 7, but that does not mean that we cannot make improvements as part of the migration. In this case, we can update the field to use the Telephone link formatter to render a link using the tel URL scheme. Users visiting the site with a mobile phone will be able to place the call by clicking on the link. Drupal is producing semantic HTML markup and it is up to the visitor's browser to determine what action to take when the link is clicked. Not obvious from the screenshot above, but the Address field shows the country in Drupal 10. The field formatter in Drupal 7 hides it when the field only allows a single country to be selected. No action to take as part of the example project.
While reviewing the field formatter migration, we identified that date formats are not migrated automatically. Migrations can be complex, and not every Drupal 7 setting has an automated upgrade path. Make sure to thoroughly review the migrated configuration and perform manual updates as needed. To wrap up the migration of fields, remember that storage, instance, widget, and formatter settings are closely interconnected.
Coming up in our step-by-step migration series, we will complete configuration migrations by walking through: media types and image styles, roles and permissions, and text and input formats. Once the remaining configuration is in place, we will be ready to work with content.
Image by Mohamed Hassan from Pixabay
Introduction
The presence of Artificial Intelligence (AI) is now an undeniable reality that can no longer be overlooked. It has captured the interest of clients across all budgets and industries.
Many organizations are still confused about what they want to achieve with AI. This confusion also extends to Digital Experience Platforms (DXPs), where companies are often unsure how they can utilize AI to enhance customer experiences, automate workflows, or ensure holistic automation.
The Launch Of ChatGPT
It’s not that AI didn't exist before ChatGPT, it did. But the advent of ChatGPT in November 2022 transformed AI's perception. For the first time, everyone could access this tech in its simplest form, a chatbot.
Tools like Dall-E and Midjourney emerged, generating graphics and images indistinguishable from real photos, blurring the lines of reality.
Similarly, DXPs began using these tools to create engaging content, deliver personalized digital experience, help improve customer service, and enhance how brands connect with their audiences.
![]()
ChatGPT did to AI, what Tesla did to electric cars, Netflix did to streaming and what iPhone did to Smartphones.
Swarad Mokal | Technical Program Manager, Axelerant
Google Search trends show a clear correlation between the terms AI and ChatGPT.

To understand where AI can be used, it is important to understand what AI is. The simplest definition is a machine exhibiting human-like intelligence, having the ability to think and respond to tasks like a human would.
Understanding The Terminology
There are different terms related to learning and working with AI.

Machine Learning And Deep Learning
Machine learning (ML) and Deep Learning (Dl) are two of the most important terms related to AI and can be considered as subsets of AI.
Machine Learning is a branch of AI that learns patterns to make predictions, recommendations, or decisions based on the data fed to the system. Once it has learned from the data, it can identify patterns and perform tasks autonomously.
DXPs often use Machine Learning to analyze user behavior, predict customer needs, and suggest personalized content, enhancing user engagement and retention.
Deep Learning is a subset of ML that uses many-layered neural networks to model complex data and its relationships, hence the term “deep.” DL setups are particularly useful when dealing with multi-dimensional data like images, language, or speech. For example, Natural Language Processing (NLP), an application of Deep Learning, enables DXPs to offer voice search, multilingual support, and more personalized customer interactions.
[embedded content]
Generative AI
Generative AI is a subset of Deep Learning. It is an artificial intelligence system that can generate new content, such as text, images, audio, video, and even programming code. Unlike other AI models which focus on recognizing patterns or making predictions, generative AI models create new data based on already learned patterns.
In a digital experience platform, generative AI can be used to dynamically generate personalized content such as custom product descriptions, individualized email campaigns, or unique landing pages tailored to user preferences.
Large Language Model
A Large Language Model (LLM), is an AI system designed to understand and generate human language. These models are trained on vast amounts of text data, enabling them to perform tasks like answering questions, summarizing information, and generating content that mimics human writing. Examples of LLMs include GPT-4, Gemma, Llama, Mistral, and Claude.
LLMs can be open or closed, with key differences in accessibility and transparency. An open LLM is available for public use and is usually open-source licensed. The model’s code, architecture, and data used for training the LLM are disclosed and available openly.
Closed LLMs are typically proprietary, which means access is restricted and might be available through a paid subscription or license. The internal workings, code, architecture and training data are not disclosed.
For a DXP, the choice between open and closed LLMs depends on customization needs, cost considerations, and the importance of transparency.
Vector Database
Humans interact with data like a relational database system. Relational databases are essentially two-dimensional, which means users store data in rows and columns. To fetch a cell in this 2D grid, the user will require a query.
Instead of using this system, AI uses Vector Databases to store and interact with data. Vector Databases store higher dimensional data. Higher dimensional data is more than just rows and columns. It is not just storing data but also memorizing how data is related to each other.
For example, in a box of LEGO bricks, a traditional database will just store information like shapes, sizes, and colors. But a vector database will also store data about how they connect with each other so that you can build a cool racing car with it.
RAG
RAG (Retrieval-Augmented Generation) is an AI approach that blends information retrieval with the power of generative language models (LLMs). This combination allows the AI to produce more accurate, current, and relevant text by using targeted knowledge along with its language abilities.
Prateek Jain, Director of DXP Services at Axelerant, and Swarad Mokal, Technical Program Manager at Axelerant, discuss the basics of the RAG AI framework and its possible use cases in a recent webinar.
[embedded content]
Privacy And Security
AI models are trained on data, requiring large amounts of data to be trained properly. This raises concerns about personal information being gathered without consent.
As AI becomes embedded in DXPs, it becomes critical to responsibly handle large volumes of user data. DXPs also need to ensure compliance with data protection regulations like GDPR and CCPA while providing seamless and personalized experiences.
AI models often act as "black boxes," where the decision-making process isn't transparent. Ensuring that AI-driven DXPs maintain high levels of trust and transparency is essential for building and maintaining user confidence.
It is also critical to safeguard against potential AI misuse. For example, if a malicious individual knows that the organization is allowing an AI model to read all incoming emails, they can send an email to talk to your AI model. This email will subtly manipulate the AI model or even send misleading messages and information.
That is why it is important to first come up with a set of AI policies to decide how to integrate AI, for example: a general good practice is to always have a Human in the loop.
How Can Axelerant Help You Transform Your Customer’s Digital Experiences With AI
The experts at Axelerant have been constantly exploring many possibilities for integrating AI into Digital Experience Platforms.
How Axelerant Successfully Implemented AI In DXP Workflows
Axelerant’s experts have implemented multiple Proof of Concepts (POCs) that showcase how AI can be seamlessly integrated into DXP workflows.
Axlebot
Axlebot is a cloud-based AI model trained on localized knowledge bases like Confluence, Handbooks, and GitHub repositories. It can answer queries with citations through Slack integration.
Contextual Learning Search With Drupal
This is a RAG AI setup integrated with Drupal for sites with large content stores. It offers direct answers to queries rather than simple search links, making it ideal for universities, government sites, and NGOs.
AI In Content Search
This POC demonstrates how organizations can integrate the Drupal AI module with OpenAI and Anthropic LLM models to improve content search. The search results were further improved by integrating Pinecone’s vector database for indexing.
AI-Generated Alt Tags And Meta Tags
By integrating OpenAI with Drupal 10, AI can generate meta tags such as title, description, abstract, and keywords. This data is based on content fields like the body and title. If the body field is empty, AI will generate tags from the title alone. To fit specific content needs, customization can be implemented by modifying the module code.
Interested In A Demo?
Reach out to the experts at Axelerant for a demonstration of how to make your customer’s digital experiences more intelligent, responsive, and capable.
DrupalCon is the biannual conference where leaders in Drupal gather to coordinate, collaborate and present the latest developments in digital and web technologies. This week 1xINTERNET attended DrupalCon Barcelona in full force. But this conference was like none before it, this was Starshots World Premier and it exceeded all expectations.
Handling vast amounts of data concurrently causes system hiccups and service disruptions. Apache Kafka is a powerful distributed data streaming platform that helps businesses handle large datasets efficiently without latencies.
Kafka achieves low latency through three key techniques:
- Batching: Data can be read and written in batches, reducing the number of requests and minimizing latency.
- Partitioning: Kafka divides data among different brokers, enabling parallel processing.
- Compression: When data is written to a Kafka topic, it's compressed using algorithms like ZSTD, LZ4, Gzip, and Snappy. This reduces read and write bandwidth, allowing for quick delivery and lowering latency. Additionally, compression helps cut storage costs.
Some of the pivotal components of Kafka are:
- Topics
- Partitions
- Consumers
- Consumer groups
Understanding Kafka’s Components
Kafka Topics
Kafka topics serve as the organizational categories for messages, each distinguished by a unique name across the entire Kafka Cluster. Messages are directed to and retrieved from specific topics, facilitating streamlined data management.

Kafka Partitions
Partitioning divides the single-topic log into several logs, each capable of residing on distinct nodes within the Kafka cluster. This partition allows a topic to be split into multiple partitions, enabling parallel processing and scalability. Each partition is an ordered, immutable sequence of messages. The number of partitions is set during topic creation but can be increased later if needed.
Messages within a partition are stored in the order they arrive and are assigned an offset, which is a unique identifier. When retrieving messages, consumers can specify the offset to start reading from, ensuring they process messages in the correct order
If a message has a key, Kafka uses a hash of the key to determine the partition, ensuring that all messages with the same key are stored in the same partition, preserving their order.
Kafka Consumers & Consumer Groups
A Kafka consumer is a component that reads and processes messages from Kafka topics. Consumer groups are a set of consumers from one application that work together to process events or messages from one or more topics in parallel. Each consumer in the group processes a subset of the partitions, allowing for parallel processing and scalability.
Consumers in a group coordinate to ensure that each partition is consumed by only one consumer at a time, preventing overlap and ensuring efficient processing. This means that one consumer group’s activities do not interfere with another group’s space or processing. To manage this coordination, Kafka uses offsets, which are unique identifiers assigned to each message within a partition.
Offsets mark the position of the last processed message, allowing consumers to track their progress and specify an offset to resume processing from where they left off. The relationship between consumers in a group and partitions is such that each partition is assigned to only one consumer within the group at any given time, ensuring messages are processed in order within each partition.
The maximum number of consumers in a group is equal to the number of partitions; if there are more consumers than partitions, some consumers will remain idle but can act as standbys in case of failures.

One consumer can read messages/events from one or more partitions. For example, a topic with 5 partitions can have upto 5 consumers, but if it has only 2 consumers, then the two consumers in the group will read messages from more than one partition. However, it is important to note that one partition can not be read by more than one consumer.
Use Cases Of Kafka Consumers
Example 1: Let's assume an application wants to send log data to one topic (Topic 1) and crawl data to another (Topic 2). Once both the topics, producers, and consumers are configured, all the log data will go within Topic 1, and all the crawl data will go within Topic 2.

This log data may be useful for a service (Service 1) here, but it does not require the crawl data. We need a different topic to process crawl data, but this topic (Topic 2) will only have crawl data, and the consumers for this will only be expecting crawl data.
We can feed the log data in Topic 2 also, but that does not mean we will. Though Kafka wouldn't throw any error as such, we don't do that because the service/application does not demand the log data to be present in Topic 2.
Example 2: In this example, client one is a mobile phone, and the second client is a car, but they both are expecting the same type of data so that they can process it.

Image Source: Kafka Documentation
A couple of questions may arise here: Why are there multiple topics within the same Kafka cluster? Can we have a different Kafka cluster?
Since the overall Kafka cluster is so huge and brings in more complexities, we don't want multiple Kafka clusters within our application. We can build as many pipelines as we want within one Kafka cluster. Topic 1 can have one type of data, and Topic 2 can have another type of data and relevant producers and consumers.
Metrics to Monitor/Track for Optimizing Kafka Consumers
Optimizing Kafka Consumers requires monitoring and tracking a few metrics. These metrics provide insights into the performance and health of the Kafka consumers by identifying inefficiencies, bottlenecks, and possible issues in the data processing pipeline. Below are some of the key metrics to focus on.
1. Consumer Offset
Consumer offsets show the position of the consumer in the partition from which it is reading. Consumers use this offset to keep track of their progress within a partition. If a consumer restarts, it will resume reading from this offset, ensuring no messages are missed or reprocessed. Optimum offset management helps consumers process each message only once and recover from failures without data duplication or loss.
How to Monitor: You can track committed offsets using:
- committed_offsets (last committed offset for each partition)
- last_committed_offset (the most recent offset committed)
2. Consumer Lag
It is a metric that indicates the lag between Kafka producers and consumers. In other words, it is the gap between the latest offset (position of the most recent message in a Kafka partition) and the consumer offset. If the gap grows bigger between the rate of data production and data consumption, it leads to delays in data processing.
How to Monitor: Developers can use tools like the built-in Kafka monitoring APIs, Kafka Manager, Grafana dashboards, or Burrow to track consumer lag. Below are some metrics to look at:
- current_offset (the offset the consumer has processed up to)
- consumer_lag (per partition)
- log_end_offset (the latest offset in the partition)
3. Throughput
Throughput is determined by the number of messages consumed per second. To maintain the data pipeline's performance, consumers must process messages efficiently, which is a sign of high throughput.
How to Monitor: Developers can use Kafka’s JMX metrics or integrated monitoring systems like Grafana and Prometheus to track metrics such as:
- records_consumed_rate (number of records consumed per second)
- bytes_consumed_rate (amount of data consumed per second)
4. Latency
It is the time taken for a message to be consumed after it is produced. For applications that require real-time data processing and immediate insights, low latency is crucial.
How to Monitor: Developers can monitor end-to-end latency, i.e., by comparing the timestamp when the message was produced to when it was consumed. Key metrics include:
- fetch_latency_avg (average time to fetch records)
- fetch_latency_max (maximum time to fetch records)
5. Error Rates
It measures the frequency of errors consumers encounter during message processing. High error rates can detect problems with data processing logic, network problems, or other systemic issues that need to be addressed.
How to Monitor: Developers can monitor the metrics:
- record_error_rate (rate of record processing errors): Kafka calculates the average number of record sends that result in errors per second. This metric is part of the producer metrics and can be monitored using tools like JMX (Java Management Extensions) or Kafka’s built-in command-line tools.
- request_error_rate (rate of request errors to Kafka brokers)
6. Resource Utilization
Resource utilization monitors various resources, such as CPU, memory, and network bandwidth, used by the Kafka consumers. Monitoring these resources is essential because high resource utilization can lead to increased costs and performance degradation.
How to Monitor: You can use system monitoring tools (e.g., top, iostat, htop) and Kafka-specific metrics:
- consumer_cpu_usage
- consumer_memory_usage
- Network_io
7. Fetch Metrics
Fetch metrics provide details about consumers' ‘fetching behavior.’ By understanding this behavior and tuning the consumer configuration accordingly, you can optimize consumers for performance.
How to Monitor: Key fetch metrics include:
- fetch_rate (rate of fetch requests)
- fetch_size_avg (average size of fetched records)
- fetch_wait_time_avg (average wait time for fetch requests)
8. Consumer Rebalance Activity
It tracks how often and for how long consumer rebalances occur. Rebalancing is the process by which Kafka redistributes partitions among consumers in a group to ensure an even distribution of workload. This is crucial for maintaining optimal performance and preventing any single consumer from becoming overloaded or underutilized.
Although it is recommended to avoid rebalances, they can sometimes become inevitable due to changes in the consumer group, such as consumers joining or leaving the group or changes in the number of partitions.
Frequent rebalances can disrupt message processing and increase latency, as consumers need to stop processing messages during the rebalance and reassign partitions. Therefore, monitoring rebalance activity is essential to identify and mitigate performance issues.
How to Monitor: Developers can monitor the metrics:
- rebalance_rate (frequency of rebalance events)
- rebalance_time (time taken for a rebalance to complete)
Complexities In Rebalancing And Factors Influencing It
Let’s assume a consumer group with some workers. The first consumer worker is connected to a partition (say, Partition 1) and has established connections to the partition at many replicas. When a rebalance is triggered, the consumers break all those connections. Again, it has to figure out which replica to connect to.
Now, there is complexity at two levels:
- Kafka has to decide which worker to connect to which partition.
- Kafka has to figure out the replica within that partition.
This is why rebalance is a costly operation. And one of the ways to optimize the consumer workers is to avoid rebalancing.
Factors Influencing Rebalancing And How To Avoid Them
- To maintain efficient resource (worker) utilization, predefine the number of consumer workers needed to prevent overutilization or underutilization. Rebalancing occurs when workers fall into either of these extremes.
- Ensure consumer workers do not die. Workers are usually designed in such a way that it scales up and down. We shouldn't do that with Kafka as it is not a best practice to scale them up and down. It should stay as it is.
- Do not overload the workers so that they run out of memory, kill themselves, and then come again. Even when a worker leaves a consumer group, the connection is lost, and rebalance is triggered.
Factors Influencing Kafka Consumer Performance
Network Latency and Bandwidth: Affects the speed of data transmission between Kafka brokers and consumers.
Consumer Configuration: Settings such as fetch size, batch size, and session timeout can impact performance.
Resource Allocation: CPU, memory, and disk I/O capacity on consumer machines.
Kafka Cluster Configuration: Broker settings and partitioning strategy.
Tools For Monitoring Kafka Consumers
- Prometheus and Grafana: Collect Kafka metrics using Prometheus and visualize them with Grafana dashboards.
- Kafka Manager: An open-source tool for managing and monitoring Kafka clusters.
- Confluent Control Center: Provides a comprehensive monitoring solution for Kafka clusters, including consumer metrics.
- Burrow: A monitoring tool specifically for Kafka consumer lag tracking.
By regularly monitoring these metrics, you can gain valuable insights into the performance of your Kafka Consumers, identify areas for optimization, and ensure that your data processing pipeline runs efficiently and reliably.
Best Practices For Scaling Kafka Consumers
Increase Partition Count: More partitions allow for greater parallelism, enabling more consumers to work simultaneously.
Distribute Load Evenly: Ensure partitions are evenly distributed among consumers to avoid bottlenecks.
Use Horizontal Scaling: Add more consumer instances to the consumer group to handle increased load.
Conclusion
Optimizing Kafka consumers helps with real-time data processing, prevents service disruptions, enhances user experience, and reduces financial losses.
Effective strategies involve understanding consumer groups, applying real-life use cases, and monitoring key metrics such as consumer lag, throughput, latency, and error rates. Tools like Prometheus, Grafana, Kafka Manager, and Confluent Control Center provide valuable insights into consumer performance and optimization opportunities.
Schedule a meeting with our experts to understand how Kafka Consumers can help improve your application’s performance.
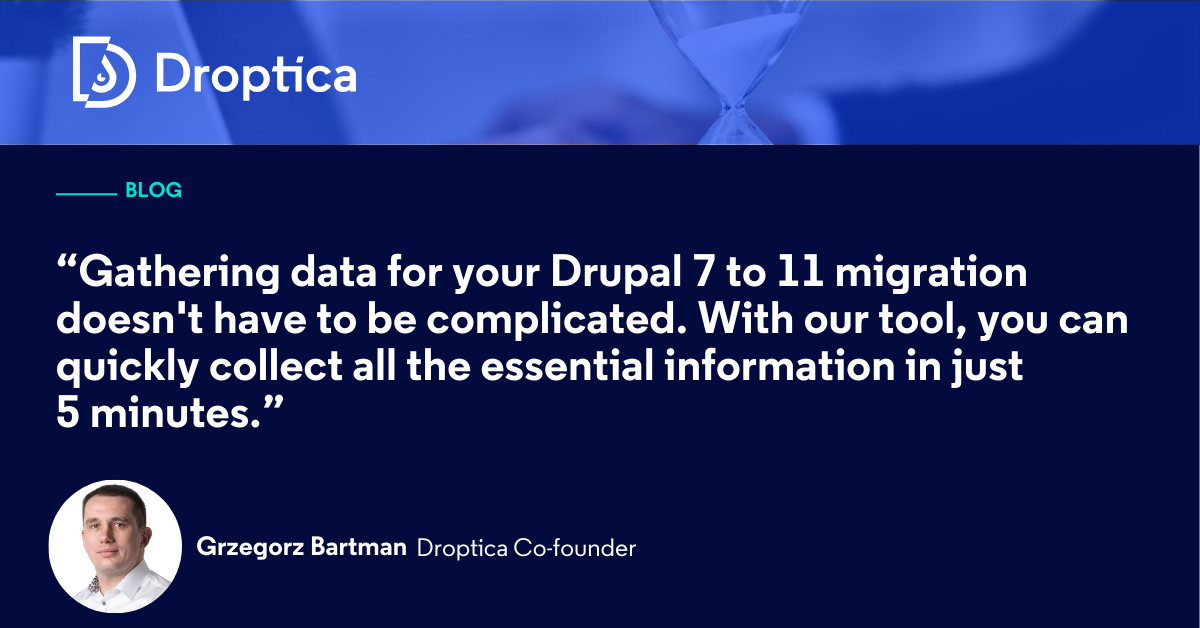
Migrating from Drupal 7 to the latest version, like Drupal 11, might seem like a big challenge, but it doesn’t have to be. One of the most common obstacles is figuring out how much it will cost. You want to know the price, but you don’t want to give full access to your site just to get an estimate. The good news? You can collect all the necessary information for an accurate project estimate in just 5 minutes.
The problem: Estimating Drupal 7 to 11 migration costs
When you're planning a migration from Drupal 7 to Drupal 11, understanding the cost is essential. Many companies ask for full access to your site to make this estimate, but understandably, you may be hesitant to provide that to multiple companies. Without knowing what’s involved, it can feel overwhelming to start the process.
The solution: Collect info for an estimate in 5 minutes
To make things easier, we at Droptica have developed a simple tool that allows you to gather all the necessary data without having to give full access to your site. In just 5 minutes, you can generate a file with all the important details needed for a migration estimate. This file can then be sent to any Drupal development company, allowing them to provide an accurate cost estimate based on your website’s setup.
How to use the migration tool: Step-by-step
Here’s how you can quickly gather the necessary data for a migration estimate using our tool:
- Log in to your Drupal 7 site as an administrator.
- Ensure the PHP Filter module is enabled. You can check this by visiting /admin/modules. You'll need to have the right permissions to see this page.
- Navigate to /node/add/page. If you don’t have a page content type, you can create a new content type that allows PHP input.
- Change the "Text format" of the body field to "PHP Code."
- Paste the contents from the following link into the body field: snippet.php.
- Save the node. Once saved, a text file will automatically download to your computer. This file contains all the necessary analysis of your Drupal 7 website.
- Send the text file to the development company of your choice for an estimate. With this file, they can give you a preliminary estimate based on your website's structure and setup.
This method doesn't actually migrate your website, but it gathers all the data the development team needs to provide a reliable estimate for your migration.
[embedded content]
Alternative: Using DDEV for local sites
If you have your Drupal 7 site running locally with DDEV, you can also collect the necessary information without using your live site. Just run the following command:
Copy code
ddev drush php-eval 'eval("?>" . file_get_contents("https://raw.githubusercontent.com/droptica/drupal_7_migration_to_latest/refs/heads/main/droptica-drupal-7-audit.php"));'This will execute the same script and allow you to collect the data for estimation.
Using the Devel module
If you have the Devel module enabled on your Drupal 7 site, you can also run the script by navigating to /devel/phpand pasting the contents of snippet.php. This is another easy way to gather the necessary information for your migration estimate. In this case remember to remove PHP opening tag “
Conclusion: Get an estimate without sharing full access
Gathering data for your Drupal 7 to 11 migration doesn't have to be complicated. With our tool, you can quickly collect all the essential information in just 5 minutes, allowing any Drupal development company to provide a preliminary estimate. While this initial estimation will give you a good idea of the cost range, most migrations will require a second iteration, including more in-depth analysis. At this stage, you may need to provide a full copy of your site for a more detailed evaluation.
However, after this first round of estimates, you can easily shortlist companies based on their cost range, saving time and avoiding the need to grant full access upfront.
If you’re looking for an estimate from Droptica, simply send us the file generated by the tool. We've successfully handled numerous Drupal 7 migrations and have additional tools that speed up the process, ensuring your migration to Drupal 11 is efficient and cost-effective.
Read more about our Drupal 7 migration services https://www.droptica.com/services/drupal-7-migration/

Together with 5 colleagues from Liip, I was excited to visit Barcelona again for DrupalCon September 24-27 2025. Together we learned what’s new and coming next for Drupal and exchanged with the Drupal community about common challenges and strategies for future success.
DrupalCon Barcelona Group picture by Bram Driesen (source)
Hola de nou barcelona
Barcelona for me has a long history of Drupal. For Drupal Dev Days 2012 I organized a mapping sprint, we cycled to DrupalCon Barcelona 2015 as part of the #tourdedrupal report , pictures and it was nice to visit a more local event - Drupal Summer - in 2016 (report, pictures). Coding beyond functionality. Altering technologies through artistic research by Mónica Rikić
Drupal CMS: una nova experiència immediata per a Drupal
This year, the focus was on Drupal CMS (previously known by its internal development name Starshot) which is all about bringing Drupal to the next level by creating an out-of-the-box experience including a new way to create layouts (Experience Builder), integrating AI features and many more features. If you like to dive deeper into Drupal CMS, check out the meta issue listing all work tracks as well as the landing page on Drupal.org. Driesnote by Dries Buytaert A similar, prepackaged version of Drupal already exists, handcrafted by many individuals and agencies. Recipes have recently been introduced to Drupal core. They allow to package configuration and content to pre-configure Drupal for common use cases like Search, SEO-optimization or an Event calendar feature. Check out our blökkli starterkit that provides you will a fully-preconfigured setup that we use at Liip. DrupalCon Crowd
Drupal al govern
We saw Drupal's wide adoption for Government at DrupalCon Barcelona. Implementing AI solutions for the French government - in this session it was demonstrated how public services were improved. AI technology would support the public servants by pregenerating responses that would be validated and modified by the public servant. The use of AI technology cut down response times from an average of 19 days to 3 days and a plus of 11% found the received answers helpful. Running a fleet of web sites with ease via LocalGov Drupal Microsites Platform showed a feature that we are also planning to roll out to one of our customers soon. You can easily manage multiple microsites in Drupal and configure on a per-site-basis the needed styling options in order to customize it to each site needs. By leveraging one CMS basis, the time-to-market and total cost of ownership for each microsite can be heavily reduced. Jonathan Noack & Thom Nagy presenting about bs.ch Large-scale content creation with Drupal — Delights, Pitfalls and support structures to help editors - in this session our customer Thom Nagy & our product owner Jonathan Noack presented their case study on relaunching bs.ch. I liked to see how a trustful collaboration with strong communication and stakeholder management combined with agile delivery and innovation led to an outcome all participants are proud about. The website is our flagship showcase for blökkli, the interactive pagebuilder that has delighted many of our customers already and is available for the community under the open-source license. Even though the canton is embedded in a typically restrictive government environment, they even launched the first AI-based assistant "Alva" that answers any questions the public might have about the canton in their own language using GPT-based technology.
Sostenibilitat
Conferences that bring together folks from all over the world have a hard time being sustainable. I appreciate the efforts to promote sustainable transport for example when amongst the attendees traveling by train, a winner was selected. The organizing team also worked with the sponsors to make sure they were taking sustainability into account for how they set up their booths and limit the swag they would give out to participants. DrupalCon Barcelona Mascot watching the crowd The next DrupalCon Europe has been announced to happen in Vienna October 14-17 2025. I am particularly excited for this location as I grew up in Vienna and have been part of the Drupal Austria community as an organizing member before moving to Switzerland. As Vienna is at the heart of Europe, I encourage you to think about sustainable ways to get to the conference. If you travel via Hamburg, Bregenz/Feldkirch, Roma/Blorence/Bologna or Amsterdam, you should even be able to sleep on one of the new generation nightrains that offers better comfort, single-cabins and wheelchair-accessible sleepers. You typically can book your train 6 months ahead. As they introduced dynamic pricing recently, it is recommended to book your tickets early. The beach alongside DrupalCon Barcelona I leave you with some pictures from this year in Barcelona. Would you like to learn more about Drupal? Find an event near you. See you 2025 at one of my favorites Drupal Mountain Camp in Davos or at DrupalCon Vienna.
A new record week: 26 MRs merged! :D Too much to cover, so going forward, I will only write about the most notable changes.
The simplified zoom interface landed thanks to Jesse “jessebaker” Baker and Gaurav “gauravvvv” — with not only better controls, but also a much smoother UX:
 Smooth zoom with pinch and using the slider!
Issue #3464025, image by Jesse.
Bálint “balintbrews” Kléri, Jesse and Ben “bnjmnm” Mullins integrated the existing “undo” functionality with the component props form, resulting in the UX you’d hope:
Your browser does not support playing videos. You can download it instead.
When undoing, the component props form on the right-hand side updates and the preview updates in real-time.Issue #3463618, video by Bálint.
Now that many fundamental pieces exist, it’s time to build upon the foundations that we have. Five weeks ago, Ben added Redux integration to the component props form, resulting in live updates. That started out with a limited set of form elements supported. Harumi “hooroomoo” Jang added support for one more this week:
Drupal Forge is a non-profit project of the Drupal community. Our mission is to support vendors that devote a portion of their revenue to sustaining the software and infrastructure Drupal needs to be a great product. Our product launch buttons are part of a business model to sustain contribution. This makes them different from launch buttons that hosting vendors offer on their own.
Every product on Drupal Forge will have a product owner. For example, the Drupal CMS being developed by the Starshot initiative will be owned by the Drupal Association. You will be able to register with product owners on Drupal Forge to become a vendor of their products. When you are registered as a vendor, you will get a launch button for your site that launches a product trial directly on your hosting platform. If a user launches a trial site from a Drupal Forge product page, they will have the option of choosing you as their vendor before their trial expires.
In return, you will support the product in one of two ways. Your first option will be to share a portion of subscription revenue with the product owner on an on-going basis. Your second option will be to give a referral fee to the product owner for each customer who subscribes to your service. For example, DreamHost gives affiliates US$100 for each yearly subscription to the DreamHost Shared Unlimited plan. We hope you will choose the first option, because a recurring revenue stream makes products sustainable.
You will not need to have your own hosting platform or payment processing service to register as a vendor. We are working on a ready-made vendor package that will allow anyone to sell hosting from AWS or Digital Ocean. We will help you get set up with Stripe for collecting payments from your customers.
Even if a product owner does not make you an official vendor, you will be able to get a launch button from Drupal Forge to sell hosting for their product. In that case, you would decide how to split the subscription revenue. For example, you could set up Stripe to deposit 80% to your bank account, 10% to the Drupal Association, and 10% split between maintainers of projects that are important to your customers.
More advanced vendors can sell bundled services and customized products, which I will cover next.
The Batch API is a powerful feature in Drupal that allows complex or time consuming tasks to be split into smaller parts.
For example, let's say you wanted to run a function that would go through every page on you Drupal site and perform an action. This might be removing specific authors from pages, or removing links in text, or deleting certain taxonomy terms. You might create a small loop that just loads all pages and performs the action on those pages.
This is normally fine on sites that have a small number of pages (i.e. less than 100). But what happens when the site has 10,000 pages, or a million? Your little loop will soon hit the limits of PHP execution times or memory limits and cause the script to be terminated. How do you know how far your loop progressed through the data? What happens if you tried to restart the loop?
The Batch API in Drupal solves these problems by splitting this task into parts so that rather than run a single process to change all the pages at the same time. When the batch runs a series of smaller tasks (eg. just 50 pages at a time) are progressed until the task is complete. This means that you don't hit the memory or timeout limits of PHP and the task finishes successfully and in a predictable way. Rather than run the operation in a single page request the Batch API allows the operation to be run through lots of little page request, each of which nibbles away at the task until it is complete.
This technique can be used any a variety of different situations. Many contributed modules in Drupal make use of this feature to prevent processes taking too long.
A good analogy I like to use is to compare the batch process to food challenges. In my home town of Congleton there is a cafe called Bear Grills that hosts a food challenge called Bear Grills’ Grizzly Breakfast Sandwich Challenge. This is a 2.7kg sandwich that contains 6 sausages, 6 slices of bacon, 4 eggs, 4 potato waffles, beans, and topped off with cheese.
Eating the breakfast sandwich challenge in one go is certainly difficult, but it certainly sounds easier when you consume the sandwich in 100 smaller meals over the course of a couple of days. This is just what batch processing does; it takes a large amount of items and breaks them up into smaller chunks so they're easier to handle (or digest).
This article is the first in a series of articles that will look at various aspects of the Batch API and how to use it. In this article we will look at the core Batch API and how to get set up with your first batch run.
The Batch Process
The following three steps are involved in the batch process in Drupal.
- Initiate Step - This is where the batch is started. It's best to start the batch from some sort of action like a controller, form, or Drush command as it means that the batch can proceed unimpeded. When the batch starts the site will redirect to the path /batch, so you need to be sure that it's the last thing run in the action or submit handler.
- Processing Step(s) - After the batch is initialised the batch process itself is then run. The number of processing steps can be set in the initiate step, but you can also set a single step and have that step run repeatedly until the task is finished. During the processing steps you can keep track of your progress, including how many items you have processed or how many errors occurred. It's also possible to run multiple different steps that do different actions.
- Finishing Step - The final step is a finish step. In this step you can log what happened in the batch and optionally perform a redirect to another page on the site.
The complexity around working with the Batch API is mostly about how you set up the processing steps. There are a couple of different flavors of initialising a batch run and the processes you create will depend on the tasks you are trying to accomplish.
Core to the Batch API is the BatchBuilder class, so lets start off looking at that.
The BatchBuilder Class
The core of the Batch API in Drupal 8+ is the BatchBuilder class. Using this class we can create the needed parameters that have to be sent to the batch_set() method, which is where the batch operations are started.
Create a BatchBuilder object like this.
use Drupal\Core\Batch\BatchBuilder;
$batch = new BatchBuilder();
The BatchBuilder object has a number of different methods that you use to create the batch setup and operations that you need. Here is a list of the available methods.
- setTitle() - Sets the title of the batch page.
- setFinishedCallback() - Sets the callable code that is run once the batch operation has finished. This is used to log success (or errors) and redirect the user.
- setInitMessage() - Sets the displayed message while processing is initialized.
- setProgressMessage() - Sets the progress message that is displayed during the batch run (if no other message has been set).
- setErrorMessage() - Sets the error message to display if an error occurs whilst processing the batch.
- setFile() - This allows you to set the location of the file that contains your callback functions (ie, the batch operations and for finishing). This path should be relative to the base_path() of the site and so should be built using the \Drupal\Core\Extension\ExtensionList::getPath() method. This will default to "[module_name].module", but if you explicitly state where your batch callbacks are then this setting will not be used as PHP will already know where your callback is located.
- setLibraries() - This sets the libraries that are to be used when processing the batch. Libraries will be included on the batch processing page and by default will include the core/drupal.batch library.
- setUrlOptions() - Sets options that will be added to the redirect URLs.
- setProgressive() - This setting changes the batch to run progressively. Normal batches should be run in a progressive manner, meaning that more than one request is used to process the batch operation. You can turn this off to force the batch to run in a single operation. Whilst this might seem like it defeats the point of running batches, it can sometimes be useful. For example, if you know that you have a tiny batch run you might activate this setting to prevent Drupal bootstrapping too many times.
- setQueue() - An advanced setting that can be used to alter the underlying queue storage system that the batch system uses when running the batch. This is normally set to \Drupal\Core\Queue\Batch for normal batches, but can be set to \Drupal\Core\Queue\BatchMemory if progressive is set to true. It is important to remember that the batch system works using the Drupal queue API with each operation we set being an item in the queue.
- addOperation() - Use this method to set the callbacks for the batch operations that will be run during the batch process.
- toArray() - A utility method that converts all of the settings of the object into an array. This is used to hand over the batch information to the Drupal batch runner.
For example, to set up a minimal batch process you would set up the batch operation object like this.
$batch = new BatchBuilder();
$batch->setTitle('Running batch process.')
  ->setFinishCallback([self::class, 'batchFinished'])
  ->setInitMessage('Commencing')
  ->setProgressMessage('Processing...')
  ->setErrorMessage('An error occurred during processing.');
All you need to do then is set the operations that you would run. As an example, here is a batch operation that counts through the numbers from 1 to 1000 in batches of 100 items each.
// Create 10 chunks of 100 items.
$chunks = array_chunk(range(1, 1000), 100);

// Process each chunk in the array to operations in the batch process.
foreach ($chunks as $id => $chunk) {
  $args = [
    $id,
    $chunk,
  ];
  $batch->addOperation([self::class, 'batchProcess'], $args);
}
Once the batch has been set up we kick off the batch run using the batch_set() method and passing in the output of the toArray() method.
batch_set($batch->toArray());This will start the batch and run through the operations we set in the addOperation() method calls, before finishing on the method we set in the setFinishCallback() method.
The Batch Process Method
The batch process method is where your processing will be done and is the main body of the batch run. The name and arguments that the method have depend on the arguments array you used when calling addOperation() when setting up the batch.
In the betch setup code we added a number of calls to the method batchProcess(), and passed in an argument array that was 2 elements in length. Here is the call again in isolation.
$args = [
  $id,
  $chunk,
];
$batch->addOperation([self::class, 'batchProcess'], $args);
This mean that the process method lives in the same class as we currently are, and has the following footprint. We'll build up the method to have all the parts we need.
public static function batchProcess(int $batchId, array $chunk, array &$context): void {
}
Argument one is the value of $id, argument two is the $chunk variable, and we always get a final argument called $context, which is passed by reference. The $context variable is where all of the internal tracking for the batch run takes place and we can use it to initialise variables, report on progress, and even stop the batch once it is complete.
When we first start the batch process the $context array will look like this.
Array(
    [sandbox] => Array()
    [results] => Array()
    [finished] => 1
    [message] =>
)
The components of this array have the following functions.
- sandbox - This is used within the batch process methods only. This is normally used to keep track of the progress of the batch run, or to figure out the max number of elements in the batch. Once the batch processing is finished this array will be thrown away.
- results - This is used by the batch processing methods to keep track of the progress of the batch run. The difference here is that this array is passed to the finish callback method, which gives us the ability to report on how the batch process went. As a result, this array is normally used to store the number of successful or failed operations that happened. What you add to this part of the array depends on what you want to print in the finished output.
- finished - This is a special value that is used by the batch system to see if the batch processing is finished. If you set this to a value of less than 1 then Drupal will call the batch method again to finish off the batch. This value is really powerful, but only comes into play when have an open ended batch process. If you set up your batch process with a specific number of items and a set number of operations then this flag will not be used. I will go into this setting in more detail in later posts.
- message - To communicate progress to the user you can set a message to this array variable and this will be shown on the batch processing page (along with the progress bar).
When we first start the batch process there isn't any information in the sandbox and results array items, so we first set up these values in the processing method. We can also add to the message parameter of the $context array since we also know some things about the batch process we are currently running.
public static function batchProcess(int $batchId, array $chunk, array &$context): void {
  if (!isset($context['sandbox']['progress'])) {
    $context['sandbox']['progress'] = 0;
    $context['sandbox']['max'] = 1000;
  }
  if (!isset($context['results']['updated'])) {
    $context['results']['updated'] = 0;
    $context['results']['skipped'] = 0;
    $context['results']['failed'] = 0;
    $context['results']['progress'] = 0;
  	$context['results']['process'] = 'Chunk batch completed';
  }

  // Message above progress bar.
  $context['message'] = t('Processing batch #@batch_id batch size @batch_size for total @count items.', [
    '@batch_id' => number_format($batchId),
    '@batch_size' => number_format(count($chunk)),
    '@count' => number_format($context['sandbox']['max']),
  ]);

  // Process the chunk.
}
The next thing to add is processing the chunk of array items.
Rather than get the batch operation to do anything destructive to the site I decide to just loop through the items in each chunk and get the process to sleep for a few milliseconds to simulate things happening to the site. This means that you can run this batch call as many times as you like without causing lots of content to be added (or removed) from your site. I will go into more concrete mechanisms later in this series of articles so show nodes being created.
public static function batchProcess(int $batchId, array $chunk, array &$context): void {
  if (!isset($context['sandbox']['progress'])) {
    $context['sandbox']['progress'] = 0;
    $context['sandbox']['max'] = 1000;
  }
  if (!isset($context['results']['updated'])) {
    $context['results']['updated'] = 0;
    $context['results']['skipped'] = 0;
    $context['results']['failed'] = 0;
    $context['results']['progress'] = 0;
    $context['results']['process'] = 'Form batch completed';
  }

  // Keep track of progress.
  $context['results']['progress'] += count($chunk);

  // Message above progress bar.
  $context['message'] = t('Processing batch #@batch_id batch size @batch_size for total @count items.', [
    '@batch_id' => number_format($batchId),
    '@batch_size' => number_format(count($chunk)),
    '@count' => number_format($context['sandbox']['max']),
  ]);

  foreach ($chunk as $number) {
    // Sleep for a bit (making use of the number variable) to simulate work
    // being done. We do this so that the batch takes a noticeable amount of
    // time to complete.
    usleep(4000 + $number);
    // Decide on the result of the batch. We use the random parameter here to
    // simulate different conditions happening during the batch process.
    $result = rand(1, 4);
    switch ($result) {
      case '1':
      case '2':
        $context['results']['updated']++;
        break;

      case '3':
        $context['results']['skipped']++;
        break;

      case '4':
        $context['results']['failed']++;
        break;
    }
  }
}
As part of the simulation of processing the batch operation I also added a random function that will pick a number between 1 and 4 and increment items in the results part of the context array. As these items will be fed to the finish method we can simulate things not working quite right on the batch run and see the results of that.
This is pretty much it for the batch process method. The Batch API will call each of the operation methods we setup at the start, passing in the array items we set for each operation. When finished, the results will be passed to the batch finish method.
The Batch Finish Method
The batch finish method is the final function that is called when the batch operations finish. This method accepts the following parameters.
- $success - TRUE if all Batch API tasks were completed successfully.
- $results - An results array from the batch processing operations.
- $operations - A list of the operations that had not been completed.
- $elapsed - Batch.inc kindly provides the elapsed processing time in seconds.
Using this information we can setup a pretty simple finished method. All we need to do look to see if the $success variable is true or not. If it is then we can report to the user (via the Messenger service) that the batch finished, log the fact that the batch finished. If the batch failed (for whatever reason) then we print this out as an error, passing in the operation that caused the issue.
Here is a typical finished method, based on the batch operations we ran in the above step.
public static function batchFinished(bool $success, array $results, array $operations, string $elapsed): void {
  // Grab the messenger service, this will be needed if the batch was a
  // success or a failure.
  $messenger = \Drupal::messenger();
  if ($success) {
    // The success variable was true, which indicates that the batch process
    // was successful (i.e. no errors occurred).
    // Show success message to the user.
    $messenger->addMessage(t('@process processed @count, skipped @skipped, updated @updated, failed @failed in @elapsed.', [
      '@process' => $results['process'],
      '@count' => $results['progress'],
      '@skipped' => $results['skipped'],
      '@updated' => $results['updated'],
      '@failed' => $results['failed'],
      '@elapsed' => $elapsed,
    ]));
    // Log the batch success.
    \Drupal::logger('batch_form_example')->info(
      '@process processed @count, skipped @skipped, updated @updated, failed @failed in @elapsed.', [
        '@process' => $results['process'],
        '@count' => $results['progress'],
        '@skipped' => $results['skipped'],
        '@updated' => $results['updated'],
        '@failed' => $results['failed'],
        '@elapsed' => $elapsed,
      ]);
  }
  else {
    // An error occurred. $operations contains the operations that remained
    // unprocessed. Pick the last operation and report on what happened.
    $error_operation = reset($operations);
    if ($error_operation) {
      $message = t('An error occurred while processing %error_operation with arguments: @arguments', [
        '%error_operation' => print_r($error_operation[0]),
        '@arguments' => print_r($error_operation[1], TRUE),
      ]);
      $messenger->addError($message);
    }
  }
}
Remember that the results array here contains information that you put into it in the batch operation step(s). This means that if you want to want to perform different operations or report on different activities then you need to change this code to report on the contents of the different results array.
One final thing in the finished method is the return value, which depends on where you start the batch from. If you start the batch operation from a form then the form redirects will be taken into account and used to send the user to the whatever was set in the form. If the batch operation is initiated from a controller then the return value must be a redirect response as controllers must return either a render array or a response object.
Essentially, if you return a redirect response from the finished method then this will be used and the user will be redirected, but returning a redirect response is optional.
Running A Batch From A Form
It is quite common to initiate a batch operation from a form. Doing so means that we can accept parameters from the user about what to do in the batch, but it also gives a more definite warning to the user that performing this action will result in a (potentially) lengthy process.
Setting a patch operation in a form is pretty simple though, in the submitForm() handler of the form class we just create a new BatchBuilder object and set the batch up.
public function submitForm(array &$form, FormStateInterface $form_state): void {
  // Create and set up the batch builder object.
  $batch = new BatchBuilder();
  $batch->setTitle('Running batch process.')
    ->setFinishCallback([self::class, 'batchFinished'])
    ->setInitMessage('Commencing')
    ->setProgressMessage('Processing...')
    ->setErrorMessage('An error occurred during processing.');

  // Create 10 chunks of 100 items.
  $chunks = array_chunk(range(1, 1000), 100);

  // Process each chunk in the array to operations in the batch process.
  foreach ($chunks as $id => $chunk) {
    $args = [
      $id,
      $chunk,
    ];
    $batch->addOperation([self::class, 'batchProcess'], $args);
  }
  batch_set($batch->toArray());

  // Set the redirect for the form submission back to the form itself.
  $form_state->setRedirectUrl(new Url($this->getFormId()));
}
As this is a form operation we can use the $form_state object to alter the redirection of the batch process once complete. This is understood by the Batch API and will be used as the final destination after the finished method is called (assuming that the finished method doesn't return a redirect response itself).
When we submit this form we see the following batch process running.
Once complete we will be redirected back to the form that we submitted, where a message will show us show many items were processed.
When To Use The Batch API
There are a number of situations that you might want to use the Batch API, I've hinted at a couple in the introduction, but here's a list of some examples.
- Performing an operation on lots of different items of content. For example, updating every page on a site or deleting lots of taxonomy terms.
- If you are interacting with an API that requires lots of operations to complete a task then the Batch API can be useful. This allows you to show the user a progress bar whilst you perform the actions, and can often mask a slow API system or prevent the API from timing out the user's page.
- If you want to accept a file from a user and process the results then using the Batch API can often help break down that file into smaller parts. I have successfully managed to parse a CSV file with 100,000 entries using the Batch API.
When Not To Use The Batch API
Of course, the Batch API isn't always the best thing to use in all circumstances. If you want to process a bunch of items quickly (and give user feedback whilst doing it) then the Batch API is normally the best approach.
If you don't need to give that feedback to the user, or timescales are less important, then just using a queue processor can be a better solution. The Batch API in Drupal is build upon the Queue API so if you build the batch operation it isn't too difficult to swap to a queue processor after the fact.
Conclusion
The Batch API in Drupal is a really powerful component of processing data whilst also giving the user a decent experience. It does away with long page loads and introduces a nice progress bar that will show you how long your user has to wait for it to complete. Drupal makes use of the Batch API in a few places, and even allows certain parts of Drupal (e.g. update hooks) to integrate with the Batch API with very little extra code.
There's quite a lot of information here on how to setup and use the Batch API, but what I have shown here is the simplest version of using batch. Using the above code you can create a form that will run a batch operation that takes a few seconds but should allow you to experiment with the API and see what it does.
In the next article we will look at setting up a batch run so that it can be run using either a form or via a Drush command.
If you want to see the source code for the examples above (or all examples in this series) then I have released them all as a GitHub project that has a number of different sub-modules that show how to use the Batch API in different situations and combinations. Feel free to take a look at the project and use the source code in your own projects. Also, please let me know if there are any improvements to the module that you can think of.
Finally, I'd like to say thanks to Selwyn Polit and his Drupal at your Fingertips book for some of the code examples I have used here. The page on Drupal batch and queue operations is really worth a read.

The statement "Love thy CMS" appeared in an internal Zoom chat about the modernization of my organization's CMS. My co-worker and I were explaining the overarching technical goals for rethinking and modernizing the organization's Drupal implementation. On the call were stakeholders, an SEO specialist, site builders, and content authors. While presenting goals and features, I finally summed it up as "We want you to love your CMS." In the chat, someone simplified that statement into "Love thy CMS!" and the "thy" adds the tongue-in-cheek aspect, being it is hard to imagine loving a piece of software. Yet, Drupal has the potential to be loved, and this concept could become part of Drupal's marketing efforts.

The Schema.org Blueprints Demo Profile is a simplified version of the Drupal Core's Standard installation profile, with some features disabled and others enabled. For example, the Comment and Contact modules are not automatically enabled. Meanwhile, the Media module is enabled and properly configured. Additionally, Drupal's default 'Article' content type is not created because it does use media, and the Schema.org Blueprints modules can easily recreate it using media. The Schema.org Blueprints Demo Profile sets up the ideal starting point for installing and configuring modules via the Schema.org Demo module.
Early on, I implemented the concept of mapping sets, which set up multiple Schema.org types in sequence to test and review the module’s out-of-the-box configuration. As I have worked to implement Schema.org for my client, I’ve realized that the generated Schema.org types and properties need additional configuration to create the ideal content authoring experience and website. While learning more about Schema.org’s history and evolution, it has become apparent that schemas for different sectors are led by working groups that research and recommend additional types and properties. For example, information architects and content experts have collaborated to define comprehensive schemas for the automotive, hospitality, medical, and financial industries. These very thorough industry schemas can feel overwhelming and make it difficult for developers to leverage and understand the available schemas and possibilities. To help developers get started and maintain their organization’s schemas, I’ve implemented a Schema.org Blueprints specific starter kit API, which can either provide the beginning or an example of an approach for implementing Schema.org via Drupal.
Recently, a tech lead on my team expressed a reasonable concern that they wanted to ensure all team members understand the architecture decisions behind the Schema.org Blueprints module, sub-modules, and its demo. Currently, only the overarching goals of the Schema.org Blueprints module are defined on the project page. The specific reasoning behind how the module's code base is structured, its dependencies, and the overall technical approach needs to be documented. Providing ADRs for the Schema.org Blueprints module will benefit my team and the Drupal community, and help define the module's current state, provide a way to move the module forward, and hopefully make the module easier to maintain.

A stable version of Recipes is yet to be released in 2023, this initiative is a prominent part of Drupal 10.
Drupal 10 provides a powerful platform for building websites and applications. It offers various ways of site-building, including profiles, distributions, and now recipes.
As part of the Drupal strategic initiative, site-builders & developers can greatly benefit from the improvements to be provided by the recipes initiative.
Drupal 10 recipes are expected to provide more flexibility and ease of use to site builders and developers, allowing them to create custom solutions that meet their specific needs. Although a stable version of recipes is yet to be released in 2023, this initiative is a prominent part of Drupal 10 features.
This blog will help you understand how recipes are different from profiles and distributions and how they are a way forward in Drupal site-building.
Understanding Profiles & Distributions
Profiles and distributions are often confused, but they are not the same thing. Drupal vanilla, or the basic Drupal installation, is relatively bare and lacks many of the essential features required to create a full-fledged website.
Profiles and distributions are pre-configured packages that contain a set of modules, themes, and configurations that can be used to create a specific type of website.
Profiles and distributions are pre-configured packages that contain a set of modules, themes, and configurations that can be used to create a specific type of website.
Distributions are built on top of Drupal and provide a use-case-specific package. They include a pre-selected set of modules, themes, and configurations that are designed to fulfill a particular use case.
For instance, a media and publishing distribution will include modules like feed, carousel banner, facet search, or similar features specific to media websites.
Distributions are a great way to get started quickly and provide a solid foundation to build on top of.
Profiles, on the other hand, are subsets of distributions and are included in Drupal core. Drupal core comes with three installation profiles: Standard, Minimal, and Demo (Umami).
Installation profiles determine the set of modules, themes, and configurations that are included in a distribution.
For an e-commerce site, one could use the standard installation profile as a base and add additional modules and themes to customize the site.
Drupal vanilla is bare and lacks any pre-configured settings or features. Profile and Distribution are similar concepts in Drupal, but serve different purposes.
Enter recipes!
What are Drupal Recipes?
Recipes are a modular approach to site-building in Drupal. They are small use cases that can be easily combined or customized to create a unique solution. Recipes are like microservices that can be plugged in and played as needed.
Recipes are modular building blocks that allow developers to create custom site features quickly and efficiently.
A distribution is a use case that customizes Drupal to fulfill a specific need. Unlike distributions, recipes do not use installation profiles and can be tweaked at any point in the site-building process.
Installation profiles are part of Drupal core. These profiles determine which set of modules, themes, and configurations are installed during the initial setup of your Drupal site.
The actual backend of any distribution is happening here, as installation profiles are responsible for setting up the initial site structure.
A Profile is a type of distribution that provides a more focused set of features for a specific use case. Profiles can be thought of as smaller, more specific distributions that cater to particular needs.
Unlike distributions, recipes do not use installation profiles and can be tweaked at any point in the site-building process.
To illustrate the differences between these site-building methods, let's consider an example. Suppose you want to build a news website that includes features such as a feed, carousel banner, and facet search. You could use a pre-built news distribution that includes these features out of the box.
However, if you need to make further customizations, you would need to modify the installation profile or distribution, which could be time-consuming and complicated.
Alternatively, you could use an installation profile such as Standard and then install the necessary modules manually. This approach provides more flexibility, but it requires more effort and expertise to set up.
Finally, you could use a recipe approach and install each required module and configure them individually. This approach provides the most flexibility but requires the most effort to set up.
Steps to install Drupal recipe

Why Recipes?
One of the primary objectives of Recipes initiatives is to overcome the challenges, site maintainers and developers face with distributions and to:
- Allow users to install multiple Drupal recipes on the same project, unlike the current scenario where selecting a distribution like OpenSocial prohibits the installation of another distribution like Commerce Kickstart or Thunder. This limitation will be eliminated, and multiple Drupal recipes can be installed on the same site.
- Install a recipe at any point in a project's life cycle, which is currently not feasible. For instance, if a user wants to incorporate community collaboration tools in their site after a few years of using standard Drupal, they can do so without any impediment.
- Simplify the process of maintaining the multisite architecture. This initiative aims to ensure that any changes made do not create additional challenges in this regard.
- Make updating easier, which is currently a challenging task as every existing site is in a different state, the Update Helper module developed by a few distributions will be integrated into the core.
- Make it easy for Drupal recipes to provide demo content, which is currently done in different ways such as importing from CSV or using custom modules, a functionality will be provided in the core to enable Drupal recipes to ship demo content.
What Drupal recipes are not
Drupal recipes have certain limitations, such as:
Wrapping Up
In conclusion, Drupal provides several site-building methods that allow users to create custom solutions to their specific needs. Profiles, distributions, and recipes are all powerful ways that can help you build your Drupal site efficiently and effectively.
Drupal 10 recipes are an exciting addition to the Drupal ecosystem and will help make building websites and applications faster and more efficient than ever before.
As a leading open-source community leader, OpenSense Labs has helped numerous enterprises transform their digital presence with our expert Drupal services and solutions. From custom Drupal development to UX design, we have the experience and expertise to help your organization succeed in the digital landscape.
Don't miss out on the opportunity to partner with a trusted and experienced team. Contact us today at [email protected] to learn more about how we can help you achieve your digital goals.
Acquia Content Management System (Acquia CMS) is an open source, composable CMS for managing digital content and experiences. It is powered by Drupal and optimized for the Acquia platform.
Acquia CMS consists of key Drupal modules, curated by Acquia to be best-in-class. Acquia keeps these modules updated and tested. Acquia also provides security patches and updates to Drupal as they become available, so your team does not have to.
Acquia CMS 2.0 introduces the new starter kit wizard. With the new starter kit wizard, you can assemble the right combination of modules that you need for your use case, be that traditional Drupal, low-code or headless. You can also add our content model and demo content.
Unlike Acquia CMS 1.0, Acquia CMS 2.0 is not a Drupal installation profile. Acquia CMS 2.0 is a set of post-installation modules setup, and is configured by the Acquia CMS starter kit system. Drupal is installed from the Drupal core Minimal installation profile.
In order to create a flawless product, it needs to undergo unparalleled quality assurance and testing.
One of the preliminary testing techniques to understand the fundamental behavioral output of a system or application is black box testing. It aims to identify the functioning of the application such as usability, response time, and reliability, and categorize them under expected or unexpected outcomes.
A powerful testing technique, it exercises a system end-to-end.
This blog will help you understand black box testing in detail, including its various techniques and tools used.
What is Black Box Testing?
Black box testing is a software testing technique where testers do not have access to the internal code or structure of the system being tested. Instead, testers focus on the software from the perspective of an end-user, testing for input/output behavior, usability, and software functionality. It helps to ensure that the software meets the user's requirements, and also helps to identify potential bugs and errors that could harm the functionality of the software. This type of testing is crucial in ensuring that software is reliable and good quality for end-users.
Let’s understand with an example, suppose you are testing a website's search functionality. You know that users should be able to enter a search term and receive a list of results related to that term. You do not know how the search algorithm works, but you can test its functionality by entering different search terms and observing the results.
Black Box Functional Testing Technique
Black box testing has various techniques that are used to test the functionality of an application. It is important to understand the concepts of each of these techniques to understand which one is the right for your project. Let’s take a look at some of the most commonly used black box testing techniques
- ECP technique
Equivalence class partitioning (ECP) is a software testing technique that helps to identify test cases by dividing input data into equivalent classes. The goal of ECP is to reduce the number of test cases needed to achieve maximum test coverage while still providing effective testing.
The basic premise of ECP is that input data can be divided into different categories or classes based on their equivalence. For example, if a system accepts input values in the range of 50 to 90, input values can be divided into the following equivalence classes:
- Valid input values - Input values within the range of 50 to 90 are considered valid input values and belong to this equivalence class.
- Invalid input values - Input values outside the range of 50 to 90 are considered invalid input values and belong to this equivalence class.
- Null input values - Input values that are empty or null are considered null input values and belong to this equivalence class.
![ECP Technique]()
By dividing input data into these equivalence classes, testers can identify a set of representative test cases that can effectively test the system. For example, a test case can be created for each equivalence class to ensure that the system handles each type of input correctly.
The Equivalence class represents or defines a set of valid or invalid states for each input after it has been validated.
The requirements and specifications of the software serve as the basis for this technique. The benefit of this strategy is that by going from an infinite to a finite number of test cases, it helps to shorten the testing period. It is appropriate for use at every stage of the testing procedure.
Let's look at one instance:
Let’s consider, a feature of the software application that takes a cellphone number with 10 digits.
With a mobile number of 10 digits as an example, we can observe that there are two equally legitimate and invalid partitions. The valid partitions operate the same way, which is to redirect to the next page.
In the example above, two further partitions include erroneous values of 9 or fewer than 9 and 11 or more than 11 digits. When these invalid values are applied, these invalid partitions behave similarly and are forwarded to the error page.
The above example shows that there are only three test cases, which is consistent with the equivalence partitioning principle, which states that this technique aims to reduce the number of test cases.
The benefit of the ECP Testing Technique
There are several benefits to using the ECP testing technique:
- Increased accuracy: ECP can detect errors that might be missed by other testing techniques increasing the overall accuracy of the testing process.
- Easy to implement: The ECP testing technique is not difficult to implement, and it can be used with a variety of platforms and software.
- Improved efficiency: ECP can save time and effort by quickly identifying invalid input and reducing the need for manual testing.
- Cost-effective: As compared to other testing methods, ECP is a cost-effective solution for software testing.
- Reduction of production issues: ECP testing helps to identify issues early on in the software development process, reducing production issues and making it easier to fix problems before they become costly mistakes.
Overall, the ECP testing technique is a powerful tool for detecting errors and improving software quality.
- Boundary Value Analysis Technique
Boundary value analysis is a software testing technique that focuses on testing the input values at the boundary or edge of the acceptable input range for a system or application. It is a type of black box testing that helps to identify errors or defects in the software that might be caused by boundary conditions.
The basic premise of boundary value analysis is that errors often occur at the extreme boundaries of the input values, rather than in the middle of the input range. By testing these boundary values, testers can identify potential errors and improve the quality of the software.
For example, let's consider a system that accepts input values in the range of 1 to 100. To perform boundary value analysis on this system, the tester would focus on testing the following input values:
- Minimum value- Testing the input value of 1, which is the minimum value in the acceptable range, helps to ensure that the system handles the smallest input value correctly.
- Maximum value- Testing the input value of 100, which is the maximum value in the acceptable range, helps to ensure that the system handles the largest input value correctly.
- Values just below the minimum- Testing input values just below the minimum value, such as 0 or -1, helps to ensure that the system handles values outside the acceptable range correctly and provides appropriate error messages.
- Values just above the maximum- Testing input values just above the maximum value, such as 101 or 1000, helps to ensure that the system handles values outside the acceptable range correctly and provides appropriate error messages.
- Decision Table Technique
The Decision Table Testing software testing approach is used to examine how the system responds to various input combinations. This methodical technique tabulates the various input combinations and the resulting system behavior.
Because the decision table records the causes and consequences of thorough test coverage, it is also known as a Cause-Effect table. Techniques such as decision table testing, which tests two or more inputs with a logical relationship, are frequently used.
There are multiple rules in the table for a single decision. A decision table's rules can be created by simply inserting AND between conditions.
In the below example, you will understand, how different input combinations, provide different results. Here “AND” is detonated by the sign of circumflex (^), Y stands for “Yes” and N stands for “No”. R1 to R4 stands for different conditions under certain input and outputs.
The following are the major rules that can be extracted (taken out) from the table:
- R1 = If (working-day = Y) ^ (holiday = N) ^ (Rainy-day = Y) Then, Go to the office.
- R2 = If (working-day = Y) ^ (holiday = N) ^ (Rainy-day = N) Then, Go to the office.
- R3 = If (working-day = N) ^ (holiday = Y) ^ (Rainy-day = Y) Then, Watch TV.
- R4 = If (working-day = N) ^ (holiday = Y) ^ (Rainy-day = N) Then, Go to picnic.
As per below graph, There is no need to check the condition in R1 and R2. If the day is working, whether it is sunny or rainy, the decision is to go to the office.
So Outlook = Rainy and Outlook = Sunny. The following rules are the optimized versions of the previous rules R1 and R2.
- R1 optimized: If (Day = Working) Then Go To Office
- R2 optimized: If (Day = Working) Then Go To Office
The refinement/optimization step produces rules that are effective, efficient, and accurate.
- State Transition Table Technique
State transition testing is used when some aspect of the system can be described using a 'finite state machine'.
This simply means that the system can exist in a finite number of states, and the transitions between them are determined by the machine's rule. This is the model that the system and tests are based on. A finite state system is any system in which the output varies depending on what has happened previously. A state diagram is a common representation of a finite state system.
If you ask for ₹100 from a bank ATM, you will be given cash. You may later make the same request but be denied the funds (because your balance is insufficient).
This refusal is due to the fact that the balance in your bank account has dropped from sufficient to cover the withdrawal to insufficient. The earlier withdrawal is most likely what caused your account to change state.
A state diagram can depict a model from the perspective of the system, an account, or a customer.
A state transition model is made up of four basic components:
- the states that the software may occupy (open/closed or funded/insufficient funds)
- the transitions from one state to another (not all transitions are allowed)
- the events that cause a transition (closing a file or withdrawing money)
- the actions that result from a transition (an error message or being given your cash)
It is important to note that in any given state, one event can only cause one action, but the same event from a different state can cause a different action and a different end state.
An example of entering a Personal Identification Number (PIN) into a bank account is shown above.
The states are represented by circles, transitions by lines with arrows, and events by text near the transitions.
The state diagram depicts seven states but only four events (card inserted, enter a PIN, valid PIN, and invalid PIN).
There would also be a return from the 'Eat card' state to the initial state.
There would be a 'cancel' option from 'wait for PIN' and the three tries, which would also reset the card to its initial state and eject it. The 'access account' state would mark the start of a new state diagram displaying the valid transactions that could now be performed on the account.
Use Case Testing Tests
The use case is a functional test of black box testing that is used to identify test cases from the beginning to the end of the system based on the system's usage. The team uses this technique to create a test scenario that can exercise the entire software based on the performance of each function from start to finish.
It is a graphical representation of business requirements that describes how the end user will interact with the software or application. The use cases provide us with all of the possible techniques for how the end-user will use the application, as shown in the image below:
The image above shows a sample of a use case with a condition related to the customer requirement specification (CRS).
We have six different features for the software's module P.
And in this case, the Admin has access to all six features, the paid user has access to three features, and the Free user has no access to any of the features.
As with Admin, the various conditions are as follows:
- Pre-condition→ Admin must be generated
- Action→ Login as Paid user
- Post-condition→ 3 features must be present
- And for Free users, the different conditions would be as below:
- Pre-condition→ free user must be generated
- Action→ Login as a free user
- Post-condition→ no features
Who writes the use case?
The client supplies the customer requirement specification (CRS) for the application, and the development team drafts the use case in accordance with the CRS and then sends the use case to the client for review.
After the client’s approval, developers design and code the software, and the testing team writes test plans, and test cases for various software features.
Test design techniques benefits include:
There are several benefits of the test design techniques, Let’s discuss them briefly.
- Efficient use of time and resources: Test design techniques help testers to identify the most important and relevant test cases that need to be executed. This makes the testing process more efficient and saves time and resources.
- Improved test coverage: By using various test design techniques, testers can ensure that all the important features and functionality of the software are thoroughly tested. This improves test coverage and reduces the likelihood of defects being missed.
- Better defect detection: Test design techniques help testers to identify potential defects early in the testing process. This allows developers to fix the issues before they become more difficult and costly to resolve.
- Increased test effectiveness: Test design techniques allow testers to design tests that are more effective in identifying defects. This leads to higher-quality software and improved customer satisfaction.
- Consistent testing: Test design techniques provide a structured approach to designing tests that ensure that each test is executed consistently.
Black Box Testing Vs White Box Testing
While both black box and white box testing ensure a flawless end product, It's important to understand what is the underlying difference between the two.
To sum up
Black box testing is used to find errors in the system without peering into the actual code. As mentioned above, it’s an efficient way to test larger code segments. This type of testing is often used to verify the quality and reliability of a system or application, by focusing on the user’s view of the system.
With emerging technological trends you need a partner that makes sure your website is innovative and user-friendly. At OpenSenseLabs, we help enterprises provide a better digital experience. Contact us at [email protected] and let our experts help you out.
Drupal 10 released in December 2022 and ever since, the community has been pushing its users to migrate to the latest version.
As many as 54% of all Drupal sites are running on Drupal 7.
Using an outdated version has downsides. Businesses miss out on technological advancements and new features that can speed up and safeguard their digital properties.
With the release of Drupal 10 and the fact that Drupal 7 will reach end of life in November 2023, it is crucial to migrate to Drupal 10 soon. Here’s why enterprises should plan their Drupal 10 migration now, and not wait until the last moment.
Why should you migrate from Drupal 7 to Drupal 10?
Drupal 10 brings automated updates, improved user experience, along with several other feature additions. These components will be more secure, user-friendly, and powerful. Let’s dive deep into why enterprises must plan their Drupal 7 to 10 migration.
- Community support: As an open source CMS, community support is what keeps Drupal's continuous innovation ongoing. With Drupal community prioritizing and actively focusing on security of newer versions, as and when Drupal 7 reaches end of life, the community support will seize. This primarily jeopardizes the security of your Drupal 7 website. This also means that contributed modules and themes that are currently used in your Drupal 7 website, will also lose support for maintenance. This would bring challenges in website maintenance.
- New features and upgrades: Another consequence of not upgrading to latest version is that certain functionalities may cease to perform as intended. Or there may be better alternatives available. Not only can this cause extra annoyance among website maintainers, but resolving these issues may incur additional expenditures for your company owing to the time and resources required to do so. In Drupal 7, while developers had to manually upgrade/updates or search for modules from drupal.org , Drupal 10 has simplified this with Automated updates and Project browser, respectively. A lot of Drupal 7 features are either incorporated out-of-the-box in Drupal 10 or simply removed to maintain ease-of-use.
- Automatic updates: Drupal sites require manual upgrading, which may be challenging, time-consuming, and expensive. Delays in applying security upgrades can lead to hacked sites. The Automated Updates Initiative seeks to give Drupal sites safe, secure automatic updates. In order to minimize the total cost of ownership of maintaining a Drupal site, increase the security of Drupal sites in the wild, and lower the entry barrier for utilizing Drupal, a safe mechanism for automatically deploying updates in Drupal is to be implemented.
- Project browser: Module installation and locating involve too many steps. Some steps call for you to navigate away from your Drupal site and visit Drupal.org. Other procedures, like utilizing Composer from the command line, need technical knowledge. For users who are new to Drupal and site builders, project browser aims to make it simpler to identify and install modules. This eliminates the need to visit Drupal.org or other sites. It is one of the primary Drupal strategic projects that determines the platform's development goals.
- New themes: Olivero & Claro - The Drupal 7 "Seven" theme from 2009 gave off an out-of-date system impression. Seven was replaced by the new "Claro" theme, which was created in accordance with the most recent requirements. The front-end theme, "Olivero," was created to fit with features that are well-liked by users, such as the Layout Builder. The Olivero theme will be WCAG AA compliant.
The simple finding and installation of modules should empower Drupal newcomers as well as "ambitious site builders" – Dries Buytaert
- Automatic updates: Drupal sites require manual upgrading, which may be challenging, time-consuming, and expensive. Delays in applying security upgrades can lead to hacked sites. The Automated Updates Initiative seeks to give Drupal sites safe, secure automatic updates. In order to minimize the total cost of ownership of maintaining a Drupal site, increase the security of Drupal sites in the wild, and lower the entry barrier for utilizing Drupal, a safe mechanism for automatically deploying updates in Drupal is to be implemented.
- Technical Dependencies: Drupal work on current supported PHP versions. Recommended PHP versions are the best choice for building a Drupal site because they will remain supported longer. Drupal 10 is built on PHP version 8.0 while 7 isbuilt on PHP 7 which is also reaching end of life. This creates technical dependencies in supporting the platform better.
- jQuery, jQuery UI, jQuery Forms- Drupal 7 includes old and unsupported versions of these libraries. jQuery's current version is 3.6.x. Drupal 7 includes 1.4.2. Other libraries have comparable challenges. You may minimize this little with the jQuery Update module, although the most recent version is 2.1.x. Drupal 8 and later (as well as many other content management systems) make it simple to provide API access to your content. In the age of "publish everywhere," this is a critical feature. Drupal 7 has some basic API support, but if you want a full-fledged API with write support, you'll have to create it yourself, which adds technical debt and possible vulnerabilities.
- CKEditor 5 update from CKEditor 4 - With a thorough rebuild and an exciting new feature set, CKEditor 5 gives Drupal 10 a modern, collaborative editor experience. Users of programs like Microsoft Word or Google Docs will be used to the new CKEditor's interface. It also offers common tools for collaboration like comments, change suggestions, version histories, and other accepted editing practices. Additionally, it has outputs to.docx and.pdf files for straightforward conversion to print formats. Although the integration is still being worked on, Drupal core 9.3 already has an experimental version if you want to try it out.
- Composer 2 and PHP 8 support - Although backporting of composer 2 to Drupal 8 was successful, PHP 8 compatibility was not. PHP 8 will be required for Drupal 10 because PHP 7 will be discontinued in November 2022.
- jQuery, jQuery UI, jQuery Forms- Drupal 7 includes old and unsupported versions of these libraries. jQuery's current version is 3.6.x. Drupal 7 includes 1.4.2. Other libraries have comparable challenges. You may minimize this little with the jQuery Update module, although the most recent version is 2.1.x. Drupal 8 and later (as well as many other content management systems) make it simple to provide API access to your content. In the age of "publish everywhere," this is a critical feature. Drupal 7 has some basic API support, but if you want a full-fledged API with write support, you'll have to create it yourself, which adds technical debt and possible vulnerabilities.
- Modules that have gone out of support: The Drupal 10 core will be updated to eliminate a few modules that are redundant or are not frequently used. For uniformity, these modules will be transferred to the Contributed Module area. Gathers and presents syndicated material from outside sources (RSS, RDF, and Atom feeds).
- QuickEdit: In-place content editing
- HAL - Serializes entities using the Hypertext Application Language.
- Users may keep track of recent content with the activity tracker feature.
- RDF – Enhances websites with metadata so that other systems may comprehend their characteristics.
You will have to leave Drupal 7 behind. Eventually, the opportunity cost of continuing to use software that is more than 10 years old is substantial, and once it is considered End of Life (EOL), the risk and expense of an uncovered vulnerability increases rapidly.
There are several possibilities available to you, and you have an additional year to choose and make plans for one of them. The ideal option will rely on the expertise level of your team, the amount of business logic you have included into Drupal 7, and your projected budget.
Conclusion
Drupal 7 will reach end of life in November 2023, Drupal experts recommend that organizations begin migrating to Drupal 10 soon and not wait till November 2023.
If you want to migrate your website to Drupal 9 and prepare for Drupal 10, you may rely on our Drupal migration skills and expertise.
OpenSense Labs, as a Drupal partner, is committed to providing active support. Contact us at [email protected] for a long-term and fruitful collaboration.
It goes without saying that (software) upgrades improve the overall performance of websites. Drupal is no exception.
Regular updates to the Drupal core benefit not just the site owners in terms of security but also help deliver better user experience.
Businesses should regularly update their websites to make them faster, secure, and easier to use.
Here’s why upgrading your Drupal website is crucial.
Why upgrading your website is important
Below are a few reasons you should prioritize upgrading your website.
- Security: Between November 2020 and October 2021, 5212 organizations worldwide experienced data breaches (source: statista). Delays before security updates are applied on site can result in compromised sites as seen in Drupalgeddon.
Acquia is known to have observed more than 100,000 attacks a day.
The scale and the severity of this Drupalgeddon brings to fore the importance of keeping websites updated on time. When enterprises fail to upgrade their sites on time, chances of it being compromised are very high.
Websites that do not receive security upgrades are vulnerable to hacker assaults. The Drupal Security Team issues security announcements for all core vulnerabilities contributed modules that are very critical (labeled "highly critical"), requiring that available upgrades be implemented as soon as feasible.
- Support & Maintenance: Community support is what enables Drupal's continual evolution as an open source CMS. The community support for Drupal 7 will wane as it approaches end of life since the Drupal community is actively prioritizing and concentrating on the security of subsequent versions.
- Improved design and cost effective: The design of your website accounts for 94% of consumers' first impressions. So, if your website design is unappealing or unpleasant to users, your visitors will bounce off. Further, 38% of website visitors do not engage with an unattractive website, and the design alone accounts for 73% of your website's trustworthiness. The online equivalent may be your website, which deters potential customers from utilizing your services or purchasing your goods. It might no longer be a symbol of excellence. So an upgrade to the design is absolutely needed. A revamp is necessary, in my opinion, every year or two.
- New Functionalities: Another consequence of failing to apply timely upgrades is that certain functionalities may cease to perform as intended. Not only can this cause extra annoyance among website maintainers, but resolving these issues may incur additional expenditures for your company owing to the time and resources required to do so.
- Technology Benefit: Technology has also advanced, enabling us to forgo conventional, cumbersome Javascript writing in favor of more user-friendly and feature-rich ways to significantly enhance the user experience (JQuery, Prototype, etc.). corner boxes and shadows. HTML5 and CSS3 may significantly improved websites.
- Improved Speed: Your website has to load as quickly as possible since Google now considers page load time as a ranking factor. It's possible that your older website might use a speed boost to obtain some additional Google points using the new technologies and techniques for speeding up websites. Images should be optimized, compression should be used on the server, web pages should be cached, and CSS and Javascript should be minified.
Drupal for a better digital experience
Drupal is popular among enterprises because of its flexibility, modularity, and authoring experience. Drupal also provides several more perks and advantages that make it one of the top CMS.
Here are some advantages that businesses might gain by developing a website using a Drupal-based platform:
- Being an open-source platform, Drupal has strong community support that makes website upgrade/migration for consistent branding simple.
- Drupal as an enterprise CMS, provides a full range of functionality, including multi site management, themes, SEO, content control, and connectors.
- It lets companies provide digital experiences consistently and uniformly across all of their journey's channels.
Even if we are aware of the numerous advantages that Drupal provides or the features that are more companies, marketers, and even digital agencies to this CMS, there are a number of factors that set Drupal CMS apart.
- Content Presentation With A Headless Architecture
- Personalization With Machine Learning And Predictive UX
- Chatbots To Drive The Business Value
- Exploring Markets With Augmented Reality (AR) And Virtual Reality (VR)
New Drupal Upgrades since Drupal 7
As of right now, Drupal 10 has just launched, and Drupal 7 is walking towards it's End of Life. It is advised that companies utilizing Drupal 7 start preparing for their migration to Drupal 10 immediately. Some of the features that set Drupal 10 apart as a unique version with some brand-new feature additions and some feature updates are listed below.
- Automatic updates - The goal of Drupal's Automatic Updates is to address some of the most challenging usability issues that arise when managing Drupal websites. Updates to the production, development, and staging environments are included, and certain integrations with the current CI/CD procedures are also necessary.
- Project browser - The Project Browser simplifies module discovery for site builders. When you pick a module, you will be given instructions on how to install it on your site. This browser is embedded into the Drupal site, so you don't have to leave it to search for modules.
- jQuery, jQuery UI, jQuery Forms- Drupal 10 runs on PHP 8, which will be phased out by November 2022. jQuery UI. Furthermore, Internet Explorer 11 and Drupal 10 are incompatible. Modern JavaScript components could someday take the role of the jQuery user interface.
- New themes: Olivero & Claro - The Drupal 7 "Seven" theme from 2009 gave off an out-of-date system impression. Seven was replaced by the new "Claro" theme, which was created in accordance with the most recent requirements. The front-end theme, "Olivero," was created to fit with features that are well-liked by users, such as the Layout Builder. The Olivero theme will be WCAG AA compliant.
- CKEditor 5 update from CKEditor 4 - Another outstanding upgrade in Drupal 10 is the new WYSIWYG editor. It is challenging to characterize it as just an upgrade of CKEditor from version 4 to version 5 because all the code was written from scratch.
This is not all here are some more insights on Drupal 10 features and modules
Conclusion
Drupal's modular design and ready-to-use configurations offer quick market entry and the capacity to keep up with technological advancement. One of the top technologies reshaping the IT sector is Drupal, which gives organizations the adaptability and scalability to develop while keeping in mind the needs and preferences of their users.
As Drupal 10 is here, and most businesses are planning their migration, We at OpenSenseLabs assist businesses in offering a superior digital experience. Email us at [email protected] so that our Drupal experts can assist you.
The significance of SEO in digital business is no secret. Organizations invest thousands of dollars just to be on the top of the search engine result pages. Despite several tectonic shifts in consumer behavior, organic search delivers the most traffic. More on that later
SEO is more than just adding keywords.
An important part of doing SEO right is ensuring your technical SEO is set right.
Apparently, organizations that have websites built on mature CMS like Drupal have to care less about technical SEO. All aspects of Google-identified site and page-level best practices are ensured out-of-the-box.
In this article, we’ll dive deep to understand different Google ranking factors and how Drupal ensures you stay on top of those trends.
SEO Objectives
Organic search remains the dominant source since budget restraints many marketers to opt for Google Ads for more visibility on SERP.
Best SEO practices not only ensure higher ranking but are also budget-friendly.
According to research, 61% of Google traffic comes from organic searches. Before we move to understand SEO objectives, here's a look at organic SEO trends.
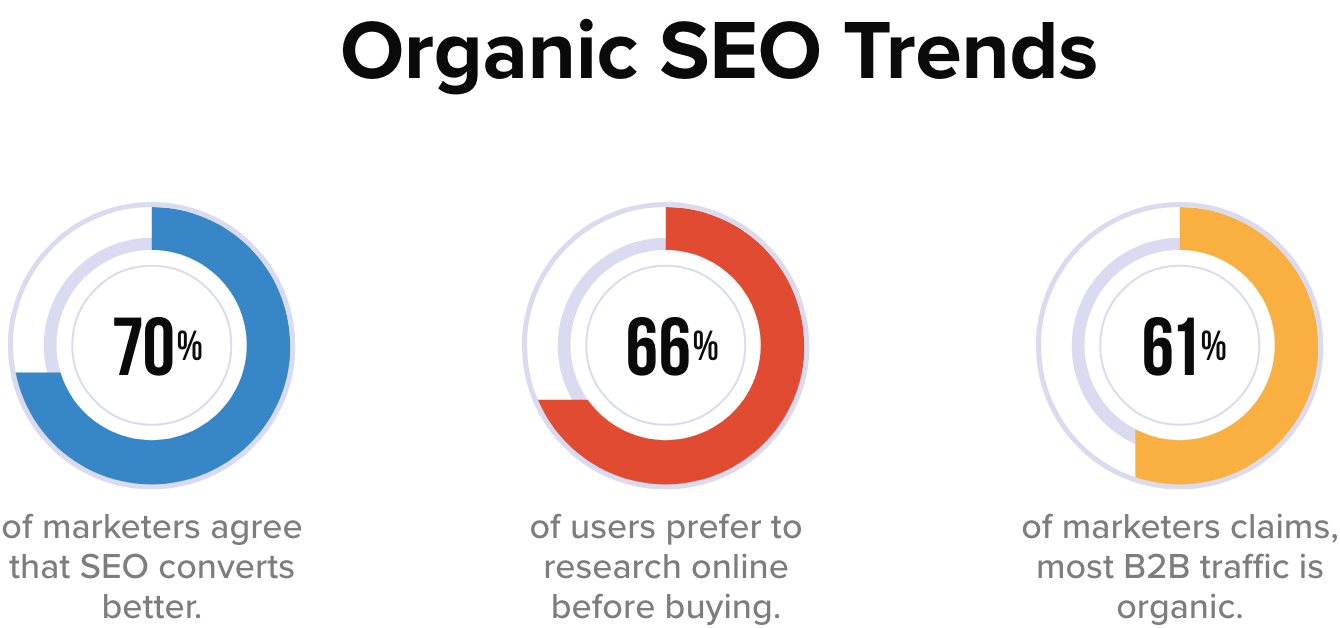
Some of your SEO goals can be:
- Brand Visibility: It simply means the rate at which your brand is visible to the target audience. SEO immensely helps enterprises to improve their brand visibility.
The more people are aware of your brand online the better your chances of a higher conversion rate. In this digital age where people consume most of their information online, not having a solid online presence is simply not an option.
Content marketing notably has a great role to play in brand awareness and when it gets infused with SEO it has the potential to make a significant transformation.
- Better ROI: Good brand visibility paves the way to high ROI. If you use SEO strategically then your conversions will increase. On-page SEO is an effective strategy to rank higher on search engines and drive more organic traffic to your website.
The more people visiting your website the more likely you will get better conversions.
- Organic Traffic: Despite so many shifts in consumer behavior people still mostly use organic ways to search for any product/service.
According to content marketing statistics 2022, quality content with optimized images can increase organic traffic by over 111.3%. On-page SEO addresses all of the tactics necessary for improved organic traffic.
The improved technical aspects of your website contributed to a better user experience, ease to crawl, and thus increased organic traffic.
Let's understand some Drupal SEO modules that you can use to make your website SEO friendly and rank higher on search engines.
Site Level Factors & Modules
- Advanced CSS/JS Aggregation: Slow website load directly affects the search engine rankings. Advanced CSS/JS Aggregation is a must-have module for websites with a lot of CSS/JS files which means this module compresses your frontend files and speeds up your website.
- CDN: A content delivery network is a distributed system of servers deployed in multiple data centers around the world. Website performance directly affects your search engine ranking and user experience. A website that takes an eternity to load will eventually lose most of its visitors. A CDN will distribute a load of your website across servers globally to reduce load time. This module will help the website in loading faster and thus improves user experience and website performance.
- AMP: AMP also known as the accelerated mobile page is an open-source framework launched by a joint initiative of google and several other tech companies. Accelerated mobile pages are lightweight and designed to give mobile users lighting fast and more engaging experience. This module converts web pages as per AMP standards and helps web pages to load faster on mobile and tablets.
- Search 404: 404 error occurs when a content of a URL is moved or deleted. It is considered bad for SEO as it hampers user experience and google bots also penalize such websites. When a web page is deleted or moved ‘search 404 module’ will do a search for URLs that are being moved or removed and show the result of the search instead of a 404 error. This improves the site’s SEO by making sure inactive URLs don’t hamper user experience by delivering the content as per the user’s query.
- Blazy: Lazy loading is a technique for waiting to load particular parts of the website, especially images- when needed. The Blazy module provides lazy image loading to save load bandwidth and help reduce bounce rate. It also helps in saving bandwidth for important information before the website load completely.
- Cloud Flare- This module helps your website load 30% faster, use 60% less bandwidth, and process 65% fewer requests. Cloud flare is a global network designed to make everything you connect secure, fast, private, and reliable. Fast content delivery and Improve SEO are some more features of cloud flare.
- XML Sitemap: In the simplest terms site map is an XML file that contains all your website URLs along with additional metadata about each URL. XML site map creates an efficient site map of your website that is easy to crawl and automatically gets added to search engines like google, bing, yahoo, etc. Site map links pertaining to the content, menu items, taxonomy terms, and user profile can also be added.
- Simple XML Sitemap: This module helps your website in creating individual site maps for each webpage according to google guidelines and policies. Apparently, a simple XML sitemap helps your website get indexed faster on any search engine. This module creates multilingual site maps for entities, views, and custom links and it supports all Drupal’s content entities i.e. nodes, taxonomy terms, users, and menu links.
- Robots txt: A robots.txt file tells search engine crawlers which URLs the crawler can access on your site. Use this module if you are operating numerous Drupal sites from a single code base and each one requires a distinct robots.txt file. This module produces the robots.txt file automatically and allows you to change it from the web UI on a per-site basis.
- Schema.org Usage: Pages with micro formatting tend to rank higher on SERP. Schema markup help website create formatted pages that help search engines understand your content easily. This module specifies the mapping between content types and fields with schema.org types and properties.
-
Menu breadcrumbs: A website with a large amount of data would immensely benefit from the menu breadcrumbs module. As this module builds a navigational path for visitors that helps the website track users' exact behavior on the website and enhance user experience.
![Snapshot Breadcrumb]()
-
Easy breadcrumb: Navigational design of a website describes how different pages of a website are organized and connected to each other. When a site is easy to navigate it increases visit duration. The easy breadcrumbs module helps in creating an accessible navigational website structure that is easy to navigate.
-
Link checker: This module is useful to detect broken links from the content. Both internal and external links can be checked via the link checker module. It occasionally removes broken links from your stored content by checking the remote sites and assessing the HTTP response codes. Broken links can easily be checked in the log/report section. In the “my account” section, author-specific broken links are stored.
-
Menu attributes: As the name suggests, this module helps you add extra attributes to your menu section like class, ID, name, style, relationship, and target. A well-organized menu helps users’ website accessibility and experience.
-
Pathauto: User-friendly URLs are extremely vital for boosting your SEO efforts. Pathauto module allows you to generate a URL based on your content. It is a must-have module for any website to make it SEO-friendly.
-
Metatag: Search engines usually prefer websites with optimized content and meta description. The meta tag module creates structured meta tags for your website so that your website ranks higher on SERP. In addition to that this module also provides support to meta tags from other social media sites. You can furthermore control how your content is going to appear on different platforms.
-
Hreflang: Now if are not sure what hreflang is then it is an HTML attribute used to specify the language and geographical targeting of a webpage. When you have different geographies to target then your website should be multilingual. This module is best for websites with multilingual content. The Hreflang module automatically adds tags to your website’s enabled languages.
The multilingual website attracts a larger audience, improves the brand image, and has an edge over competitors. With only 25% native English speakers, it's a great opportunity to reach out to the rest 75%.
-
External Hreflang: This module allows you to add hreflang for external sites to easily detect spammy and faulty websites. External links connecting spammy websites degrade the user experience and can damage your brand presence and online ranking.
-
Redirect: Directing visitors and bots from one URL to another is called redirection. The key benefits of redirection are to improve user experience and help search engines better understand website content. The redirect module helps in merging websites, moving domains, deleting existing pages, and switching from HTTP to HTTPS.
301, 302, and javascript redirects inform the web browser that a page has moved from one URL to another and let visitors and users land on the right page.
-
Domain 301 Redirect: A 301 redirect sends all the requests from the old URL to the new one. Domain 301 redirect help in redirecting users to relevant pages and page relevance congruent with the user’s query help in good ranking. This module allows sites to 301 redirects to a domain that has been selected as the main domain.
- W3C Validator: HTML errors or poorly coded websites can hamper the site quality and bad site quality consequently damages your website’s SEO. W3C validator reduces the code size on your web page and adds value to your content. Small codes help your website loading speed on diverse platforms. It validates your HTML and CSS codes according to international coding standards.
Page level factors
- CKeditor: It is a rich text editor that helps users write or edit the content inside the webpage. It has a nice writing interface where you can easily format and style content like adding a head, sub-heads, and numbering and bullet feature for better readability.
- Disqus: Pages with lots of comments may be a signal of user interaction and quality. In fact, one Googler said comments can help “a lot” with rankings. Enabling comments on a blog has multiple benefits including the possibility. To engage with your readers and grow a strong community. Disqus module helps you integrate a comment feature on your website that helps your readers to better engage with your content.
![Snapshot-Benefits of comments in website]()
- Scheduler: This module can help content writers to plan and publish content as per their requirements. The scheduler module makes your overall publishing experience hassle-free and supports both Drupal 7/9.
Time Scheduling enables achieving your intended interest group in the circumstances they're on the web, regardless of the possibility of what that time is, hence it has a huge benefit in content marketing.
- Automatic Alternative Text: Alt text is basically an alternative text for images. The whole purpose of alt text is to improve accessibility by describing what an image looks like to the user who doesn’t have the ability to see it.
![SEO benefits of Alt-text]()
This module automatically generates an alt text for your images if you missed putting one. Interestingly google prioritize images with meaningful alt text and it can be helpful in ranking higher on google.
- ImageAPI Optimize: A blog with optimized images has always been the prime factor for higher ranking. Search engines prioritize images that have a proper title, description, alt text, file name, and caption. This module allows you to compress images without compromising image quality with flawless image optimization.
- ImageMagick: This is an open-source software suite that helps edit, display, and convert picture elements and vector files. It’s also helpful in creating image thumbnails, color correction, and liquid rescaling which basically means rescaling the image without distortion.
- CKEditor Nofollow: A no follow link doesn’t authorize the website it is linking to. You can make no follow the link by Adding the “re=nofollow” code to your website. This module requires no modules outside of Drupal core and is used to add rel="nofollow" to links using CKEditor widget.
- Linkit: Internal links are the inclusion of web pages connected to each other. It can increase the ranking of the other pages within your website. It helps both readers and crawlers to easily find your site. Linkit gives you a nice interface for searching and links to internal content on your website instead of you trying to look for URLs manually. Within the editor section, you can select which URL you want to interlink and you will get the asked result.
- Editor advance Link: This module helps you convert normal hyperlinks into a styled button. This module allows content creators and editors more control over link appearance or functionality.
- CKEditor Entity Link: Drupal entities (content, tag, files) can be easily linked with the help of CKEditor Entity Link. This module is compatible with Drupal 9 and with all content entity types. It allows you to choose which entity types and bundles to search for and also provides an autocomplete box to make entity selection easier.


Drupal SEO Checklist Modules
- SEO Checklist: This module is compatible with Drupal 8/9. As the name suggests Drupal SEO checklist module creates an automated SEO optimization checklist so that you can optimize your website hassle-free. If you are someone who likes to follow organized checklists for website optimization then this module is a must-have.
- Real-time SEO for Drupal: If you like writing your content according to SEO guidelines then this module is quite helpful. SEO is a great source for organic reach and a higher SERP ranking is the prominent source of it. While writing, real-time SEO for Drupal provides inbuilt SEO-friendly suggestions as per best SEO standards.
- Requires on Publish:This module is required when your content is published or getting published. Requires on publish can be used when you have fields on your pieces of content, such as tags or SEO information, that editors don't need to fill up until the material is published.
Conclusion
Drupal comes with countless SEO benefits and it delivers the best SEO results. All the modules that we discussed encompass all the features that can help you achieve the best quality results in 2023 and beyond.
With changing Google updates and SEO trends, you need a technology partner that makes sure your digital game is top-notch.
Our Drupal expertise ensures that your site measures up to Drupal’s capabilities in SEO and you leverage them for the top-most SERP rankings.
Looking to enhance your website’s visibility on Search Engines? Get the SEO results you want.
Contact us at [email protected] and let our experts help you out with SEO.
Between November 2020 and October 2021, 5212 organizations worldwide experienced data breaches. (source: statista).
And the number is steadily increasing.
While every business that operates online faces some cyber threats, there are many ways to prevent data breaches or at least minimize their impact.
Delays before security updates are applied on site can result in compromised sites as seen in Drupalgeddon.
Manually updating a Drupal site can be an expensive, difficult, & time-consuming.
The goal of the Automatic Updates Initiative is to provide safe and secure automatic updates for Drupal sites. It aims to solve the problem of any security concerns while over ridding the troublesome manual update process of a Drupal site.
Explained: Drupal Automatic Updates
Drupal’s Automatic Updates focus on resolving some of the most difficult usability concerns in maintaining Drupal websites. It is listed as one of the Drupal Core Strategic Initiatives for Drupal 9.
It comprises of updates on production, development, and staging environments, with some integrations required in existing CI/CD processes.
Automatic Updates in Drupal offers some major benefits to its users such as a reduction in the total cost of ownership (TCO) for Drupal websites and also a decrease in the maintenance cost.
Presently, we get to see a stable release that comprises features such as public safety alerts and readiness checks which will be discussed below.
Importance of updating website
Here is the importance of updating a website. Take a look below:
- Helps in increasing brand exposure
If we update a website by changing the outdated information with newly updated content then it will lead to an increase in brand exposure. But if we do not take this responsibility of updating content then it can be an obstacle in increasing the brand exposure which is essentially important.
- Increases security
One of the major reasons for updating a website can be security concerns. For example, if a website is hacked then it can bring trouble for both the business and clients. But if we frequently update our website with the latest security features then such troubles of website hacking can be avoided.
- Mobile-friendly
By updating our website to a mobile-friendly website we enable our users to go through our website across various devices and platforms with ease and comfort. This leads to an increase in website traffic also resulting in a better company reputation.
Key Features of the Automatic Updates Module
Here’s a list of features in the Automatic Updates module.
- Update readiness checks
We might not be always capable of updating all websites. Therefore, in instances like such, the readiness checks, one of the key features of Automatic Updates helps in identifying if a website is ready for updating automatically after a new release is offered to the Drupal community.
For instance, websites that have un-run database updates, not having sufficient disk space for updating, or working on read-only file systems, won’t be able to get automatic updates. And if our website fails readiness checks and a Public service announcement (PSA) happens to be released, then it is essentially important to solve the readiness issue so that the website can be updated instantly.
- In-place updates
- After the PSA service provides a notification to a Drupal site owner of an available update, and also the readiness checks happen to confirm that the website is ready to be updated, the website administrator is then able to update through the Update form.
- Tarball-based installations are well supported by this particular module and it doesn’t happen to choose some of the requirements in order to secure updating, rollback, etc which will come under the core solution.
- This module doesn’t support contrib updates or composer-based site installations. And also, the work on composer integration has begun already and is in progress.
- Public service announcements (PSAs)
We get to see that infrequent announcements are done especially for critical security releases in regard to core and contrib modules. After a PSA is released, site owners need to review their websites so that they are updated well with the latest releases. Also, the website needs to be in a good position in order to quickly update if any fixes are given to the community.
Here is a quick video on the above-discussed features of automatic updates.
[embedded content]
Conclusion
The Drupal community never fails to make an honest effort in building a community where its users can be benefited by making their software and websites safer and more user-friendly. The Automatic Updates initiative is a great example of it and by far it has made tremendous progress that cannot be unseen.
The way companies are developing their products is changing. That’s because more people are accessing websites in more ways than ever before. To create and innovate at a faster pace, developers are leveraging reusable components. Pattern Lab is one such front-end framework that uses atomic design architecture to execute the component-based design. Reusability and portability of components are the prime reasons for its fast-gaining popularity.
In this blog, we’ll cover what Pattern Lab is, and how developers can use it with Drupal to create their own frontend library and accelerate their product development.
What is Pattern Lab?
Pattern Lab is based on Brad Frost’s Atomic Design concept. Pattern Lab proves to be one of the best dynamic prototyping and organization tools for professionals. It is easily available for download on GitHub and can be used as part of existing or new projects.
It helps in transforming pattern templates, authored by developers, into a full-featured, static site. Easy to learn, it can be used in different types of projects. In fact, it can also be used as a front-end style guide, a rapid prototyping tool, and the actual templates powering one or more live sites. It uses atomic design for accelerating the process of creating modular designs.
Now, let’s break down the above visual building blocks:
- Atoms: They are the basic building blocks of design. For example, UI elements such as buttons, search fields, form elements, and labels.
- Molecules: These are groups of atoms that work together for performing a particular action. For example, search navigation involves a combination of atoms such as a search button, a search field, and a label.
- Organisms: These are molecules and atoms grouped together to define sections of the application. They’re more complex and also have more interactions. For example, a footer a header, or a related blog post section.
- Templates: Groups of organisms form Templates. They are placeholders for organisms. For example, a login page template, a blog page template, or a shopping cart page template.
- Pages: When we combine a template with real content, we get a page.
Pattern Lab with Drupal
Pattern Lab has become popular in the Drupal community, since the release of Drupal 8 with Twig. The combination of Pattern Lab and Drupal leads to better performance of Drupal websites that are complex in nature. Pattern Lab ensures that its Twig templates and CSS can be consumed like a service by Drupal.
Contributed theme such as Emulsify Drupal that comes with inbuilt the Pattern Lab architecture. Emulsify is basically a component-driven prototyping tool that uses atomic design principles and modern frontend practices in order to build a living style guide. It can be executed easily into any CMS for rendering twig files since it adopts the methodology where the smallest components are atoms, which are assembled into organisms, molecules, templates, and pages.
Emulsify authorizes us to manage and assemble components in a way that improves the workflow by integrating Pattern Lab. So, the Emulsify-based project works with custom template names that are very particular to the project, clients, and developers. This helps in segregating the category-wise patterns (modules) and also increases the expertise of the process.
When the templates are ready for production, Emulsify then connects them to Drupal in a non-complex way as a Twig function (include, extend, or embed) and connects the Drupal templates to the component files.
Emulsify prioritizes a "living style guide" approach where the style guide components are basically the same ones in use on the live websites. And we do not need to worry about the components becoming outdated or more unusual than the normal style guide.
Why should we use Pattern Lab?
Let’s now look at why should we use Pattern Lab.
- Dynamic Data: Patterns are supposed to be authored to work with dynamic data. Example data files are easily customizable, included, and available to templates. Also, we will find a global set of data and the capability to customize per component, and variant. This will further encourage writing templates in such a manner that they can also be used outside of the pattern lab, with real data.
- Organization and Presentation: A high-level structure, or groups, based on "Atomic Design" principles is offered in Pattern Lab. We can choose to work within that structure or change the terminology to whatever fits our wants by directly renaming file system directories. These groups happen to turn into dropdown menus, that expands in order to show all the pattern templates in that group and also allow navigating to them. This indeed makes it very simple for the team members to browse and discover what patterns actually exist.
- Proper documentation: Documentation can be easily added at group and component levels, as wished, by simply adding a markdown file, with the same name. This documentation happens to be exposed in the static site, along with the source code of the template.
- Variants: It’s very common to have several variants of a pattern. For instance, in a typical "Hero" pattern we might just have a "light" and "dark" version. So, basically, Pattern Lab supports variants, which it calls "Pseudo Patterns" and displays them very clearly in the static build.
Conclusion
By implementing Pattern Lab, teams can quickly prototype and iterate without multiple rounds of expensive redesigns with the help of traditional design flats. It enables us to be more efficient when it comes to multi-device testing and cross-browser and also makes the job of a front-end developer a lot easier and more fun.
Pattern Lab supports keeping designers, developers, and stakeholders on track in regard to visual decisions. So, if we prioritize brand consistency, and value design, and wish to have a website that works in a very effective way both on the front-end and the back-end then Pattern Lab is the right choice.
When creating websites on Drupal, as developers, we should try to make our job easier. Managing modules, users, generating code – all these processes can be automated and performed with single commands. In this article, we'll take a look at the tools available and discuss them, giving specific examples of use.
1. Drupal Console
Drupal Console is a powerful Command Line Interface. It's used to generate boilerplate code and maintain and debug Drupal. The latest version of this tool is v1.9.8, released on 28 November 2021.
To add Drupal Console to our project, all we need to do is use one command:
composer require drupal/console:~1.0 \
--prefer-dist \
--optimize-autoloader
After that, we can use various commands provided by Drupal Console. We provide some examples below.
Module generation:
drupal generate:module  \
  --module="modulename"  \
  --machine-name="modulename"  \
  --module-path="/modules/custom"  \
  --description="My Awesome Module"  \
  --core="8.x"  \
  --package="Custom"  \
  --module-file  \
  --composer  \
  --test  \
  --twigtemplate
Entity generation:
drupal generate:entity:content  \
  --module="modulename"  \
  --entity-class="DefaultEntity"  \
  --entity-name="default_entity"  \
  --base-path="/admin/structure"  \
  --label="Default entity"  \
  --is-translatable  \
  --revisionable
  --has-forms
Service generation:
drupal generate:service  \
  --module="modulename"  \
  --name="modulename.default"  \
  --class="DefaultService"  \
  --interface  \
  --interface-name="InterfaceName"  \
  --path-service="/modules/custom/modulename/src/"
User creation:
drupal user:create  username password  \
  --roles='authenticated'  \
  --email="[email protected]"  \
  --status="1"
As we can see, Drupal Console gives us a lot of possibilities. Another interesting option that this Command Line Interface (CLI) provides us with is running a local PHP server to test our website.
$ drupal serverThis command will launch a local server on port 8088 for us.
2. Examples for Developers
The Examples for Developers project is one great collection of examples of how we can write our own modules in Drupal. We have 33 different modules at our disposal, from simple blocks, through various types of forms, to controllers with REST API support. We'll probably find everything we need. This module will allow us to learn new things and work faster.
3. Devel
The Devel module includes additional functions and help pages for developers and administrators. It provides us with blocks and toolbars for quick access and developer information. We can use it to “simulate” another user. It's a very helpful functionality, especially when we need to test roles and permissions in Drupal. Devel provides us with features that help us with debugging. And the icing on the cake – we can use it to generate test content.
To install this module, we use Composer.
composer require --dev drupal/devel4. Weight
Sometimes, it happens in our project that we use modules that use the same hooks. By default, Drupal doesn't allow to choose the order of module execution. However, we can work around this limitation in three ways.
Method 1 – setting the Drupal module weight during its installation
In the install file of our module, we can add HOOK_install and use it to set the module weight.
Drupal 9 provides a built-in feature to deal with this issue:
function your_module_name_install() {
  module_set_weight('[your_module_name]', [your_preferred_weight]);
}
It's a little more complicated in Drupal 7, because we have to change this field in the database by ourselves:
function your_module_name_install() {
  db_update('system')
    ->fields(array('weight' => your_preferred_weight))
    ->condition('name', '[your_module_name]', '=')
    ->execute();
}
Method 2 – Changing the weight in core.extension.yml
If we use configurations in our project, we can change the weight of our module in the core.extension.yml file after exporting them. The weight is shown as a number after the module name. The larger the weight, the earlier the methods in the module will be executed.
Method 3 – using Modules weight
The Modules weight Drupal module will add an easy-to-use configuration of module weights. When we go to the configuration page (/admin/config/system/modules-weight/configuration), we'll see this:
Here we can easily set the weights of our modules.
5. Settings.php and services.yml
We can find these two files in the sites folder of our Drupal installation. With just a few lines, we can make developing software a lot easier. It's a good idea to create a settings.dev.php file and put all the changes in it. During development, we can include it in the main settings.php file and remove it when we upload our website to the server.
An even more convenient option is to use an environment variable such as ENV and set it to "dev". Next, we check in settings.php if there's a settings.$env.php file. If so, we include it.
.
$env = getenv("D_ENV");

if (file_exists($app_root . '/' . $site_path . '/settings.' . $env . '.php')) {
  include $app_root . '/' . $site_path . '/settings.' . $env . '.php';
}
We can keep all our support changes for development in the settings.dev.php file.
What exactly can we do there?
1. Enable error display in addition to the message that our website has encountered a problem.
$config['system.logging']['error_level'] = 'verbose';2. Disable CSS and JS aggregation – something we often forget when editing JS styles or scripts.
$config['system.performance']['css']['preprocess'] = FALSE;
$config['system.performance']['js']['preprocess'] = FALSE;
3. Disable render cache:
$settings['cache']['bins']['render'] = 'cache.backend.null';4. Include the development.services.yml file.
$settings['container_yamls'][] = $app_root . '/' . $site_path . '/development.services.yml';The content of the latter file may look like the one we show below.
parameters:
  twig.config:
    debug: true
    auto_reload: null
    cache: false
services:
  cache.backend.null:
    class: Drupal\Core\Cache\NullBackendFactory
We enable Twig debugging. These are helpful comments in the HTML structure that'll make it easier for us to find a template file or create hooks. In addition, we disable cache. Also, we add the cache.backend.null service, which we used earlier to disable the render cache.
6. Lando
It's a tool that facilitates the local development of our website. It allows us to run literally anything and is based on Docker. We have CLI at our disposal, which allows us to easily manage our installations. To set up a Drupal installation locally, all we need is a few commands.
First, we create a Drupal project using Composer.
composer create-project drupal/recommended-project lando-demoThen, we go to the created directory and run the command:
lando init- Choose drupal9 as the recipe,
- name your webroot web,
- and then name your project.
After this process, a .lando.yml file will be created. We'll find there a lot of different information, such as the name of our project, what services we use (initially, these will include appserver and database), addresses of our application, PHP version, or access data for our database.
Next, we run the command
lando startNow we can go to the address given in .lando.yml and finish the Drupal installation.
7. Drush
A tool that every Drupal developer should know. Drush has been with us since Drupal 4.7 and is still developed. As of writing this, the latest version is 11.0.8, and it was released on 9 April 2022. Drush allows us to manage our website by importing and exporting configurations, updating the database, or cleaning the cache. Newer versions of this tool also allow us to generate code. Let's go over some useful commands:
Cache cleaning
drush crConfiguration importing
drush cimConfiguration exporting
drush cexCreating a one-time login link
drush uliModule enabling
drush en module_nameModule disabling and removing
drush pmu module_nameDatabase updating
drush updbWatchdog checking (dblog module)
drush wsWhen it comes to code generation, we have a lot of options to choose from. We recommend using the command
drush generateand finding the option that interests us the most.
Drupal development tools - summary
We went through some interesting tools that we can use when working with Drupal. As we can see, Drupal development can be quite quick and pleasant when we know the tools that make the job easier. It's good to take some time to explore these solutions. This investment will pay for itself quickly!
Last week we released a new version of OpenLucius: a lean and fast Drupal social collaboration distribution with features like: groups, social posts, messages, group chats, stories, file -and folder management, notebooks, categories, activity streams, notifications, @-mentions, comments and likes.
OpenLucius 2.0 has been in production for the last ~5 months, it's stable enough to go into beta! We also keep on improving: what we globally did since last release:
- Added new features;
- Enhanced existing features;
- Tweaked UI / Design.
All work we did was based on feedback we got internally, from our customers -and trial users. And we plan to keep it this way, so if you have ideas for new/better features: let me know!
The fastest way to explore OpenLucius is by trying it via the product site. And since a lot has changed, I though I'd make it easy on myself by just showing off with current main features -with the newest on top, here you go:
Task / Kanban Board (*Sneak peak*)
You can already try this task board, but it needs work to get it to an open source release. We plan on releasing this as an add-on contrib module:
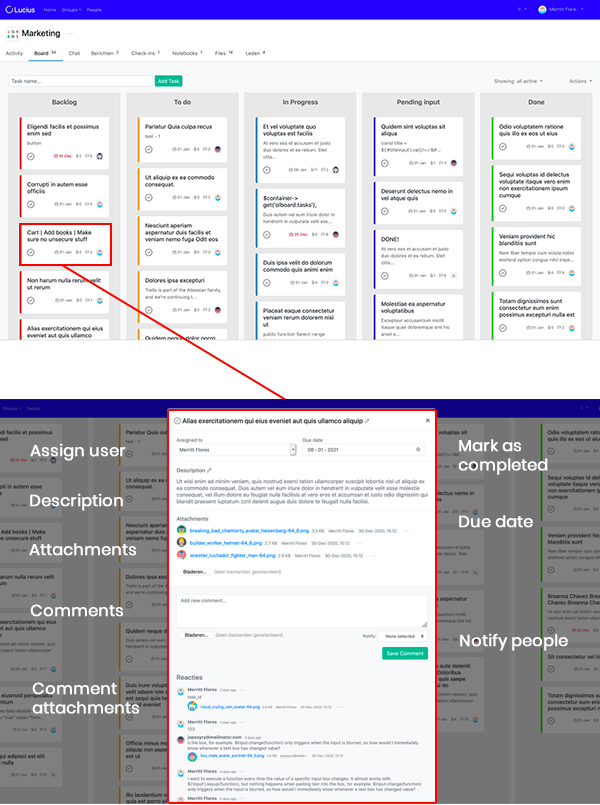
@-mentions (*new*)
What we really missed in previous version where @-mention, so that's now included in texts and chats, with autocomplete:
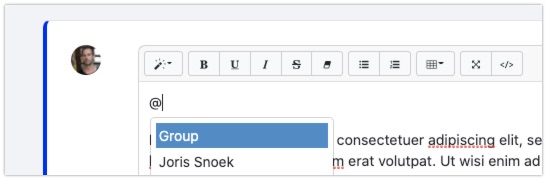
@group mention: As you can see, you can also mention everyone in current group.
Technical background: via Drupal core's CKEditor this was hard to accomplish, so we tested out other editors and came up with open source editor Summernote, a light-weight editor based on Bootstrap. It's extendable, able to facilitate inline-editing and it's also very nice that it automatically inherits theme styling (since it's not loaded via an iframe).
Also, we are building a Kanban/Scrum board with highly interactive modals and for example: inline editing of card descriptions and comments. For that we also needed a lean editor.
And last but not least: we could tweak the editor UI, making it blend with the theme smoothly.
Summernote also facilitates drag-and-drop images & texts:
Drag/drop images (*new*)
So drag-and-drop images is now available in all text editors:
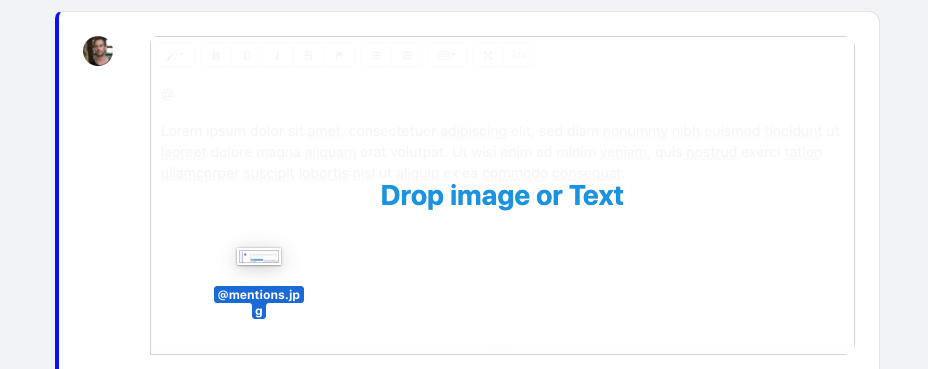
It also has some great, user friendly, inline image options:
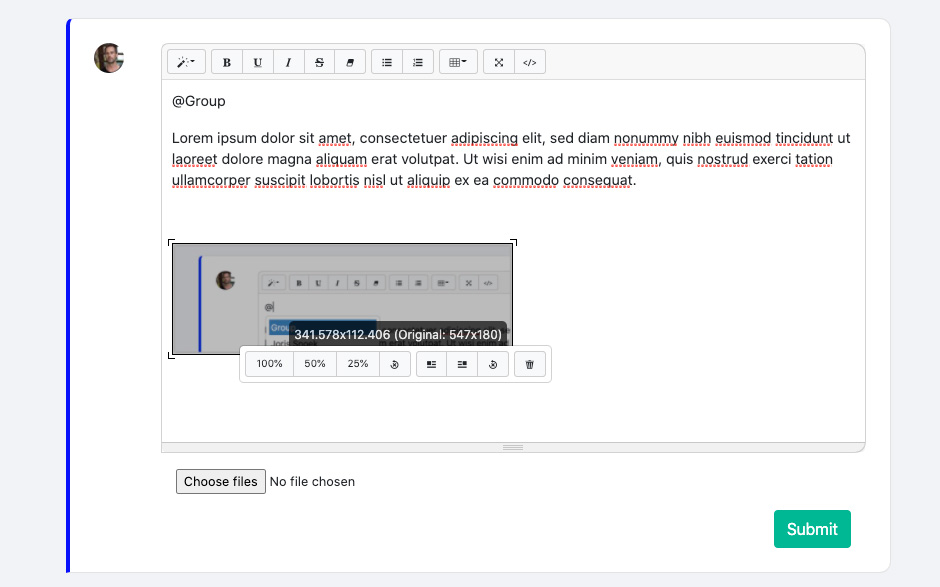
General settings (*new*)
Set global colors, homepage tabs and homepage image:
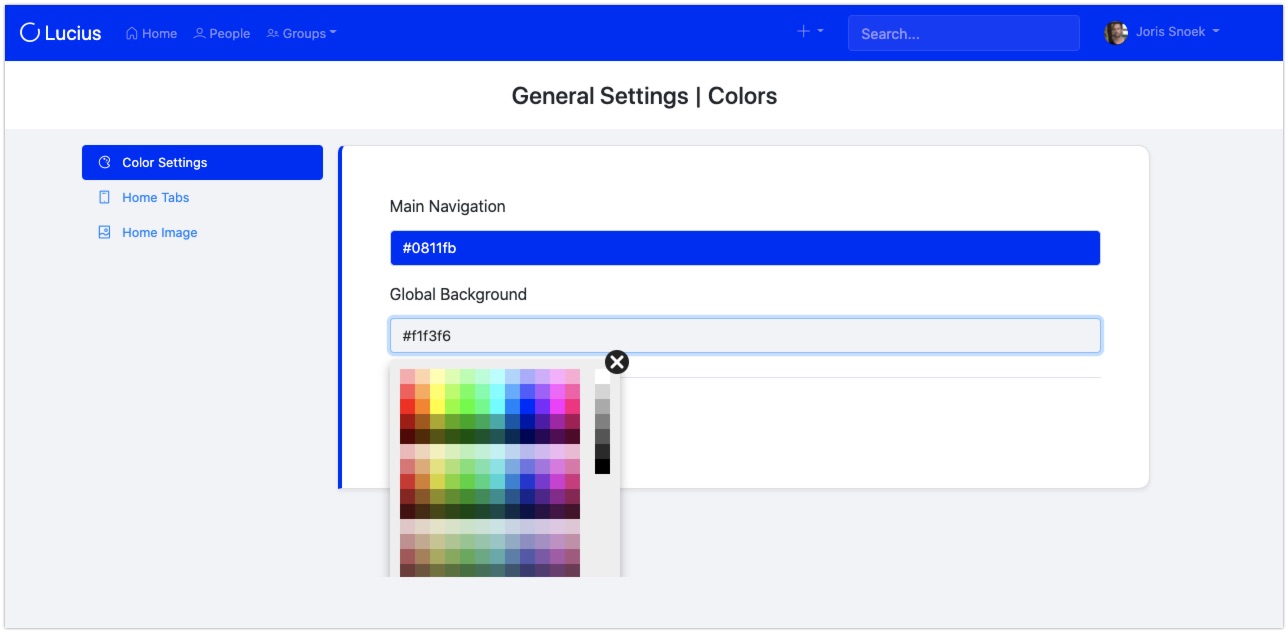
Order book pages (*new*)
You can now order book pages easily, with unlimited depth:
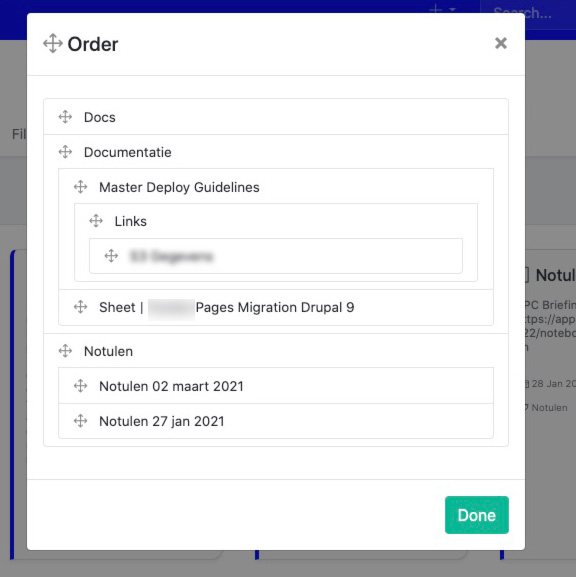
Groups
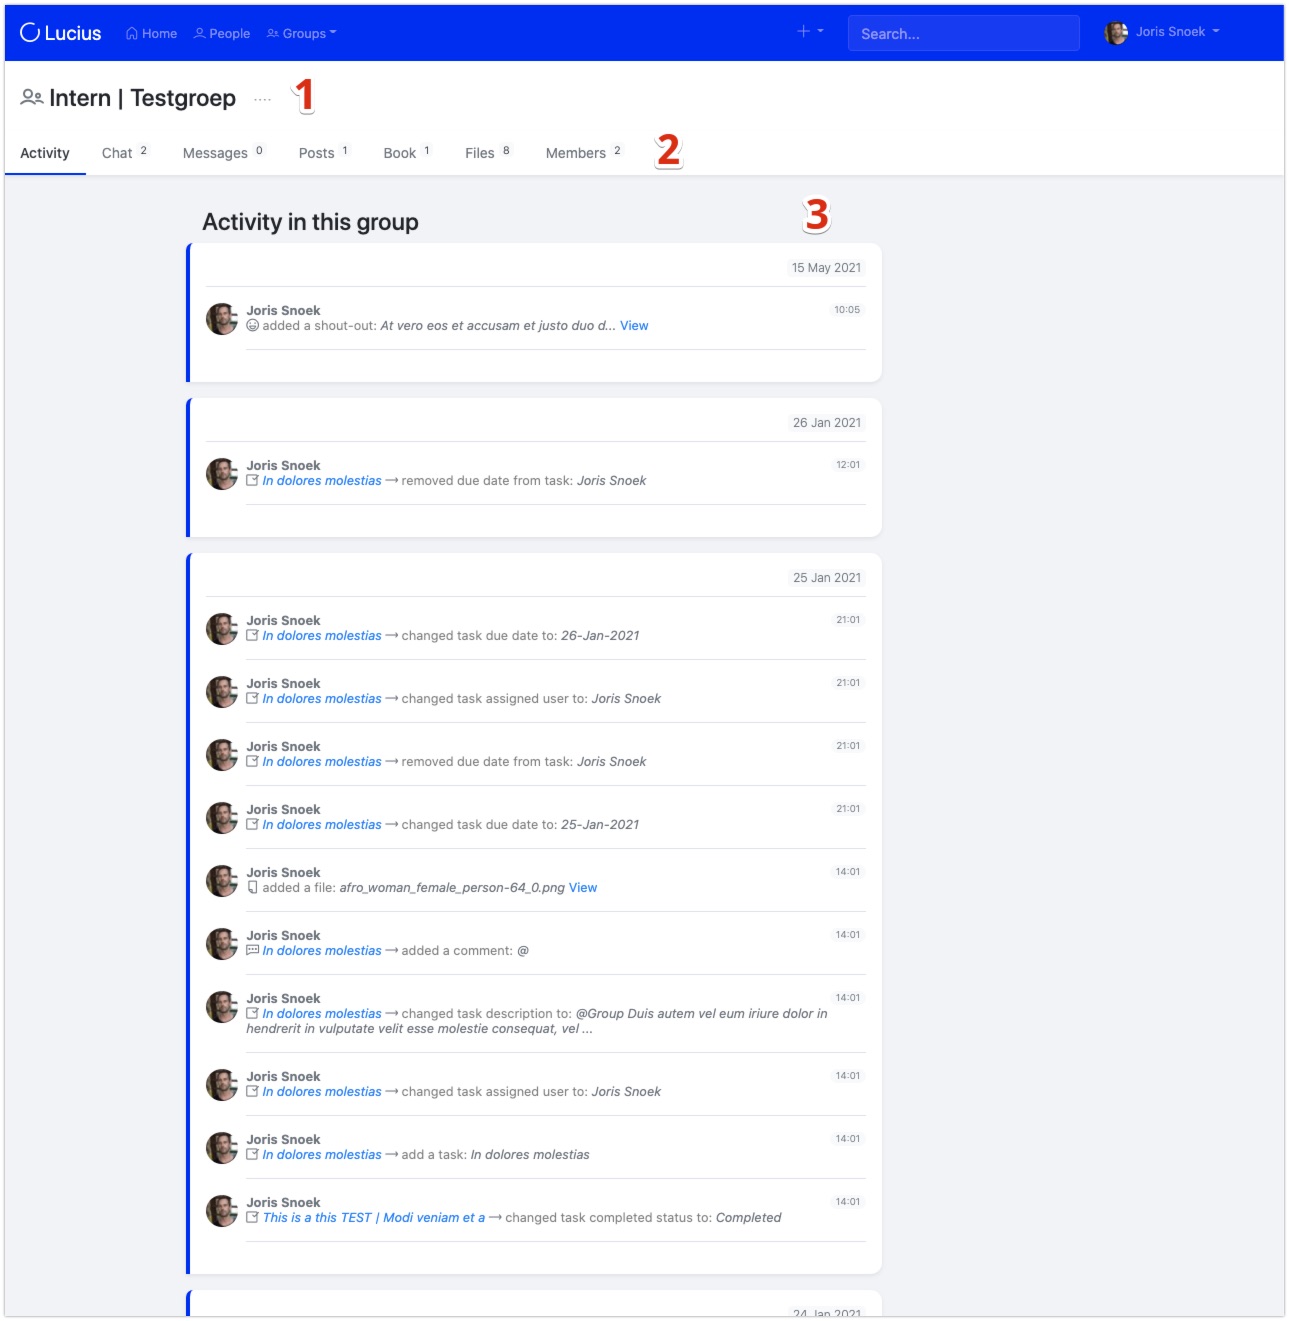
- Group name, with drop down for group settings.
- Group sections, with activity badges that you can turn on/off per group.
- Group activity stream, bundled per day.
Activity streams (global and per group)
Homepage with activity stream example:
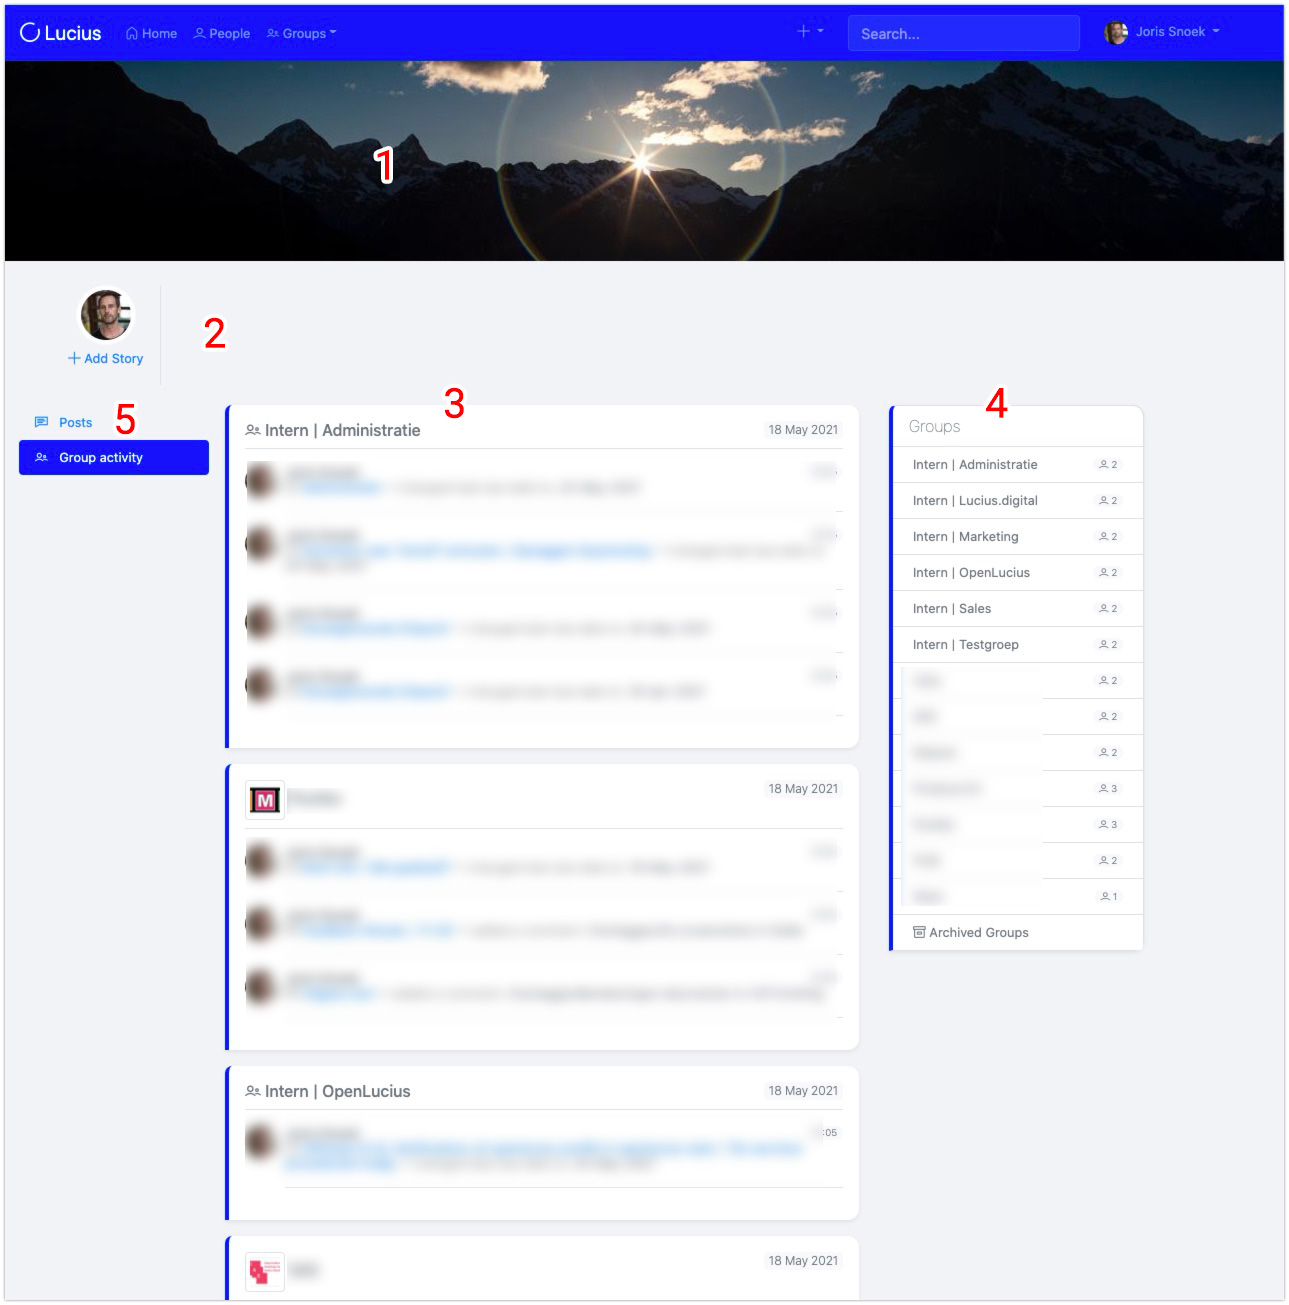
- Home banner, configurable;
- Stories;
- Activity stream, personalised, bundled per day, per group;
- Your Groups, with link to group archive;
- Social posts, global, can also be turned off.
Social posts

Messages
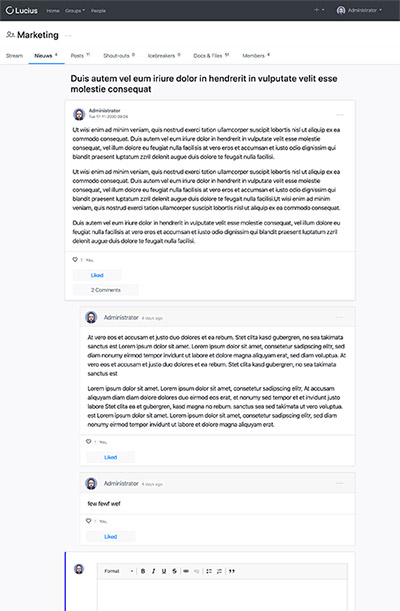
Group chats
Stories

File -and folders management
Notebooks
Overview:
- Hierarchical book pages;
- Order pages modal;
- Like and comment;
- Add file attachments to comments and notebooks.
Order pages easily, with unlimited depth:
Use notebooks for example for:
- Project documentation
- Manuals
- Notes
- Web links
- Agreements
- Minutes
- Ideas
- Brainstorm sessions
- Onboarding information
- House rules
- Customer information
- ...whatever needs text.
Notifications (non-disturbing)
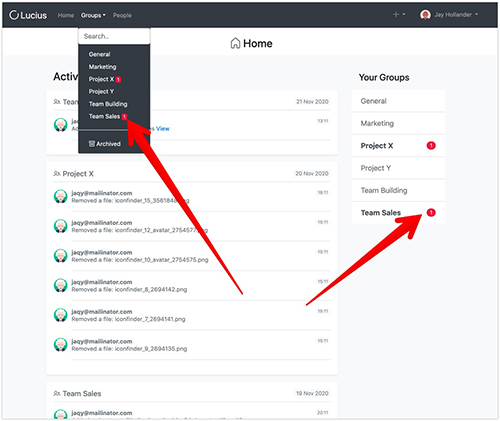
Comments
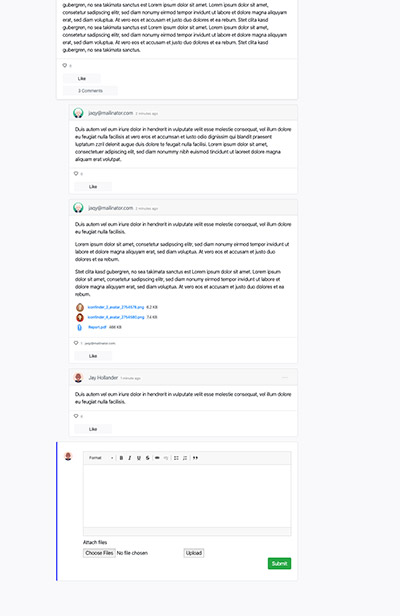
Likes
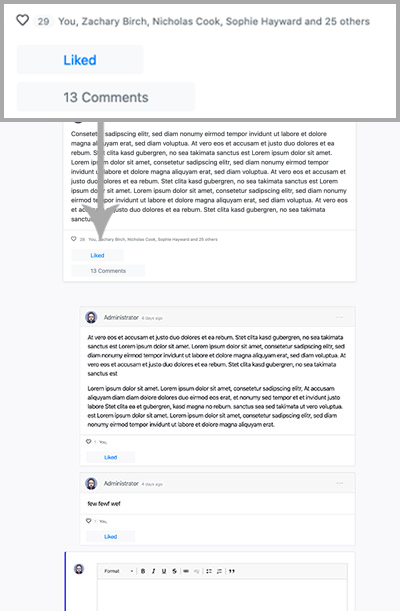
Get it, got it, get that!
That's it for now, if you want to test OpenLucius this instant, that of course is possible via the product website. Or download and install OpenLucius yourself via the project page on Drupal.org
Planet Drupal Written by Joris Snoek | May 25, 2021
Landing pages are great for product presentation and customer engagement.
There are a must for today marketing campaigns, mobile advertising and sales development.
There is no easy way to build a simple landing page in Drupal.
You can use custom themes or modules to manage layout like parade but it is not that simple. Layout options are limited. For instance. The module does the job; you can build a simple landing page without custom development, but requires a lot of dependencies for a simple page and you may still have to do some css editing.
In this article we will explain how our landing page has been constructed within Drupal 8 website using separate dedicated theme and a custom module with twig templates.
The original page which is a stand alone 1 page theme is now fully integrated in the website.
It may not be the best method, but it can be easily replicated and give more room for creativity and extra flexibility compared to a layout module or a full land page theming construction.
Part 1: the custom theme
To achieve that, we created a custom theme with only 1 region for content. When building a 1 page theme, you usually do not want side columns or extra headers and footers.
To create your theme, you only need 1 file to be saved under your custom theme folder in the Drupal 8 "themes" folder: myTheme.info.yml.
type: theme
base theme: false name: 'EK'
description: 'Built to use land page'
version: VERSION
core: '8.x' regions:
  content: Content
  footer: Footer
This is what is needed to create the basic theme that will be used in our landing page. We keep a region "footer" to insert hidden blocks or content.
This theme will be called on specific routes names and will replace the default theme of the site.
You can add a screenshot image also in the theme folder if you want to enhance your admin view.
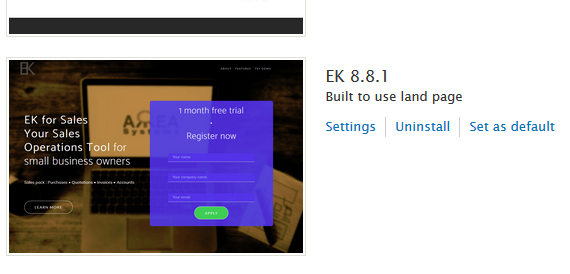
In the next step we will explain how our custom module switch theme for dedicated url and build the landing page with twig template. For that step you will need some knowledge on creating a simple module, insert libraries and make a twig template.
Do you want to serve personalized experiences to your users? Are you managing a large amount of data, served from disparate systems? Is your IT team unable to support you with fast changes to your marketing platform? Are you worried about data ethics and how your technology is geared to ensure standardization? Are you looking to quickly prototype your marketing platform and test it out for your specific use case? Drupal 9 is here to solve many of your content problems of the 20s.
Drupal 9 is scheduled to be released on June 3rd 2020. Drupal’s next major release coming with features aligned towards a future-proof offering. Here are 9 things to watch out for in Drupal 9.

1. User Experiences for First time Users
You never get a second chance to make a first impression. First-time users, beginners, evaluator experience with Drupal is this context would facilitate overall increased adoption of Drupal.
In Drupal 9 there is going to be an improved User experience for First-time users. Some of the specific features in the road map include installation profiles for common use cases, separation of journeys by roles and an upgraded ‘Try Drupal’ experience which helps users familiarize themselves with the platform. Installation profiles means a ready to use bundle of Drupal that solves for specific use cases like profile for conferences, profile for a government project, profile for setting up a multilingual project, etc. This will make it easier for the first time user to not only try Drupal, but try Drupal in a context that is relevant to them. Separation of journeys by roles is a concept where what the user can experience based on his/her role is different. Today this is limited to an anonymous user and an admin role. ‘Try Drupal’ is a quick, free build out of Drupal in the cloud by popular Drupal cloud hosting providers.
2. Decouple CMS Capabilities
Tomorrow’s content can flow to the Digital screens in conferences, the kiosks and other marketing channels from a central content repository. Decoupled/Headless CMS capabilities are a prerequisite for this “cross-platform publishing”.
Drupal 9 brings enhanced Decoupled CMS capabilities. Some of the key enhancements in this area include auto-generated API documentation, JSON API explorer to quickly generate APIs and optimized performance. The JSON API explorer is an interactive web application that makes building JSON queries simple. The performance optimizations are much-needed in the context of the large scale applications that are powered by a Decoupled CMS design.

2. Native DAM
Enterprises have a large volume of content. Digital Asset Management (DAM) brings this content to a central location, making this content accessible and contextually available to serve the end-user the content they need. This is important for the marketers whose objective is to engage with their users/customers. AI and analytics of content are tightly coupled with DAMs.
Drupal 9 roadmap includes building out a DAM solution.

3. Integration Framework
Today’s Marketing solutions are a mash up of different tools, cloud services and content publishing channels that provide specialized capabilities. Some of these interactions include social integrations, integrations with bots, integrations with CRM solutions, Marketing automation solutions and such.
Drupal 9 continues to act as an Integration framework. Based on the popular needs this layer is normally plugged in by the Contributed modules. To ensure you have access to these modules, it is important you stay up to date.

4. Improvement to Editor Tools
Editors are one of the main stakeholders who use Drupal. They are constantly using Drupal to churn out fresh content to the world wide web. Drupal has consistently prioritized improvements to the Content Editor tools.
These tools enable marketers and content teams to work independent of technology teams and enable publishing content with faster time-to-market.
Admin UI Claro theme brings a modern look improving the visual appeal, focused on accessibility and mobile compatibility in Drupal 9.
Rich media content like images, videos, tweets are an integral part of today’s digital content. Managing these Rich media content in a centralized repository delivering them to the various devices, channels or various experiences further enhances the speed with which the editors can publish.
Drupal 9 brings with it the Media module as part of core. Media will assist in organizing the multi-media assets in a manner that renders easy reusability. These are augmented by the existing capabilities to manage responsible images, integrations with streaming services or external video hosting services.

5. Structured Data
Structured data is simply data that is organized based on specific data models. The information around a particular content is captured, stored and displayed based on the meaning the particular piece of data provides to the content as a whole. Also Structured data helps to build relationships.
As we move into an era of personalization and individualized experiences with a forecast of increased data in the coming years, structured data becomes extremely important. Structured data is also important in the context of Search Engine Optimization.
Some new features in consideration in Drupal 9 include support for GraphQL that allows to manage large amounts of structured data.

6. Open Web Standards
“Open Web Standards” define a set of best practices to follow while publishing on the World Wide Web. With increase in data privacy challenges, capabilities of certain organizations/browsers to take control of user data there has been an increased focus on “Open Web Standards” that help to preserve the “Open Web”.
Aspects of “Open Web standard” that will remain a priority in Drupal 9 include GDPR, Accessibility, Privacy, Fast by default, Webmentions and Semantic.
GDPR stands for General Data Protection Regulation. It's the core of Europe's digital privacy legislation. Accessibility is something Drupal has been. Web accessibility means ensuring Drupal is designed and developed so that people with disabilities can use them. Drupal has been adhering to WCAG Accessibility guidelines since Drupal 8. Webmention is a (now) standardized protocol that enables one website address (URL) to notify another website address that the former contains a reference to the latter.
7. Simple Upgrade Process
Ease of software maintenance, lowers the cost maintenance for the end user.
Maintenance of Drupal is easier with a simple upgrade process in Drupal 9. Tightly integrated Composer initiative facilitates updates of 3rd party tools will continue to remain a key focus area in Drupal 9. Further in the roadmap is Automatic upgrades which further enhance this process.

8.Community-Centric Approach
Drupal, with its strong community-centric approach, is poised to deliver cutting edge, innovative tools for Marketers, Content editors, Site builders and all its different stakeholders.

9. Managing Application Changes
Agile development is the norm of the day. Customers want to be in a mode where product is developed iteratively, quickly testing their ideas. Key to this is a technical process that ensures tools that facilitate deploying changes to applications easily.
Continued emphasis to support automated deployment using Devops tools like Jenkins or Kubernetes and improved configuration management systems make this possible.
What’s unique to the Drupal 9 release is that the upgrade process is really simple. Just need 4 steps to upgrade your Drupal 8 site. Even if you are still in Drupal 7, there is no need to fret as there is an upgrade path directly to 9 as well. Many of the most complex sites go beyond just the Drupal core and today well ahead of the Drupal 9 launch we also have close to 1500 contrib modules fully compatible and 3400+ other modules that are near completion.
Are you evaluating migrating to Drupal 9? Write to us to get a Free Audit & Approach note for your site.
Related resources:
Context
EK application has a module that store personal documents for user. When user account is deleted, those documents may be transferred to another account.
To achieve that, we need to alter the user account cancel form when building the form, validating and submitting it.
Let's review the 3 steps.
BUILD
The form before altering it looks like this
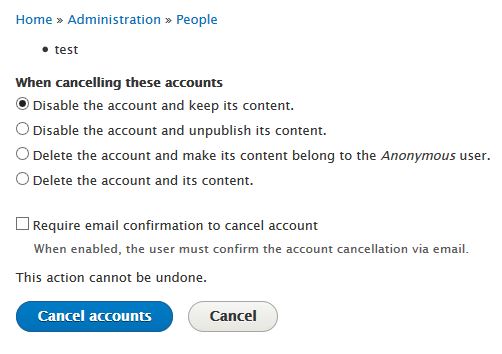
We need to add a field to select another user account to which the document of the canceled account will be moved to.
To achieve that we Implements hook_form_alter() in MyModule.module:
function MyModule_form_alter(&$form, \Drupal\Core\Form\FormStateInterface $form_state, $form_id) {
  if ($form_id == 'user_multiple_cancel_confirm') {
        $form['move_uid_documents'] = [
      '#type' => 'textfield',
      '#title' => t('Move uer documents'),
      '#autocomplete_route_name' => 'MyModule.user_autocomplete',
      '#description' => t('Select to whom to transfer personal documents'),
    ];
    $form['#validate'][] = 'MyModule_form_user_delete_validate';
    $form['#submit'][] = 'MyModule_form_user_delete_submit';

    return $form;

  }
}
What we can notice here is:
- We alter selected form defined by form ID. In this case : "user_multiple_cancel_confirm";
- We create the required field by returning $form['move_uid_documents'] ;
- We add 2 new actions for validation, $form['#validate'][], and submit, $form['#submit'][], for the next steps.
After altering the form will look like this:
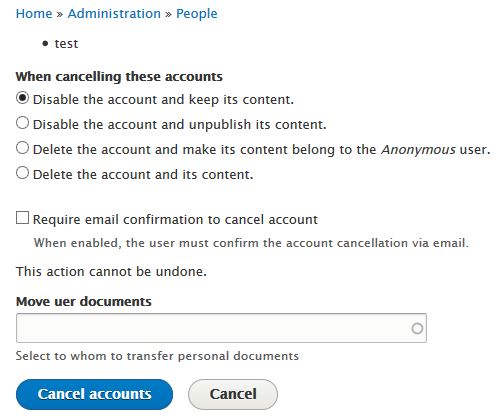
We have a new field to select user. In our case, we also have an autocomplete function that helps selecting existing user. However, we need to ensure that the value entered in the field is really an existing user. This is the part handled by the validation.
VALIDATE
The validation is defined in MyModule_form_alter by adding validate callback named MyModule_form_user_delete_validate. Therefore, we need to create the function with thah particular name in MyModule.module.
function MyModule_form_user_delete_validate(&$form, \Drupal\Core\Form\FormStateInterface $form_state) {
  if ($form['#form_id'] == 'user_multiple_cancel_confirm') {
        if ($form_state->getValue('move_uid_documents') <> '') {

            $query = "SELECT uid FROM {users_field_data} WHERE name = :n";
            $data = db_query($query, [':n' => $form_state->getValue('move_uid_documents')])
                    ->fetchField();
            if ($data) {
                $form_state->setValue('move_uid_documents', $data);
            } else {
                $form_state->setErrorByName('move_uid_documents', t('Unknown user to move documents'));
            }


        }

     return $form;

  }
Here the function will check against user_field_data table that the id is valid.
If not an error message will be displayed:
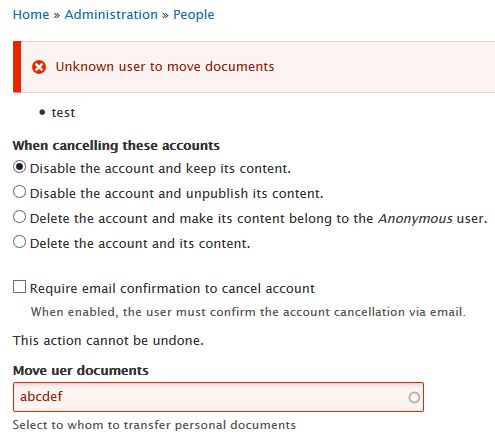
However, if valid, we store the value to be used in the next step which is the submission.
SUBMISSION
As for validation, the submission is defined in MyModule_form_alter by adding validate callback named MyModule_form_user_delete_submit.
function MyModule_form_user_delete_submit(&$form, \Drupal\Core\Form\FormStateInterface $form_state) {

  if ($form['#form_id'] == 'user_multiple_cancel_confirm') {
    if($form_state->getValue('move_uid_documents')){
        foreach($form_state->getValue('accounts') as $key => $id) {
        \Drupal::database()->update('MyModule_table')
           ->fields(['uid' => $form_state->getValue('move_uid_documents'), 'folder' => t('Moved from user @u', ['@u' => $id])])
           ->condition('uid', $id)->execute();
       }
    }
     \Drupal::messenger()->addStatus(t('Documents moved to user @u', ['@u' => $form_state->getValue('move_uid_documents')]));
     return $form;

  }
}
In the function above, we pick the id of each user account that is canceled and change to new user id in the document table.
The function also display a message to confirm actions: both cancellation and the submit hook have been executed.
Please feel free to comment or suggest improvements.
Thank you.
Drupalcon is always special! Back from DrupalCon, left feeling happy, proud to be part of a caring Board, a passionate DA team and last but not least the wonderful Drupal community.
Drupal Board Retreat
Was in Dublin Friday evening 23rd September. Saturday and Sunday was the Board retreat at The Gibson hotel.
The Board meetings at the conferences are day-long sessions where the 12 Board members along with Megan the Executive Director of the Drupal association work together on a strategy for the Drupal Association. The 12-Member Board includes 1 Founder Member (Dries Buytaert), 9 Class Directors bringing various expertise and 2 At Large Directors elected by the community. We have a very interesting mix for our 9 Class Directors - Tiffany, Vessa and Jeff all run successfully large Drupal shops, Rob who earlier worked with NBC & now part of Acquia, Mike who works with Pfizer, Danese brings with her the best of Open Source Strategies from her various open source associations, Sameer from the education background - brings a good external perspective, Donna brings in her expertise from having organized large open source events, a great community person, Steve comes from a technical background, the COO of Docker project, involved or been a part of multiple open sources technologies - again brings a good external perspective and experience from similar communities. Addi & I are the community elected At Large Directors on the board.
To know more about us checkout https://assoc.drupal.org/node/1589
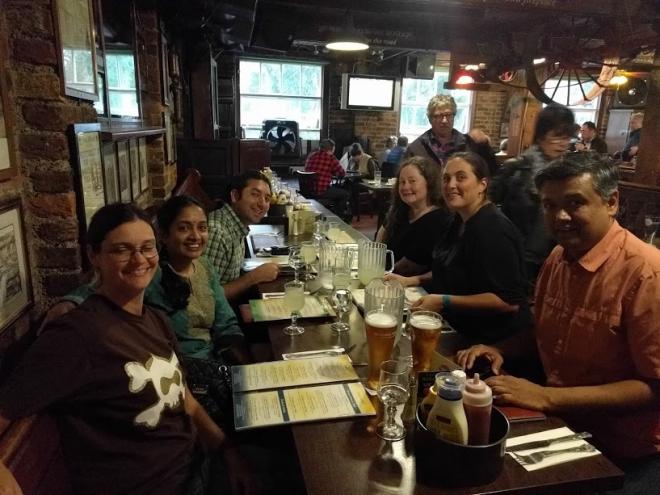

Drupal association is a non profit to support initiatives that in turn benefit the Drupal project and community. The Drupal association operates with the Mission that - Drupal powers the best of the Web. The Drupal Association unites a global open source community to build and promote Drupal. The key initiatives that Drupal association has been sustainably maintaining drupal.org and running Drupalcons. The Board worked with Megan in defining the strategic direction and the boundaries in which the association should operate to ensure Sustainability. The Board also actively involved in the implementation through Task Force that jointly represent the community, Board and the association.
Megan presented us the work of the Drupal association and this was followed by a strategic planning session that was facilitated by Adam. Adam plays the most important role to make sure we work towards structured outcomes that then provide direction to Megan and the Drupal Association staff. Key objective of the retreat being:
- Reach a shared understanding of issues and opportunities for the Drupal Association in 12 - 24 month duration.
- Pick the top three opportunities and strategic focus areas
- Discuss to provide guidance and help identify resources, Task Force to support the same
Day 1 had the Executive update and Financial update from Megan, followed by a session to Discuss and select Strategy Questions to address. Day 2 was spent on more elaborate discussions on the selected Strategic focus areas. Watch out for the Public board meetings at DrupalCons where the DA presents the work that they have done and the Board and DA jointly take questions from the Community. Below is the video of the Public boarding.
[embedded content]
My Next Steps
I am proud to represent the vibrant Drupal Community as a Board member. Besides being involved in the strategic planning want to spend my next few months speaking to more members of the community - Drupal developers, Core Developers, Drupal Community Champions, Shop owner and more. Do reach out to me for any clarifications or support. Best way to connect with me is by dropping a mail to [email protected]
Watch out for my next blog on the Board Staff Mixer!
Have you been to an event recently involving free software or a related topic? How did you find it? Are you organizing an event and don't want to fall into the trap of using Facebook or Meetup or other services that compete for a share of your community's attention?
Are you keen to find events in foreign destinations related to your interest areas to coincide with other travel intentions?
Have you been concerned when your GSoC or Outreachy interns lost a week of their project going through the bureaucracy to get a visa for your community's event? Would you like to make it easier for them to find the best events in the countries that welcome and respect visitors?
In many recent discussions about free software activism, people have struggled to break out of the illusion that social media is the way to cultivate new contacts. Wouldn't it be great to make more meaningful contacts by attending more a more diverse range of events rather than losing time on social media?
Making it happen
There are already a number of tools (for example, Drupal plugins and Wordpress plugins) for promoting your events on the web and in iCalendar format. There are also a number of sites like Agenda du Libre and GriCal who aggregate events from multiple communities where people can browse them.
How can we take these concepts further and make a convenient, compelling and global solution?
Can we harvest event data from a wide range of sources and compile it into a large database using something like PostgreSQL or a NoSQL solution or even a distributed solution like OpenDHT?
Can we use big data techniques to mine these datasources and help match people to events without compromising on privacy?
Why not build an automated iCalendar "to-do" list of deadlines for events you want to be reminded about, so you never miss the deadlines for travel sponsorship or submitting a talk proposal?
I've started documenting an architecture for this on the Debian wiki and proposed it as an Outreachy project. It will also be offered as part of GSoC in 2018.
Ways to get involved
If you would like to help this project, please consider introducing yourself on the debian-outreach mailing list and helping to mentor or refer interns for the project. You can also help contribute ideas for the specification through the mailing list or wiki.
Mini DebConf Prishtina 2017
This weekend I've been at the MiniDebConf in Prishtina, Kosovo. It has been hosted by the amazing Prishtina hackerspace community.
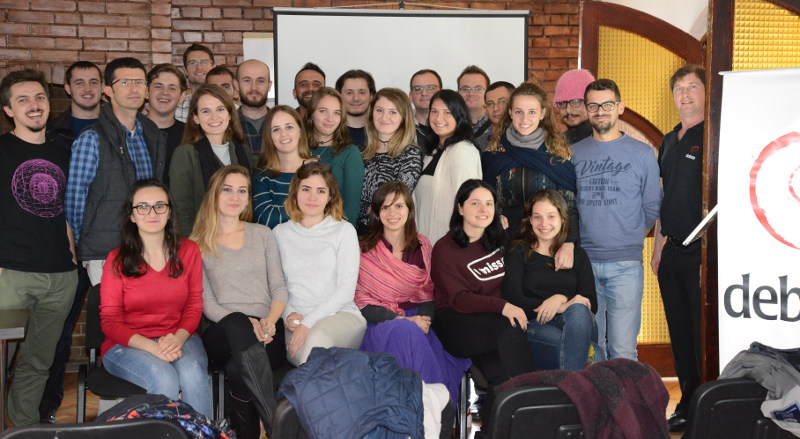
Watch out for future events in Prishtina, the pizzas are huge, but that didn't stop them disappearing before we finished the photos:

You can now easily test your Drupal projects on AppVeyor. Currently, AppVeyor is the major player in CI regarding Windows Servers. On other CI systems (Travis, Bitbucket pipelines) you are limited to Docker containers for the *nix platform. (This will soon change as some CI will throw Windows containers into the mix).
Until then, the only tool to CI your Drupal (or any PHP project) on a Windows based environment using IIS is AppVeyor.
Language EnglishMore articles...
- How to use NetPhp
- Decent PDF generation in Drupal
- Distinct options in a views exposed filter: The Views Selective Filters Module
- Hiding the fact that your site runs Drupal
- Couchbase 4.5 released: now x6 faster than MongoDB
- Drupal: Add new operators to views filters (such as contained in CSV) or how to override default view's handlers
- Cheap Pipe (sort of BigPipe) in Drupal 7
- When PHP crashes: how to collect meaningful information and what to do with it
- Database Transactions in Drupal
- Using LINQ (Language Integrated Queries) in Drupal or how to write queries x5 faster
In this post I will share a quick tip on how to upgrade the jquery.once plugin in Drupal 7 without breaking current code.
Drupal 7 ships with jquery.once plugin version 1.2 that dates from 2013. For a project we needed to make code targeting the old 1.x and the 2.x work at the same time. In our case this was core javascript written for 1.x working with some code of ours designed for jquery.once 2.x.
The solution is easy: upgrade the core jquery.once to 2.x and add a polyfill to make it backwards compatible.
Language EnglishMore articles...
- Using Heatmaps to boost conversions: Heatmap.me Drupal integration
- Drupal 8 Performance: Moving the service container cache away from the database
- Drupal Session Handler: everything you need to know
- Deploying Drupal Like a Pro
- Powerpoint presentation to images in PHP: a Drupal example
- Drupal on IIS or Apache
- Database Transactions in Drupal
- Git shell on Windows reports “sh.exe has stopped working (APPCRASH)”
- Benchmarking Drupal 7 on PHP 7-dev
- PHP 7 nightlies for Windows
Being able to analyze and monitor - with ease - the performance of your application is a key part to the success of any web based project. Not only because a slow site might negatively affect conversions, but as Drupal 8 is shifting away from websites and more into complex web based applications, specific business transactions are becoming more important. Considering Drupal's historical poor performance when it comes to "backend" operations, having proper profiling tools is a must.
Language EnglishMore articles...
- NetPhp User Guide
- Running Drupal 8 on PHP 7
- How to use NetPhp
- Powerpoint presentation to images in PHP: a Drupal example
- Deploying changing module dependencies with Drupal
- Profiling Drupal: XHprof, Uprofiler, Tideways with PHP7 on Linux and Windows
- PDF Generation in PHP
- PHP 7 nightlies for Windows
- ChainedFastBackend in Drupal 7
- PHP COM class: consuming .Net from PHP
Last week the Couchbase team released the new 4.5 version of Couchbase Server.
You can see all the new introduced features here:
http://www.couchbase.com/binaries/content/assets/us/product/couchbase-se...
Language EnglishMore articles...
- Hiding the fact that your site runs Drupal
- Benchmarking Drupal 7 on PHP 7-dev
- Fixing slow queries and database deadlocks in Drupal without PHP profiling tools
- Drupal 8 performance: the Supercache module
- Best Drupal Hosting - Choosing the right one
- ChainedFastBackend in Drupal 7
- Decent PDF generation in Drupal
- How to use NetPhp
- Drupal 8 Performance: Moving the service container cache away from the database
- Deploying Drupal Like a Pro - Part 1: File Structure
This year a significant number of students are working on RTC-related projects as part of Google Summer of Code, under the umbrella of the Debian Project. You may have already encountered some of them blogging on Planet or participating in mailing lists and IRC.
WebRTC plugins for popular CMS and web frameworks
There are already a range of pseudo-WebRTC plugins available for CMS and blogging platforms like WordPress, unfortunately, many of them are either not releasing all their source code, locking users into their own servers or requiring the users to download potentially untrustworthy browser plugins (also without any source code) to use them.
Mesut is making plugins for genuinely free WebRTC with open standards like SIP. He has recently created the WPCall plugin for WordPress, based on the highly successful DruCall plugin for WebRTC in Drupal.
Keerthana has started creating a similar plugin for MediaWiki.
What is great about these plugins is that they don't require any browser plugins and they work with any server-side SIP infrastructure that you choose. Whether you are routing calls into a call center or simply using them on a personal blog, they are quick and convenient to install. Hopefully they will be made available as packages, like the DruCall packages for Debian and Ubuntu, enabling even faster installation with all dependencies.
Would you like to try running these plugins yourself and provide feedback to the students? Would you like to help deploy them for online communities using Drupal, WordPress or MediaWiki to power their web sites? Please come and discuss them with us in the Free-RTC mailing list.
You can read more about how to run your own SIP proxy for WebRTC in the RTC Quick Start Guide.
Finding all the phone numbers and ham radio callsigns in old emails
Do you have phone numbers and other contact details such as ham radio callsigns in old emails? Would you like a quick way to data-mine your inbox to find them and help migrate them to your address book?
Jaminy is working on Python scripts to do just that. Her project takes some inspiration from the Telify plugin for Firefox, which detects phone numbers in web pages and converts them to hyperlinks for click-to-dial. The popular libphonenumber from Google, used to format numbers on Android phones, is being used to help normalize any numbers found. If you would like to test the code against your own mailbox and address book, please make contact in the #debian-data channel on IRC.
A truly peer-to-peer alternative to SIP, XMPP and WebRTC
The team at Savoir Faire Linux has been busy building the Ring softphone, a truly peer-to-peer solution based on the OpenDHT distribution hash table technology.
Several students (Simon, Olivier, Nicolas and Alok) are actively collaborating on this project, some of them have been fortunate enough to participate at SFL's offices in Montreal, Canada. These GSoC projects have also provided a great opportunity to raise Debian's profile in Montreal ahead of DebConf17 next year.
Linux Desktop Telepathy framework and reSIProcate
Another group of students, Mateus, Udit and Balram have been busy working on C++ projects involving the Telepathy framework and the reSIProcate SIP stack. Telepathy is the framework behind popular softphones such as GNOME Empathy that are installed by default on the GNU/Linux desktop.
I previously wrote about starting a new SIP-based connection manager for Telepathy based on reSIProcate. Using reSIProcate means more comprehensive support for all the features of SIP, better NAT traversal, IPv6 support, NAPTR support and TLS support. The combined impact of all these features is much greater connectivity and much greater convenience.
The students are extending that work, completing the buddy list functionality, improving error handling and looking at interaction with XMPP.
Streamlining provisioning of SIP accounts
Currently there is some manual effort for each user to take the SIP account settings from their Internet Telephony Service Provider (ITSP) and transpose these into the account settings required by their softphone.
Pranav has been working to close that gap, creating a JAR that can be embedded in Java softphones such as Jitsi, Lumicall and CSipSimple to automate as much of the provisioning process as possible. ITSPs are encouraged to test this client against their services and will be able to add details specific to their service through Github pull requests.
The project also hopes to provide streamlined provisioning mechanisms for privately operated SIP PBXes, such as the Asterisk and FreeSWITCH servers used in small businesses.
Improving SIP support in Apache Camel and the Jitsi softphone
Apache Camel's SIP component and the widely known Jitsi softphone both use the JAIN SIP library for Java.
Nik has been looking at issues faced by SIP users in both projects, adding support for the MESSAGE method in camel-sip and looking at why users sometimes see multiple password prompts for SIP accounts in Jitsi.
If you are trying either of these projects, you are very welcome to come and discuss them on the mailing lists, Camel users and Jitsi users.
GSoC students at DebConf16 and DebConf17 and other events
Many of us have been lucky to meet GSoC students attending DebConf, FOSDEM and other events in the past. From this year, Google now expects the students to complete GSoC before they become eligible for any travel assistance. Some of the students will still be at DebConf16 next month, assisted by the regular travel budget and the diversity funding initiative. Nik and Mesut were already able to travel to Vienna for the recent MiniDebConf / LinuxWochen.at
As mentioned earlier, several of the students and the mentors at Savoir Faire Linux are based in Montreal, Canada, the destination for DebConf17 next year and it is great to see the momentum already building for an event that promises to be very big.
Explore the world of Free Real-Time Communications (RTC)
If you are interesting in knowing more about the Free RTC topic, you may find the following resources helpful:
RTC mentoring team 2016
We have been very fortunate to build a large team of mentors around the RTC-themed projects for 2016. Many of them are first time GSoC mentors and/or new to the Debian community. Some have successfully completed GSoC as students in the past. Each of them brings unique experience and leadership in their domain.
Helping GSoC projects in 2016 and beyond
Not everybody wants to commit to being a dedicated mentor for a GSoC student. In fact, there are many ways to help without being a mentor and many benefits of doing so.
Simply looking out for potential applicants for future rounds of GSoC and referring them to the debian-outreach mailing list or an existing mentor helps ensure we can identify talented students early and design projects around their capabilities and interests.
Testing the projects on an ad-hoc basis, greeting the students at DebConf and reading over the student wikis to find out where they are and introduce them to other developers in their area are all possible ways to help the projects succeed and foster long term engagement.
Google gives Debian a USD $500 grant for each student who completes a project successfully this year. If all 2016 students pass, that is over $10,000 to support Debian's mission.
Pages
About Drupal Sun
Drupal Sun is an Evolving Web project. It allows you to:
- Do full-text search on all the articles in Drupal Planet (thanks to Apache Solr)
- Facet based on tags, author, or feed
- Flip through articles quickly (with j/k or arrow keys) to find what you're interested in
- View the entire article text inline, or in the context of the site where it was created
See the blog post at Evolving Web