
Upgrade Your Drupal Skills
We trained 1,000+ Drupal Developers over the last decade.
See Advanced Courses NAH, I know EnoughHow to Set Up Drupal Authentication Using OAuth2 and OpenID Connect
In the era of increasingly distributed architecture of applications and web portals, there is a need to provide flexible methods of authentication while maintaining convenience for the user. From this article, you will learn how to easily create an authentication server and client application in Drupal using OAuth2 and OpenID Connect.
Distributed systems, their scaling and maintenance is a problem for many clients who come to our company to take advantage of the Drupal consulting services. Very often, there is a need to implement a central login system for all platforms belonging to a wider federation of websites. Large companies and organisations have separate portals – we have created image-building websites, intranet systems and Drupal Commerce services for them many times, taking into account various functions. The need to register a separate account and log in by users in every single place separately seems to be an archaic way of dealing with the problem. After all, who among us does not make it easier for themselves to register on websites on a daily basis – for example by employing quick registration methods using an account on a social network or a Google profile?
Why not do the same, especially since – as it will turn out in a moment – using Drupal for this is very easy.
OAuth2 and OpenID Connect
In order to shed some light on the whole problem, one should, first of all, focus on the commonly used standards in web applications that are used in the authentication process.
The first is OAuth2, an open standard for authorisation that does not require sharing authenticators between applications. Access to resources (if it has been granted) is being verified on the basis of a token issued to client applications by the authorisation server.
As OAuth2 was designed with authorisation in mind, that is – with granting specific access to given resources; it is not really directly intended for a standard user authentication (logging-in) process. For this purpose, it was decided to propose an additional (authentication) layer to the OAuth2 protocol, which standardises this exact process in it. This technology is called OpenID Connect and – apart from the logging-in process – it also unifies the method of exchanging user profile data between applications. We will, therefore, take a look at how to employ both technologies in practice.
Installation of the modules
If you want to set up both the OAuth2-based authentication server and the client applications based on OpenID Connect, in Drupal, you can basically use ready-made solutions. In the case of a server, you have several appropriate modules, including the most popular one (simple_oauth). In our example, we will use the OAuth2 Server module. It is slightly less popular and has not yet been released as a stable version for Drupal 8 and 9, but it is supported by significant companies and organisations related to Drupal.
Additionally, the second client application module, OpenID Connect, is a project being maintained and developed by exactly the same organisations and development team. You can, therefore, be sure that both projects will be developed simultaneously and that no problems with their compatibility will arise at a later time.
The modules' installation is standard. First, you need to download and install the modules on our server:
composer require drupal/oauth2_serverdrush en oauth2_server -y && drush crThen, in a similar way – for the client:
composer require drupal/openid_connectdrush en openid_connect -y && drush crThe main dependency needed to install the server is the oauth2-server-php library which provides the basic mechanisms to fulfil this role. If you are using Composer in PHP, all dependencies are already terminated automatically for you.
Server setup
The setup of the OAuth2 Server module is mostly based on entities. Therefore, among the things it provides are the entity of the server, client, token, etc. Our setup must begin with defining the server. So, we go to the setup page /admin/structure/oauth2-servers.
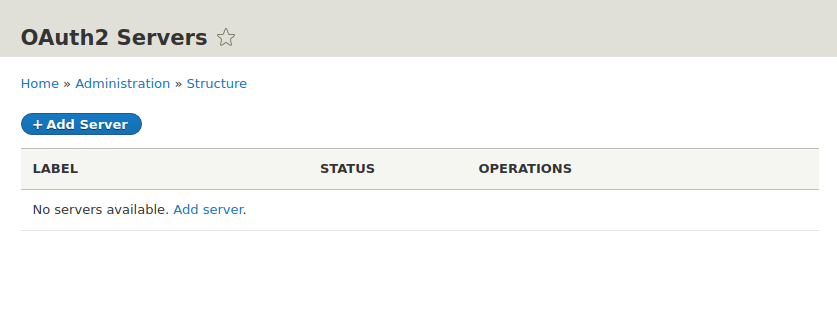
And add a new server (Add Server). In the next step, we see the server entity form:
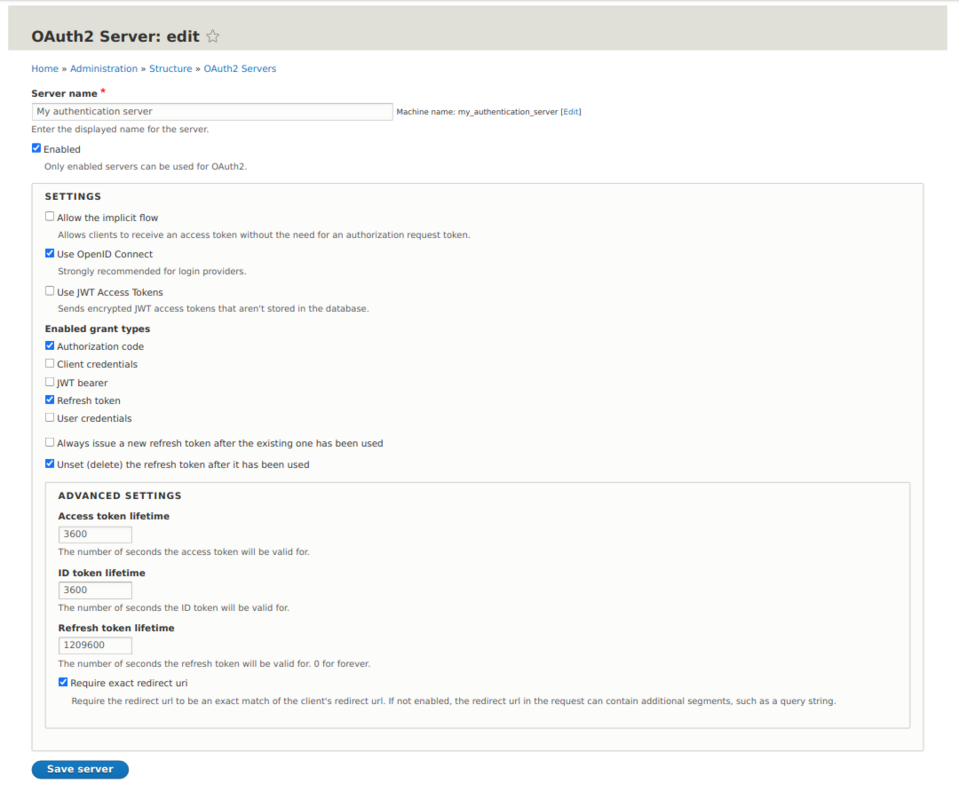
In the simplest configuration variant, we leave all the values selected by default and filled out. In addition, we check the "Use OpenID Connect" option as the default layer used in the logging-in process.
As you can see from the settings, the authentication and authorisation process takes place without the use of the authentication data sent by the client, but on the basis of an authorisation code – exchanged then for the access token and the refresh token, which are exchanged during the communication between the applications. The technical details of the OAuth2 protocol go beyond the scope of this article, so if you want to know more about how the individual options and the protocol itself work, you can do so using the official documentation.
In the next step, we should define the clients that can connect to our server. We must, however, have at least one client application in order to do this.
Client setup
OpenID Connect is a very user-friendly module also in terms of setup. To configure the clients you want to use, go to /admin/config/services/openid-connect.
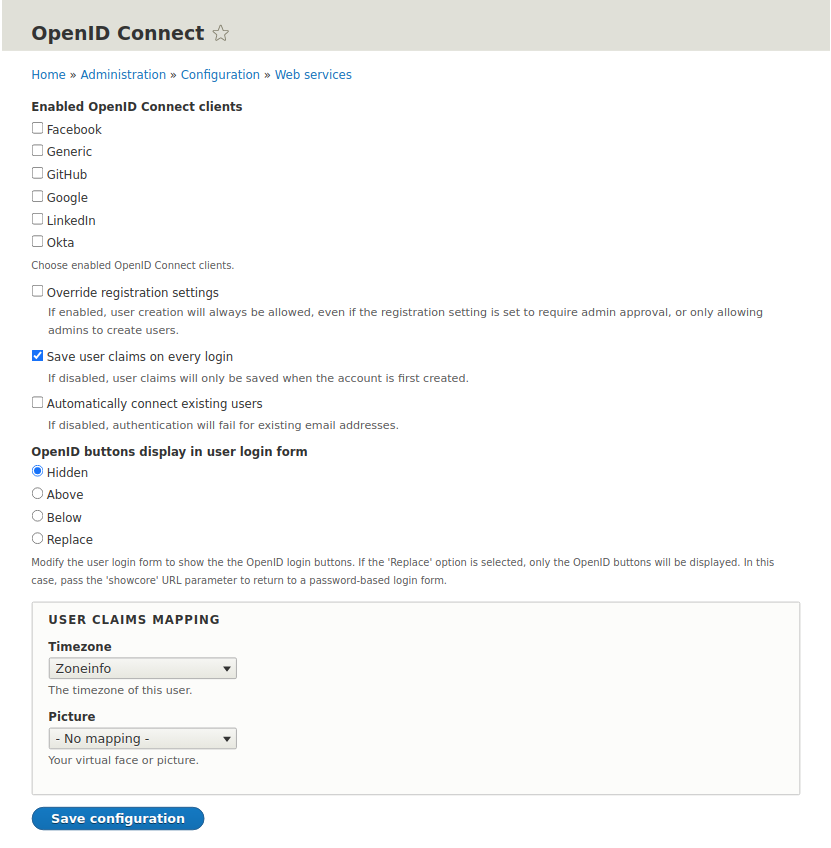
As you can see, there is a list of clients in the form. The module, therefore, allows you to easily login using, e.g., well-known social networks. Each type of client is defined as a separate plugin (OpenIDConnectClient), which makes it easy to extend the project with completely new clients. Our example, however, is about connecting to our own server, so we will use the client for generic uses (Generic).
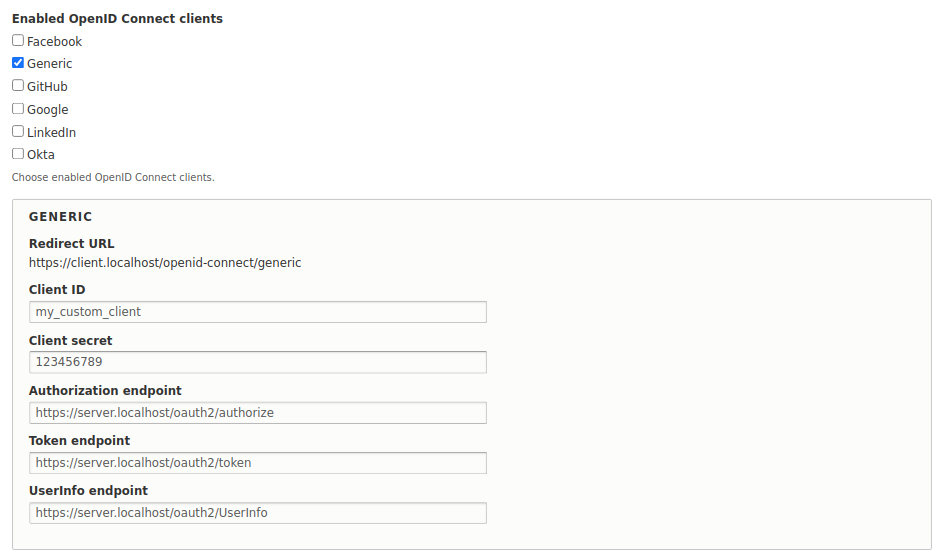
The configuration is quite simple because it consists of defining the client's name and the so-called secret key, as well as providing the server addresses:
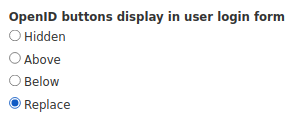
While we are at it, we will add a small improvement, namely – replace the logging-in form with a login button using our authorisation server. It is very simple and accessible from the setup form:
Great! The client looks ready to use. The only drawback is the lack of a convenient option of changing the name from "Generic" at the moment without a bit of coding, but the result still looks great for such a quick setup:
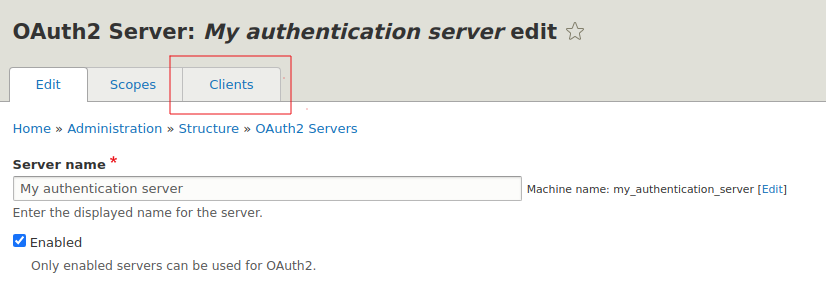
Server setup part two
We have a pre-configured server, as well as a ready client. So, let us define our client in the server setup so that it knows it can connect to it and request access to its resources. Drupal is a very secure CMS compared to the competition, but the security is also based on its correct setup.
Always remember that it is up to you to verify and configure what client applications should be able to connect to the server and use its resources.
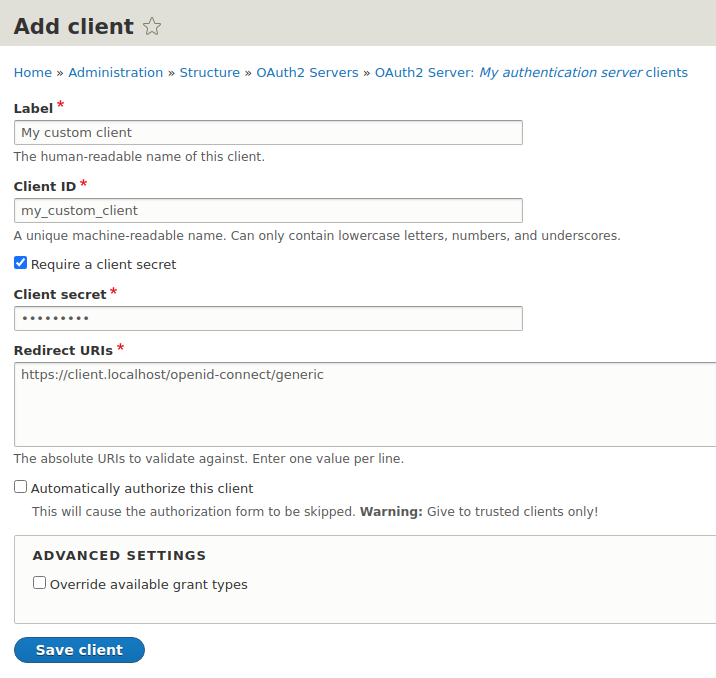
In order to add new clients, go to the Clients tab, and then click the button for adding new clients.
You should see a form, the data of which should be filled out in the same way as what you set up in the OpenID Connect module in the client application.
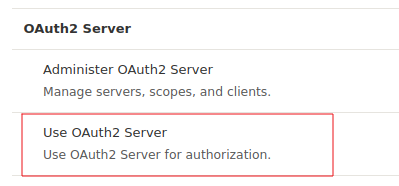
We save the form, and it is ready... almost. You still have to grant the appropriate permission, so that it would be possible to use the OAuth2 server at all. In order to do this, go to the /admin/people/permissions page and assign the Use OAuth2 Server permission for the anonymous user.
Test
All is set. So, let us check the actual logging-in scenario. First, we will register the test user on our server so that they can log in into our other applications.

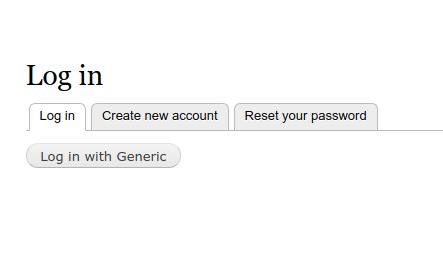
Go to the client's application (login form) and click the Log in with Generic button (form screenshot).
You are redirected to the server login page on the server along with the destination parameter destination
(/user/login?Destination=/oauth2/authorise).
After correctly entering the login and the password (test:test), you should see this additional step ...

...in which you decide as a logging-in user whether you actually want to authorise our client page to your user data from the server, on the basis of which a local user account will be created.
After approving it, you are redirected to the client application page as a logged-in user:
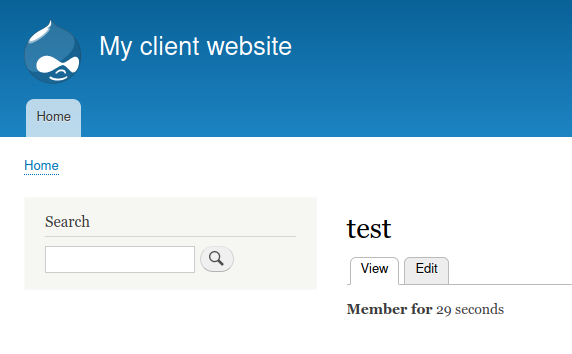
Success! We can now fully enjoy our central login system.
Summary
The possibility of creating a central login system is a more and more frequently occurring need among the clients who have various types of distributed services, sites, and applications. By choosing Drupal, you can focus on implementing specific business rules, instead of reinventing the wheel. Using the ready-made solutions, such as OAuth2 Server or OpenIDConnect, supported by well-known organisations, gives you the certainty that you will easily implement the mechanism you need – even without the need for detailed knowledge of the protocols used in them.
In our Drupal agency, we always use the already available solutions which we often extend, and we adapt Drupal modules to the specific business model. I hope that the above article and the modules used will also prove useful in your project.
About Drupal Sun
Drupal Sun is an Evolving Web project. It allows you to:
- Do full-text search on all the articles in Drupal Planet (thanks to Apache Solr)
- Facet based on tags, author, or feed
- Flip through articles quickly (with j/k or arrow keys) to find what you're interested in
- View the entire article text inline, or in the context of the site where it was created
See the blog post at Evolving Web