
Upgrade Your Drupal Skills
We trained 1,000+ Drupal Developers over the last decade.
See Advanced Courses NAH, I know EnoughMany of the enterprise-grade Drupal sites we build at Bounteous rely on lots of data—much of which is often managed and stored in a third-party provider’s system. While conventional APIs—like those that rely on RESTful services—are common sources for pulling external data into a website, you may encounter some third-party providers who dispatch updates via webhooks. Here's how to work with those notifications in Drupal.
While Drupal 8/9 core provides all of the necessary tools for receiving and processing webhook notifications, the lack of an established API, dedicated plugins, or generic contrib modules can make building a custom solution a bit daunting. In this blog post, we’ll walk through a complete top to bottom implementation that’s able to create, update, and delete (CRUD) entities whenever webhook notifications are received.
Note: To try out our example code, you can skip over the lengthier explanations and simply follow the instructions in the blue boxes. You’ll want to begin by downloading the sample Drupal module we’ve assembled from the Bounteous GitHub account. Clone that repository to your Custom modules folder and enable it to follow along with our example.What Are Webhooks, Anyway?
If you’ve worked with APIs in the past, you’re probably familiar with the general process: make a request to a third-party service to ask for some data and it responds to let you know what—if anything—is new.
In Drupal, we most commonly rely on a cron task to make periodic requests, tailoring the frequency of those calls to the timeliness of the data that’s being retrieved, the ebb and flow of traffic to the site, or both. Think of that process as being akin to calling a friend every evening to find out what’s happened over the past 24 hours. Some days will be slow and they won’t have any updates to share, while others are full of news; either way, you get a complete rundown of their day in one fell swoop.
Webhook notifications are more like that friend who texts throughout the day whenever something happens. While the frequency, urgency, and length of their messages may vary, you always receive their updates on a rolling basis—and only when there’s something that (they feel) you need to know. Webhooks provide a similarly timely heads-up whenever data is modified in an external system, saving you that daily (API) call.
Use Cases for Webhooks
All that’s required in Drupal 8/9 is core—there are no contrib modules required! But, there are a few additional prerequisites to cover before we get started.
A Data Provider That Dispatches Webhook Notifications
This piece of the puzzle will be specific to your particular use case. Learning that your third-party service is capable of delivering webhook notifications likely led you to this post; if you’d like to work with that provider’s actual data, you’ll need to review their API documentation and adapt the code in our example module to accommodate the specific data structure in their notifications.
In order to bootstrap a working example, we’ll be using the Postman app to post webhook notifications to our Drupal site in this tutorial. Whether you plan to follow along with our example or do local development against actual data you’ll want to download and install Postman on the computer you typically use to write code.Sample (or Actual) Notification Data
In order to develop a custom solution that can act on a provider’s data, you’ll need at a minimum a sample notification that represents what will ultimately be posted to your Drupal site. Example data is useful for any project since it—in combination with Postman—allows you to trigger notifications without logging into your provider’s system and/or modifying any actual data.
Fire up the Postman app on your computer, then follow their guide on importing Postman data to pull in the sample collection (Webhook Entities.postman_collection.json) found in the root directory your downloaded copy of our example module.If you’re already up and running with a particular provider and would like to use their data but can’t find an example in their documentation, several online tools may provide some help. One, webhook.site, is a particularly indispensable resource. Simply pull up that site and copy the temporary URL it generates, then log into your provider’s system and paste the temporary address into their webhook notification field. At that point, any valid events in the provider’s system should result in a notification being sent to the temporary webhook.site URL you’d copied—and that will allow you to see all of the data received from each new notification that’s generated.
A (Publicly) Accessible Drupal Site
Longer-term, your site will ultimately need to be publicly accessible via the Internet in order to actually listen for any real notifications. While that’s a given for hosted environments (and you can skip the rest of this section if that’s you), most development with modern tools (Acquia Dev Desktop, a Docker container running the Lando D8 recipe, or Drupal VM, etc.) is done locally—and therefore effectively offline. While offering solutions for all possible approaches to local development is beyond the scope of this post, two common approaches have proven to be the most reliable and quickest to get up and running for us at Bounteous:
Exposing a Local Environment on the Internet via ngrok
ngrok is a tool that allows you to create a secure tunnel to a locally hosted site so that it’s accessible via the web. If your local development workflow requires working with actual notifications dispatched directly from your provider, then this tool might be the way to go.
Let Postman Stand in for Your Webhook Provider
If you can access your local or hosted dev environment from a browser on your computer, Postman can post sample notifications to it. We’ll be relying on this approach below since it’s much more tooling-agnostic and the Postman app is freely available for Windows, Mac, and Linux.
Universally Unique Identifiers
The last prerequisite is a Universally Unique Identifier (UUID) that will be used to permanently associate an individual data point in your third-party provider with a corresponding Drupal entity. This value will be distinct from Drupal’s internal entity IDs and is required in order to look up previously imported records whenever future updates are made. Consequently, every Drupal entity type that will be storing webhook data needs a custom field to store the identifier that accompanies each notification.
Log in to your site and navigate to /admin/structure/types, then Manage Fields for the Basic Page content type and add a new plain text field named Webhook UUID. Ensure the generated machine name is field_webhook_uuid) before saving.
While many providers automatically include a unique string that represents a record in their system, others may rely on a specific field. In the rare instance that your notifications don’t contain a dedicated UUID that’s present across all events, you may need to do some additional legwork to concatenate one or more static values into a usable identifier. Check your specific provider’s documentation or use webhook.site to examine notifications and determine which value(s) might be good candidates.
Building the Webhook Entities Module
The sample code you’ve already downloaded has all of the necessary components that are required in order to listen for, receive, and process webhook notifications. It was built to serve as a reusable springboard that can get your own project up and running quickly (in other words, feel free to use our code!). Here’s the overall file and folder structure:

We’ll briefly review the key components below.
The Listener Endpoint
All webhook dispatchers require an endpoint that can receive notifications, so the first step is to define a new route in Drupal.
webhook_entities.listener:
  path: '/webhook-entities/listener'
  defaults:
    _controller: '\Drupal\webhook_entities\Controller\WebhookEntitiesController::listener'
    _title: 'Webhook notification listener'
  requirements:
    _custom_access: '\Drupal\webhook_entities\Controller\WebhookEntitiesController::access'
You might have noticed that the last line in the code from our routing.yml file above looks a bit different—that’s because it enforces custom access checking on the listener endpoint.
Access Tokens
/src/Form/WebhookSettingsForm.php
Security is a critical consideration whenever data makes its way from any external source into Drupal; since webhooks fit that bill, our custom access check validates each incoming notification to ensure it was legitimately dispatched from the actual provider.
In order to facilitate that handshake, our custom module includes a simple form that allows you to specify a secret key that can be used to allow or deny access. The most common security mechanism implemented by webhooks is an Authorization header that’s included in each notification and corresponds to a secret value that only you and your provider know (like an API key).
Log in to your Drupal site and navigate to /admin/config/webhook_entities/settings. Enter the authorization key used by our sample Postman collection: 123456. Then save the form.
Authorizing Notifications
/src/Controller/WebhookEntitiesController.php
In this simple example, we retrieve the config value saved via the form and compare it to the notification header to validate that the notification is legitimate and should be captured in the Drupal database.
/**
   * Checks access for incoming webhook notifications.
   *
   * @return \Drupal\Core\Access\AccessResultInterface
   *   The access result.
   */
  public function access() {
    // Get the access token from the headers.
    $incoming_token = $this->request->headers->get('Authorization');

    // Retrieve the token value stored in config.
    $stored_token = \Drupal::config('webhook_entities.settings')->get('token');

    // Compare the stored token value to the token in each notification.
    // If they match, allow access to the route.
    return AccessResult::allowedIf($incoming_token === $stored_token);
  }
Be sure to check your specific provider’s documentation to confirm this is the correct authorization method, since some services implement more robust security measures. For example, one CDN that we worked with required combining a notification-specific signature with a timestamp, hashing that value, and then comparing it to another header value. Clearly they’re a bit more serious about not letting anyone spoof their notifications!
Updating the Notification URL
Now that we have a dedicated path that can be used to listen for incoming notifications, we’ll need to instruct our provider to direct your implementation of their webhook API to that URL.
Your mileage will vary here, since the actual method for accomplishing this varies from provider to provider—however, in most cases, it’s a simple change that can be accomplished by logging into the control panel associated with your account. To facilitate local development we’ll make this change in Postman.
With Postman running and our sample collection imported as described above, expand the collection folder named “Webhook Entities” to find three sample requests. One at a time, you’ll need to click on each one and update the POST value found at the top of the Params tab to point to your development environment.For example, if you access your local development site via your browser at http://mysite.local, you’ll need to update the POST URL in all three of the requests to http://mysite.local/webhook-entities/listener.
Additional Data Concerns
Before completely moving away from the topic of security, it’s worth discussing some additional measures that are often overlooked when processing notifications. While it’s probably unlikely that your provider will intentionally deliver malicious code, it’s possible that a bad actor could gain access to their system and inject something nasty or get ahold of your authorization token and spoof legitimate notifications.
In order to safeguard against those risks, we’ll follow two golden rules of working with someone else’s data:
- Only keep what you’re actually going to use;
- Sanitize everything before using it.
Since Drupal typically sees us capturing all user input as it’s entered and sanitizing on output (and Twig’s autoescaping facilitates that to a large extent), we’ll focus primarily on working with only a limited subset of incoming data in the queue worker (below). However, the extra-cautious among us might also consider the addition of a generic service capable of sanitizing individual data points in each webhook notification or escaping HTML entities on markup-rich fields like body text.
Handling Notifications as They Arrive
/src/Controller/WebhookEntitiesController.php
The controller referenced in our routing.yml file (above) primarily serves as a gatekeeper that receives incoming notifications, determines whether or not to act on them (via the authorize method), and then shuttles them along to their final destination.
/**
   * Listens for webhook notifications and queues them for processing.
   *
   * @return Symfony\Component\HttpFoundation\Response
   *   Webhook providers typically expect an HTTP 200 (OK) response.
   */
  public function listener() {
    // Prepare the response.
    $response = new Response();
    $response->setContent('Notification received');

    // Capture the contents of the notification (payload).
    $payload = $this->request->getContent();

    // Get the queue implementation.
    $queue = $this->queueFactory->get('webhook_entities_processor');

    // Add the $payload to the queue.
    $queue->createItem($payload);

    // Respond with the success message.
    return $response;
  }
For maximum efficiency, we’re not doing anything with the data as it rolls in—but instead handing everything off to Drupal’s queue API for actual processing.
Processing Notification Data
/src/Plugin/QueueWorker/WebhookEntitiesQueue.php
Relying on the queue to process notifications in batches helps prevent your site from becoming overloaded in the event that it’s inundated with an influx of webhook notifications (for example, a bulk update that’s triggered when you upload a CSV file to your third-party provider).
Our custom module tells Drupal to queue notification data for processing later alongside any number of other notifications that might have come before or after it; the queued notifications (or a portion thereof, depending on how full the queue is) are processed during each cron run.
While authorization has already occurred by the time a notification reaches the controller, we perform several additional verifications to ensure the data we’ve received is usable and speed up processing time. We start by checking to ensure the notification body actually contains data and isn’t empty, then further validate that it contains the necessary UUID identified during our preparatory steps above (for simplicity we assume the UUID is a simple value contained within the headers for each notification).
Assuming both of those checks pass, we then implement the previously mentioned security tactic of stripping out anything we won’t be using. This step has the added benefit of simplifying the data we’ll be working with later as well as potentially gaining some efficiency by not passing along unused values that might end up being processed unnecessarily.
Remember that all-important UUID you’d identified in your incoming notifications? Here’s where it finally comes into play. Since your third-party provider probably doesn’t know anything about Drupal (most webhook notifications are purposely written to be generic), we’ll need a way to cross-reference the incoming data with any entities that Drupal already knows.
Since two of our CRUD actions (updating and deleting) will require database queries to find existing nodes—and considering there’s a good chance some of your other custom code will also need to identify those entities—we’ve abstracted this functionality out into a service (/src/WebhookUuidLookup.php) that other components of our Drupal site can leverage in order to more easily work with the entities managed via webhooks.
public function findEntity($uuid) {
    $nodes = $this->entityTypeManager
      ->getStorage('node')
      ->loadByProperties(['field_webhook_uuid' => $uuid]);

    if ($node = reset($nodes)) {
      return $node;
    }

    return FALSE;
  }
The last step is to shuttle each notification on to its final destination according to the action it represents. We’re managing create events a bit differently from the others since they’re the only occasion where we specifically don’t want to have an existing record in the Drupal database.
// Handle create events.
if ($entity_data->event == 'create') {
  // Create a new entity if one doesn't already exist.
  if (!$existing_entity) {
    $this->entityCrud->createEntity($entity_data);
  }
  // Otherwise log a warning.
  else {
    $this->logger->warning('Webhook create notification received for UUID @uuid but corresponding entity @nid already exists', [
      '@uuid' => $entity_data->uuid,
      '@nid' => $existing_entity->id()
    ]);
  }
}
// Handle other modification events.
else {
  // Ensure a Drupal entity to modify exists.
  if ($existing_entity) {
    switch($entity_data->event) {
      case 'update' :
        // Update an entity by passing it and the changed values to our CRUD worker.
        $this->entityCrud->updateEntity($existing_entity, $entity_data);
        break;

      case 'delete' :
        // Call the delete method in our CRUD worker on the entity.
        $this->entityCrud->deleteEntity($existing_entity);
        break;
    }
  }
  // Throw a warning when there is no existing entity to modify.
  else {
    $this->logger->warning('Webhook notification received for UUID @uuid but no corresponding Drupal entity exists', [
      '@uuid' => $entity_data->uuid
    ]);
  }
}
}
// Throw a warning if the payload doesn't contain a UUID.
else {
$this->logger->warning('Webhook notification received but not processed because UUID was missing');
}
Ultimately this is yet another component that will be specific to your provider and data model; the sample notifications in our Postman collection contain an event key, the corresponding value of which indicates which action should be taken when that particular notification is posted to your Drupal site.
Managing Drupal Entities
Now that we have a tool for recalling data that’s already been sent to Drupal, we can build out the logic required to handle each type of event that can be triggered by one of our notifications.
Since our sample postman collection contains short and simple notification data, all of our example CRUD components have been defined as separate methods within a single service class—however you might want to consider breaking yours out into separate services, since operations on actual data will almost certainly be more complex.
Rather than diving into the specifics of the CRUD manager service in our sample module, we’ll wrap up our code explanations by pointing out some general observations for best practices worth considering when you modify the examples to your own needs.
Our create() method offloads the handling of incoming notification data to a separate mapFieldData() function, which in turn constructs an array of values corresponding to Drupal field data that are required for creating a node. We’ve taken the approach of only mapping those values that might also be included in other events (such as updates) in order to prime the pump for future code reuse. We also ensure the notification payload contains a title value before creating a new node—since that’s the one value required for the basic page content type.
The update() method implements a series of simple checks to determine which values exist in the notification data—since unlike API calls that often return complete records, webhook notifications typically only contain modified values. This allows us to only act on those fields that have actually changed, rather than updating every value for a given node.
And finally, the delete() method does simply that. Like the update() method it’s receiving the complete node entity as an argument—so we’re able to call that entity’s built-in method in order to remove it from Drupal.
Seeing it All in Action
Go back to Postman and post the sample notifications in the same order as the actions listed above, returning to Drupal in-between each post:
Create: after posting the create notification and running Drupal cron, you should find a new node listed on your content overview page. View that node and you’ll see that all of its values correspond to those in the notification data (excluding the one we removed before handing the create notification off to the CRUD worker).
Update: post this update notification, run cron, and reload the Drupal node and you’ll find the title and body fields have been updated.
Delete: Finally, post the delete notification and run cron a third time to remove the sample node from Drupal.
Webhook Processing Done Simply
And there you have it—a simple yet functional example of processing webhook notifications. While this tutorial has touched on all of the key pieces that are required to manage one type of core-provided entity (nodes), you’ll find that your own specific application might warrant additional considerations such as:
- Locking down (or hiding) any Drupal fields populated from webhook data. This helps to preemptively stave off frustration for content admins since they won’t be able to edit any values that might be programmatically updated via future notifications.
- Creating additional CRUD managers: Each distinct entity type—particularly any custom ones you might create to store webhook data—will require its own set of field mappings. This is especially true if you aim to manage Media entities as we did for a recent project, since that task also requires parallel management of File entities. Be sure to leverage that UUID!
- Handling duplicate entries: While our example module simply throws an error—and ignores create operations—whenever a representative node already exists, your use case might warrant a different approach to safeguard against data loss. For example, you might want to instead hand off the incoming notification data to your update method.
Finally, despite how powerful webhooks can be it’s important to give some consideration to what they can’t do:
- Perhaps most critically, Drupal won’t receive any notices when your provider’s system goes offline and stops dispatch notifications—since your site is passively listening, the running assumption is that no news means nothing has changed. Unless the third-party service that’s broadcasting your notifications is capable of queuing and re-sending notifications, that gap will translate to missed updates that won’t be made to your Drupal entities.
- In a similar vein, webhook notifications are a one-and-done setup—so if your custom code contains a bug that prevents the changes specified in a payload from being saved, that update is lost forever once the queue believes it’s been processed. Be sure to test your code thoroughly with sample data that are highly representative of the actual notifications you’ll be receiving!
- Additionally, there’s always the possibility that your provider might modify the data structure of their notifications. Hopefully, they’ll be considerate enough to give you a heads-up if they do so, however it’s not a bad idea to wrap any functions that parse that data in try/catch statements so you’ll see some indication that things aren’t being processed in your Drupal logs.

Hosting web applications presents a lot of challenges. Designing and building a valuable experience for your users is difficult enough, why should you increase the effort by managing a complicated technical stack? Acquia offers a purpose-built Drupal hosting solution that lets you focus on the most important part–your users.
Three Types of Service Models
Before we examine the benefits of Acquia as a Drupal host, we need to understand what hosting models are available for Drupal. Generally speaking, there are three categories of hosting service models, each offering a different level of sophistication and requiring the technical knowledge to match1. Selecting one of these models depends significantly on the project’s requirements. Let’s compare these models and examine the separation of responsibility for managing each aspect of the technical stack.
Management Responsibility Across Hosting Models
X = You Manage
On-Premises
On-Premises covers self-hosted and self-managed hardware–no cloud involved. In this model, you manage the entire stack from the bare hardware and networking through the web application and its data. Often this model requires a team of expert technicians, administrators, and developers to manage safely and securely at scale. It provides a high degree of flexibility and customization but requires significant resources to match.
Infrastructure-as-a-Service
Infrastructure-as-a-Service (IaaS) begins to remove some of this complexity by taking over management of the lower levels of the technology stack. In most cases, IaaS services will handle the management of physical hardware, allowing administrators and developers to focus on the software systems required to manage their web applications.
Creating and destroying machines can be done relatively easily, allowing hardware to scale based on traffic or change based on new requirements. However, this still requires a certain level of expertise to keep running services up-to-date with the latest security and bug patches. Usually, the team must have knowledge specific to the IaaS provider in addition to sysadmin level IT skills.
Examples
Google Cloud Platform, AWS, Azure
Platform-as-a-Service
Platform-as-a-Service (PaaS) further removes complexity, allowing developers and site administrators to focus directly on the web application. PaaS providers handle the management of the entire technical stack while the site owner is still managing the web application and its data. This provides an excellent balance of customization in the web application without requiring a large, knowledgeable team to manage infrastructure.
PaaS providers such as Acquia provide purpose-built solutions for deploying custom, scalable web applications like Drupal. These are carefully tuned environments based on years of experience that may not exist in smaller IT teams.
Examples
Acquia, Google App Engine, AWS Elastic Beanstalk, Azure Marketplace
Selecting a Service Model
Platform-as-a-Service is the Default
For most web applications, a PaaS model will provide a strong value proposition. By providing cloud solutions maintained by experts, they can offer economies of scale that smaller IT teams cannot attain on their own. Expensive hardware no longer needs to be purchased.
In turn, this removes the maintenance overhead for cooling, power, and other support systems. In the PaaS hosting model, software maintenance is handled by the provider, allowing your internal support personnel to focus on other tasks. Any maintenance tasks that remain can usually be run directly by developers or other project team members.
Additionally, the costs associated with a PaaS model like Acquia’s are more spread out, increasing the business' agility in managing costs. By removing the need for hardware purchase and setup, the initial cost is reduced significantly and capital expenditures can be made elsewhere. This also makes the application team more Agile in how it responds to changes and new opportunities by providing additional flexibility in the hosting costs. As needs scale or new opportunities appear, it can be much easier to grow or alter hosting needs.
When to Choose IaaS or On-Premises
There are some circumstances where taking on additional maintenance responsibilities may be required, driving your application toward an IaaS or On-Premises model. Most importantly, legal concerns and other policies may prevent you from selecting a cloud solution. Special privacy concerns might require an on-premises model to maintain strict control over personally identifiable information or other sensitive data. It’s also possible that existing agreements and contracts require the use of a particular service. In these cases, it might be valuable to assess when a switch might be made or if a PaaS service can be worked into existing infrastructure while following applicable policies.
It’s also possible you have a strong technical reason to select another service model. If the application has very specific technical requirements, it may be necessary to host it in an IaaS solution or even On-Prem to allow customization of the stack in ways Acquia doesn’t allow. These would generally be exceptionally unique circumstances driven by heavily customized features or specific networking needs.
Why Acquia?
If you’ve decided that a PaaS solution is right for you, Acquia is a PaaS provider specializing in Drupal. Dries Buytaert, Drupal creator, is both the co-founder and CTO of Acquia. Buytaert along with Jay Batson founded Acquia to provide infrastructure, support, and services to enterprise organizations using Drupal. In addition, Acquia was created to help Drupal scale, make Drupal easier, and to empower a thriving network of Drupalists around the world. Today, Drupal is about one of every 40 websites used.
Acquia gives Drupal development teams access to targeted solutions offering features that smaller IT teams can’t reasonably support. This provides a compelling value proposition, often letting site owners run services that are more complex than their team would otherwise be able to maintain. The technical stack can be more robust, improving value, reducing time-to-market, and reducing costs.
Fully-tuned Stack
Acquia is able to apply an immense amount of time and resources towards carefully tuning its stack to provide optimal hosting for Drupal and related technologies. This lets them provide situation-specific efficiencies and support that are simply not reasonable to expect from self-managed solutions. Acquia has spent many years refining the hosting environments for hundreds of clients. This level of sophistication is not achievable for smaller IT teams.
Improved Access and Support
Sites hosted with Acquia are generally faster and more reliable than sites hosted internally. Acquia operates at a large, global scale and has the networking and storage locations to support such an operation. Some of these technologies that are required at scale are difficult to maintain.
Acquia provides these technologies for teams that would otherwise be unable to support them. For example, Content Delivery Networks and robust caching tools provide fast, global access to your site through local access nodes, reducing load times and improving the user's experience.
In addition to faster access, Acquia also offers additional support for your site. This reduces or removes the need for an on-call rotation of technicians to maintain the site. Acquia hosting comes with a defined Service-Level Agreement (SLA) setting contractual obligations for reliability of the site. In other words, Acquia takes on the burden of maintaining the servers 24 hours a day.
Additionally, Acquia provides added reliability features and tools such as New Relic, recording important diagnostic information for problems on the site. Features like these can drastically improve the user's experience with your brand without placing a heavy burden on support teams.
More Robust Security and Recovery
Along with the added support features, sites hosted with Acquia are more secure and better equipped to recover from incidents. Because the technology stack is managed by Acquia support professionals, security patches, and bug fixes are applied regularly and the stack supporting the application is constantly monitored.
Acquia also offers edge protection solutions, defending against Denial of Service and other HTTP attacks. Acquia will even support Drupal in some situations. For example, Acquia has provided additional protections on occasions when vulnerabilities in Drupal have been found. These sort of specialized benefits offer great protection for your users and your business.
In the event an incident does occur and recovery is necessary, it is easy to restore the application to a prior state. Data backups are taken daily and databases can be quickly and easily rolled back through a simple, drag-and-drop admin user interface (UI). The same UI can be used to rollback code to match. These features let development teams react very quickly to incidents and quickly get the application running again.
Delivery Tooling
Because Acquia is already managing the technical stack beneath the application, they must support delivery and deployments. This makes deployments much easier. Acquia’s simple drag-and-drop interface makes it easy to move code across environments. Acquia’s Cloud Hooks and Pipelines features provide a complete Continuous Integration/Continuous Deployment solution, out of the box. These pipelines are tailor-made for Acquia and Drupal and are generally much easier to set up, drastically reducing time-to-market for new features.
The Benefits of Acquia
Each application and team has unique needs that will naturally push a project towards a given hosting model. For exceptionally complex or custom applications, an IaaS or On-Premise solution may be required. However, these models lose the benefits Acquia provides. For most Drupal projects, the additional security, support, and tooling, as well as performance improvements, make Acquia the right choice.
1Commonly, a fourth category called Software-as-a-Service is included but this model doesn’t fit Drupal’s customizability well and has been intentionally excluded from this article.

One of the best parts about working for a digital experience agency is the number and variety of projects we get the opportunity to work on. And while the size and complexity of the digital experience platform projects we work on differ, they’ve offered us the opportunity to learn and discover best practices that others can use to help drive the success of their own projects.
Though the type of client work we take on can vary greatly, some frequent projects we’ve been tasked with are clients looking to switch content management systems (CMS) and clients looking to build multiple websites. From this, we’ve discovered the best way to ensure success involves two key factors: having the correct mindset and the correct approach.
It’s a Replatform—Not a Lift and Shift
A key part of any digital experience platform (DXP) is a CMS. The CMS serves as a hub to centrally manage content. Over the past several years as clients have built out their DXP, we have seen more and more of them looking to move off of one CMS and onto another.
Many times, the move is between two different CMS options (e.g. Sitecore to Drupal). Other times, it can be moving from one major version to the next major version of the same CMS (e.g. Drupal 8 to Drupal 9). In both these cases, it’s best to think about the project as a replatform or a rehost, and not as a lift and shift.
The term “lift and shift” can make the project seem very easy. We already have a website over here. We just need to move it over there. That shouldn’t be too difficult. Not only does the term obscure the project’s complexity, but it also misses one of the most important advantages to a project like this. When moving to a new CMS, it’s the perfect time to reassess the goals and requirements.
Discovery Phase
When a project like this comes up, an upfront Discovery phase is key for a successful replatform. The Discovery phase helps the team understand the requirements and learn what works in the current system and where improvements can be made in the new platform.
A key component of the Discovery phase is to perform stakeholder interviews to find out what is and is not working in the current system. If you just “move” everything as is to a new platform, you’re bound to repeat the mistakes and shortcomings of the current system.
We aren’t just concerned with the current system’s mistakes. If the current system has been in use for a number of years, the system’s goals may have changed since it was built. If you are investing in a new platform, you do not want to solve yesterday’s problems.
Platform Audit
In addition to the stakeholder interviews, a full audit of the current platform is also key. Even though the goal is not to recreate the current platform in the new CMS, the architect can learn a great deal from the current platform.
Part of the audit should focus on the custom code that has been written. Often, custom code will contain business logic that is needed in the new platform. Another important part of the audit is understanding how the current platform is used and any workflows that have been created for it. The better the architect understands the current system, the better they can plan for the building of the new system.
Understand the CMS Features and Functionality
One last key point is that the new CMS will have different features and functionality than the current CMS. When moving to the new CMS, you will want to change how the current system is built to take advantage of the strengths of the new CMS. Trying to make the new CMS work exactly like the old CMS will result in a lot of frustration and a poorly-built platform.
Build an Ecosystem, Not a Series of Websites
Whenever you need a system that will support multiple websites, it’s important to approach it as an ecosystem and not just a number of individual websites. Building an ecosystem can be, and often is, a challenge. But done correctly, building an ecosystem results in an easier-to-use and easier-to-maintain system that takes advantage of the CMS.
Building an ecosystem allows you to take advantage of the economies of scale. One way to realize that is to build all of the websites with the same code base. This lets you update the CMS and modules as needed in one place, saving time and resources.
But, you can extend this further. If your platform is built with a component-based approach and you build all the websites using a common set of components, the builds will take less time, as will future updates.
By building a custom theme for each website, but using the same components, you can create different looks to cater to your specific brands. Or, for even more scale, you can build out a common theme to use for all websites and just change colors, fonts, etc. By leveraging the same functionality and components across websites, you can make the platform much easier to maintain and use.
Component Consolidation
One of the main challenges with building an ecosystem versus a series of websites is that doing so requires compromises from the websites owners. It is not uncommon for a client with 10 websites to have hundreds of components and dozens of page templates among the websites.
However, when building the new ecosystem, you should consolidate the components and page templates to reduce the number needed. Without consolidation, the build will cost more and take longer than needed and result in a harder-to-user and harder-to-maintain platform.
This consolidation will require the stakeholders to make compromises as it is not possible to rebuild all of the websites exactly the same with fewer components and templates.
A well-built ecosystem lends itself to be easier to build, use, and maintain. This reduces the total cost of ownership and makes it a better choice than building highly-customized, individual sites.
Flexibility is Key
A new DXP is a large undertaking. Today’s consumers expect a much more personalized and seamless experience across channels. The CMS is a critical piece to providing that flexibility.
One way to provide flexibility in the CMS is by using a component-based approach for the content editors to create content. A component-based approach allows content editors to build pages using a series of components within the CMS rather than having a structured format to the page.
This allows flexibility to build pages tuned to the exact message they are trying to send. When done correctly, it can also speed up the content building process by eliminating the need to have developers involved in the creating and publishing of content.
Component-Based Approach
Component-based approaches are much more common these days, but they’re not always executed well. Having someone experienced with this type of approach is vital to the success of the project.
From a design perspective, striking the correct balance between the number of components and the number of component settings is essential to creating an easy-to-use content editor experience.
From a technical perspective, there are usually a number of ways to execute a component-based approach and pros and cons to each. For example, in Drupal, we can use the Layout Builder module as the foundation for our component-based approach, and it works very well.
As an alternative, we can also use a site-building tool like Acquia Cohesion to execute the component-based approach. Both are solid options with pros and cons depending on the requirements.
A CMS that Provides Data
Another way to provide flexibility is by having the CMS be able to provide data to all of your platforms. Using your CMS as a centralized content source allows each channel to use the content as needed.
Drupal is an example of a CMS that excels in this area. Drupal was built with an API-first mentality, meaning that exposing content using APIs is baked into its fabric. Drupal has several modules that make exposing your content as REST APIs services very easy. Drupal also makes it easy to return that data in a variety of formats, such as JSON and GraphQL, as needed by the system consuming the data.
Mind Over Matter
No two projects are alike. However, your next project can benefit from what we have seen and learned from our projects here at Bounteous. The best way to be successful is to have the correct mindset (“This is a replatform, not a lift-and-shift”) and the correct approach (“Build an ecosystem, not a series of websites”) while focusing on creating a flexible system.

In a rapidly evolving digital landscape, organizations need robust solutions to align marketing strategies with overarching business objectives. Drupal, a powerful content management system (CMS) known for its flexibility and scalability, is poised to cater to the specific needs of marketing teams.
Today’s marketer faces several unique challenges, such as communicating with customers across multiple channels, quickly updating content, driving marketing ROI, improving the customer experience, and refining processes—challenges that can typically be addressed with a modern CMS.
Why Download This ebook?
Bounteous x Accolite helps you understand how Drupal supports the modern marketer. This guide offers valuable insights into how Drupal can be leveraged to enhance marketing outcomes, drive the customer experience, and ultimately, achieve ROI goals.

DrupalCon Barcelona 2024 is a wrap. This DrupalCon was special not only because it was a return to a beautiful city, but also because it was the first DrupalCon since the announcement of Drupal Starshot (now known as Drupal CMS). Drupal CMS is an important advancement of Drupal as the community continues to innovate and expand Drupal’s capabilities. In his 40th DriesNote, Dries Buytaert, creator and product leader of Drupal, demonstrated the progress that has been made to date with Drupal CMS.
At DrupalCon Portland earlier this year, Dries introduced Drupal CMS. The goal of the project is to build a version of Drupal that is optimized for non-developers, like content creators, digital marketers, and site builders. Drupal CMS will not replace Drupal as we know it. Instead, Drupal CMS will be built on top of Drupal Core. Developers will continue to use Drupal Core to build more complex Drupal builds, yet will benefit from the advances made to developer Drupal CMS.
As we covered in our previous article on Drupal CMS, the primary goals for the forthcoming Drupal CMS are to enable marketers and non-technical users to create ambitious digital experiences, improve the ‘out-of-the-box' functionality of Drupal, adapt to emerging trends in the technology/CMS space, and boost the overall adoption of Drupal.
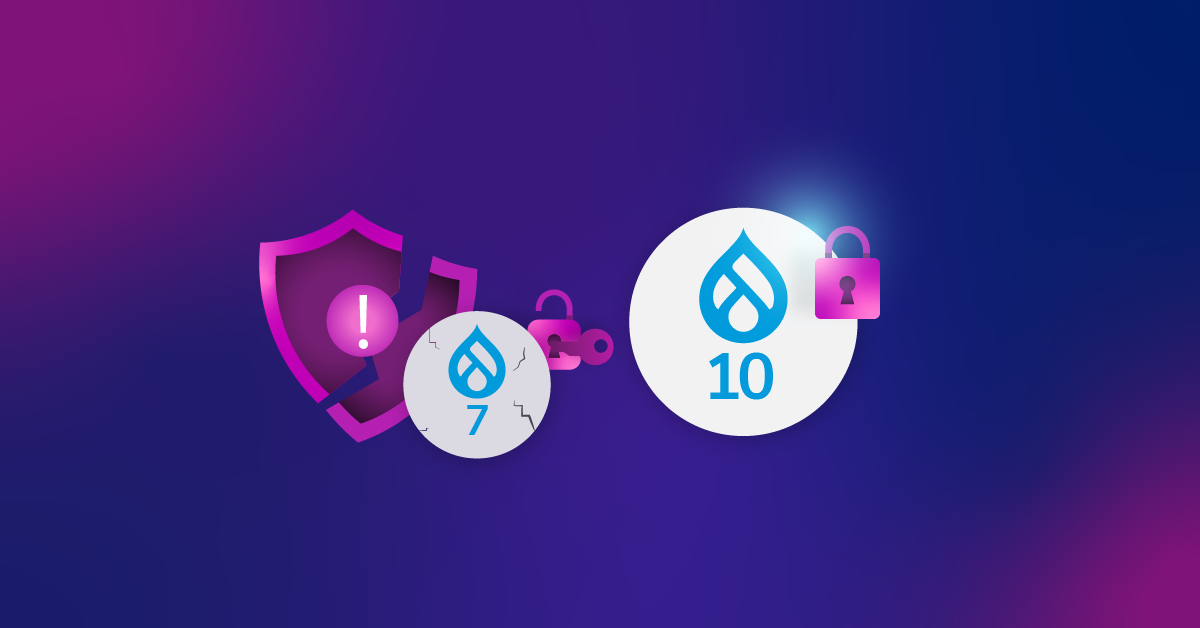
The launch of Drupal CMS is set for January 15, 2025, which will be Drupal’s 24th birthday and just a few weeks after Drupal 7’s end-of-life. The retirement of Drupal 7 and the launch of Drupal CMS will mark a significant transition in Drupal’s evolution, as all supported versions of Drupal will now be built on a modern framework that will be easy to upgrade and extend over time.
*If you are currently on Drupal 7, time is quickly winding down to Drupal 7’s end of life in January 2025. Bounteous x Accolite can help you quickly move your site from Drupal 7 to the latest version of Drupal with our Migration Accelerator technology. Contact us for more information.
What Progress Has Been Made So Far?
When Drupal CMS was announced, Dries laid out the vision to complete the 1.0 version in eight months. It has been about four months since then, so Drupal CMS is about halfway through the timeline.
In his DriesNote, Dries demoed the current progress of Drupal CMS. The demo focused on several key areas: trial experience, artificial intelligence capabilities, SEO capabilities, and Drupal Recipes. All this was done through the lens of a non-developer building a new website.
Improving the Drupal trial experience is an important way to get more people to try and adopt Drupal. Historically, it has taken expertise to set up Drupal just to try it out. You would either need to set it up on a server or have a local configuration to set it up. Both require setting up and configuring software before even setting up Drupal. With Drupal CMS, it is now easy to set up a Drupal demo environment. If you follow this link, you can try Drupal in a browser. No server setup or configuration is necessary.
Leveraging AI to Enhance the Site-Building Experience
In the demo, a hypothetical user asked the AI Agent (which took form as a chatbot) to make modifications to a Drupal content type, including changing the name of the content type and adding an image field. This feature will give people unfamiliar with Drupal the ability to make changes within Drupal without needing to learn site building and administration.
The demo also showed a content migration of a simple blog post into Drupal. When provided with the URL of a page, the AI Agent retrieved the page, parsed the content, and mapped it into fields of an existing blog post content type. It also augmented the content by classifying it with taxonomy terms.
Together, these AI features show the potential of AI with creating, migrating, and managing content. Dries noted that AI will be a fundamental shift in how Drupal sites are built, empowering non-technical users with tools that allow them to fulfill the aim of creating ambitious digital experiences.
Introducing Experience Builder
The second notable item shown in the demo was the new Experience Builder. Experience Builder gives users the ability to place and update freeform content on pages a visual building experience. It features previews of content at both desktop and mobile breakpoints, giving insight into what the published page will look like. Experience Builder is the most effort-intensive feature within Drupal CMS with the equivalent of 30 full-time contributors to the initiative. Dries indicated that Experience Builder will not be production-ready at the initial launch of Drupal CMS in January but will be included in a future version of Drupal CMS in 2025.
Other features of Drupal CMS will be available through Drupal’s system of Recipes. Recipes are pre-packaged features that are designed to provide one-click installation of functionality to address frequent use cases for site administrators. To date, 14 features have been identified to be part of Drupal CMS. In addition to the AI features we mentioned above, there will be Recipes to bring enhanced SEO, accessibility, analytics, and marketing tools to sites, among others.
The future of Drupal is just a few months away. When it is released, Drupal CMS should significantly expand the usage of Drupal across the internet by making building Drupal easier for non-developers. Attaching this wider range of users and organizations to use Drupal to reach their audiences will spur growth within the Drupal community, provide greater community support, and make the overall Drupal ecosystem stronger.
Drupal CMS will also establish a framework for future-proofing Drupal. By investing and releasing new features like AI and Experience Builder will help Drupal remain competitive and relevant as methods to content management evolve. We are particularly excited to see this approach of releasing bold and innovative features through Drupal CMS rather than through the traditional experimental module approach. This new approach allows Drupal to be more nimble as future features and needs are identified and rolled out.
We are excited to see how Drupal CMS continues to develop and evolve in the coming months and years!
Interested in Learning More?
Take a look at the demo from the Driesnote, and tune into DrupalCon Singapore in December, when it’s anticipated the demo will be ready for release.

Personalization has been a moving target for the last decade. What started as something simple as Dear John, has now turned into a higher level of expectations by customers from the brands they engage with. It is only natural, then, that the technology that supports personalization evolves as well. This is exactly what is happening at Acquia.
As of July 1, 2024, Acquia Personalization (formerly Acquia Lift) is no longer available for new customers. Acquia is sunsetting Personalization in favor of a new offering called Acquia Convert, powered by VWO. Acquia Convert offers enhanced features and reporting and will provide a better understanding of user behaviors, testing, and personalized experiences.
Acquia Convert supports all of the capabilities currently available with Acquia Personalization, enables key integrations with your organization’s existing MarTech stack, and is a Google Analytics Integration Partner. Furthermore, Acquia’s partnership with VWO expands Acquia’s DXP with the ability to optimize digital experiences through testing, insights, and personalization.
What Does This Mean for Current Acquia Personalization Customers?
You don't need to take immediate action if you have a current Acquia Personalization account. Acquia will still provide Acquia Personalization and support for the duration of your existing contract. But owners of Acquia Personalization should start investigating and thinking about migrating to Acquia Convert.
Even though Acquia continues to support Acquia Personalization, new features or enhancements will likely not be added to the legacy personalization service, potentially limiting some of your opportunities to convert and personalize. We recommend migrating to Acquia Convert as soon as possible to take advantage of its powerful features.
Introducing Our Acquia Convert Migration Offering
Bounteous x Accolite offers a solution for migrating from Acquia Personalization to Acquia Convert. In this engagement, we review your objectives, provide a roadmap, and migrate your business to Acquia Convert. In many cases, aligning on objectives and a roadmap with our team will inform enhancements that will elevate personalization strategies and conversions.
Bounteous x Accolite and VWO Implementation: A Comprehensive Support for Your Experimentation Needs
Over the past two years, Bounteous x Accolite has partnered with numerous clients to implement, onboard, and activate VWO for their experimentation requirements. VWO offers unique features that cater to both clients who are just beginning their A/B testing and personalization journey, and those with mature programs that are seeking to elevate these efforts.
These features and capabilities will carry over to Acquia Convert, enabling a whole new set of tools for your organization:
- Core A/B Testing: Robust A/B testing capabilities, which are essential for organizations at any stage of their optimization journey.
- Third-Party Integrations: Seamlessly integrates with third-party tools, enhancing the testing and analysis/reporting process.
- Behavioral Analysis: Features such as heat mapping and session recordings offer deep insights into user behavior, highlighting areas of interest and friction.
- Form Analytics: Provides valuable insights into form drop-offs, helping organizations improve form completion rates.
- Surveys and Feedback: Enables the creation of on-page surveys and feedback experiences, allowing direct user input to inform decision making.
Acquia Convert also introduces several advantages over other products on the market, including:
- User-Friendly UI: The intuitive interface makes it accessible to users with varying levels of technical expertise.
- Flexible Pricing: Offers a range of pricing options, making it ideal for organizations looking to enhance their experimentation capabilities.
- Comprehensive Toolset: Combines core testing functionalities with advanced behavior analysis and feedback tools.
By leveraging these features, Bounteous x Accolite helps organizations enhance their experimentation efforts, providing a seamless user experience that positively impacts business goals and objectives.
As an Acquia Elite Partner and Acquia DXP Certified Practice, Bounteous x Accolite is at the forefront of enhancing customer experiences that boost conversions and drive business success. Our team leads digital transformations for major brands across all industries and sectors.
Together with Acquia, Bounteous x Accolite can create personalized customer experiences that drive meaningful results.
To learn more, view our Acquia Convert offerings.
Discover the Power of Drupal for Enhanced Operational Efficiency and Security for Healthcare Systems

Wearable devices and real-time patient health-tracking applications have spurred technological advancements in the healthcare industry. As a result, healthcare systems are relying more and more on technology to give consumers access to accurate and timely care.
A scalable, integrated content management system (CMS) enables healthcare systems to increase service offerings in less time, which is why Drupal has become the CMS of choice for many large health systems.
Healthcare Applications That Benefit from Drupal
Several healthcare applications that consumers and healthcare providers use are excellent use cases for Drupal:
- Electronic health records (EHR) enable medical information to be documented, stored, and shared among various organizations within health systems. This allows providers to diagnose and treat faster, while accurately tracking a patient’s medical history.
- Patient portals give consumers more control over their healthcare by enabling them to schedule appointments, message providers, manage prescriptions, and make payments.
- Health and wellness applications, when paired with wearable technology such as fitness bands or wearable medical devices. These apps help consumers track their health and habits, and can report trends to providers.
Why Drupal for Healthcare Systems?
Drupal, an open-source CMS, provides flexibility and a robust architecture that makes it the ideal choice for elevating the patient experience. With Drupal, healthcare systems can create personalized, secure, and accessible digital experiences that support patients and healthcare staff. It enables healthcare systems to address security concerns, internal and external integrations, multi-site management, and accessibility needs.
Security
Historically, healthcare systems have not used open-source CMS solutions because of security and privacy concerns. But newer versions of Drupal (Drupal 8 and above), provide additional security features via contributors who have addressed vulnerability issues and breaches. Today’s healthcare systems can be confident in patient and system data remaining confidential.
Integrations
Healthcare systems are large and can span multiple states, time zones, and IT systems. It’s critical for their CMS to be fully integrated to handle the flow of information across internal and external systems. Drupal’s architecture is scalable, making it the most flexible CMS for third-party integrations, including multiple EHR, patient portals, prescription portals, billing portals, and more.
Multi-Site Management
Maintaining websites for the various departments within healthcare systems can be difficult, as each department has its own types of content and functionality needs. Drupal can provide needed consistency and faster content sharing between these websites, while maintaining varied functionalities. One of Drupal’s key features is enabling content to be pushed to multiple sites in various formats at the same time.
Accessibility
Drupal addresses the need for accessibility right out of the gate with its flexible theming system that meets all requirements in Section 508 of the Web Content Accessibility Guidelines (WCAG) This allows healthcare systems to meet their consumers and providers where they are, regardless of disability. Also, its multilingual features can help users develop location-based, language-specific websites for desktop and mobile.
Drupal’s robust, flexible, and secure architecture makes it an optimal choice for healthcare systems aiming to streamline IT operations and enhance patient experiences. With its advanced integration capabilities, efficient multi-site management, and dedication to accessibility, Drupal addresses the unique challenges faced by healthcare providers, making it a strategic investment for the future.
Want to learn more? Explore our Drupal capabilities and healthcare expertise to see how Bounteous can help support your organization’s digital transformation.

Drupal is at a crossroads. Currently, enterprise-level Drupal implementations provide amazing capabilities for digital experience platforms. However, these platforms often require specialized talent to build out so that enterprise organizations can realize the power Drupal brings to bear. Should Drupal stay on the same path, or should it adapt and become more friendly to marketers and less technical people looking to create new websites? If Drupal stays on its developer-driven, developer-focused trajectory, it could become a niche content management system (CMS) with a smaller footprint in the enterprise CMS platform space.
Having worked with Drupal for more than 15 years, I know that Drupal is easy to implement and use. But when looking back at that time, it was not easy to get started and learn. And now, 15+ years later, Drupal is much more feature-packed and complex. Getting started with Drupal today can be overwhelming for users without a technical background or who haven't used the underlying technologies in other projects or contexts.
During the DrupalCon North America 2024 main keynote (affectionately called the “Driesnote”), Drupal founder Dries Buytaert said that Drupal has been part of many “golden eras of the web,” including leading the way on low-code/no-code capabilities and democratizing web publishing—but Drupal’s competitors are doing it better today.
So where does Drupal go as an open-source project?
Dries’ point of view is that Drupal should become even more friendly to marketers, evaluators, and less technical folks than it is today. Dries offered a vision for what this new flavor of Drupal could look like and has named the initiative “Drupal Starshot.”.
Drupal has been around for 23 years and has evolved to incorporate innovations in modern CMSs, integrations, technologies, and accessibility. Over time, there have been efforts to simplify the complexity of Drupal to make it easier to learn and adopt. These have been met with varied success. Drupal is an amazing platform and CMS for enterprise DXPs, but the new features and technologies introduced by continuous innovation have outpaced the efforts to simplify. Oftentimes, specialized skills in the Drupal platform are needed to activate the power and potential of Drupal. It is time for the Drupal project to take a big step to make the platform easier to adopt.
The primary focus of the Drupal Starshot initiative is to create an interface that is easier for everyone to use, particularly for marketers, content editors, site builders, and junior developers. One idea is to create a Drupal platform where someone does not need to use the command line at all to install and launch a Drupal site. This is ambitious and a goal worth pursuing.
The result of Drupal Starshot will be a new version of Drupal called Drupal CMS that is based on Drupal Core and includes features and contributed modules that bring an easier-to-use site-building experience for marketers and junior developers.
Installing Drupal Isn’t Easy
When preparing to install a Drupal site for the first time, a lot of setup must take place, and much of it happens on the command line. For example, when setting up Drupal on my laptop for the first time, I had to install Docker and my preferred tooling (DDEV), then run Composer commands to get the source code of Drupal. Most of this setup happens on the command line, and even when you do a perfect copy/paste of commands following any of the many useful setup guides and tutorials, it’s not uncommon for something to go sideways the first time installing a site. When this happens, you have to work through the problem, often with only a cryptic error message and a lot of conflicting information from a web search. This can be a steep hill for new developers or those who simply want to try Drupal for the first time.
Services like GitPod and SimplyTestMe can help those who want to test out Drupal for the first time, which helps remove that pain. But those instances can be ephemeral and are difficult to find unless you know what you’re looking for. The new install from the browser approach will remove this huge barrier to taking Drupal for a test drive.
Drupal CMS’s Installer and Setup Experience
Drupal CMS’s most notable difference over Drupal Core is a new installer experience, installing Drupal with pre-shipped contributed modules and configuration, and introducing new entity types. The current installer asks the user to pick an installation profile and database credentials, among other information. The profile selection and database credential forms should be removed to make the experience less technical. These steps will likely be replaced with something similar to the wireframe presented in the Driesnote, where the user picks the types of content the site will have (articles, forms, events, etc.). The challenge with the initial setup is to give the user the flexibility to create the site they want without overwhelming them with options or unnecessary steps. It will also be important to let the user know what options can be changed and modified after the setup is complete.
Module Configuration and UI
I love the idea of bringing some of the best contrib modules and common configurations to the initial setup process as part of the new version of Drupal. This will bridge a huge gap many first-timers experience when setting up their first Drupal site. It will help them by giving them many of the most popular modules out of the box without having to learn the details of the contributed modules ecosystem and how to go about finding, installing, and setting up these modules.
Take, for example, the ability to create a URL for a page based on the content title—a common need that doesn’t come with Drupal core today. Putting myself in a new user’s shoes, how would they know where to look and how would they know that ‘Pathauto’ is the module they are looking for? And then once it’s installed, how does a new user know about tokens and how to use them to configure Pathauto? Having Pathauto ship with Drupal CMS removes much of the guesswork.
Bringing the concept of Recipes into the Drupal ecosystem will be a game changer for Drupal Core and Drupal CMS. Giving users and developers the ability to quickly spin up fielded content types and reuse common configurations will greatly reduce effort and timelines in building out complex Drupal platforms.
New Entity Types
Dries noted that they will take the “best of Paragraphs” to help create the new Experience Builder. During DrupalCon, Bounteous x Accolite had a chance to hear some of Drupal Starshot’s principals on this front. Their current hypothesis is to create a new entity type that encapsulates the best of Paragraphs to use within the new Experience Builder. This new component entity type is planned to have all of the content of the component contained within it instead of a nested tree of paragraph entity references. This makes loading these entities from the database much easier and faster. It will also make it easier to marry these to Single Directory Components. But the biggest benefit it will bring is to resolve the longstanding complexity and confusion with translating Paragraphs. I look forward to this new component entity type being added to the Drupal ecosystem, either as a contrib module or a core module that complements Single Directory Components.
Experience Builder
Layout Builder is great. It was a giant leap for Drupal when it was rolled out. Giving content managers the ability to add and arrange blocks and content on a node gives them a tremendous amount of control and flexibility with how content is presented. Taking this to the next level with Experience Builder will be huge for Drupal and content managers.
One of the limiting factors with many enterprise CMSes today is the ability for content managers to style pages without needing to know CSS or needing help from developers. Tools like Acquia Site Studio offer a low-code/no-code approach to building and styling components today. While technically accurate, one must know CSS, JavaScript, and a lot of Drupal (and Drupalisms) to effectively implement more advanced experiences using Site Studio.
The prospect of giving non-technical users the ability to style pages is exciting. It can be frustrating for developers to work in “just a tweak or two” to styling on a single page of a site. It’s equally frustrating for content managers to wait for those tweaks to be developed, tested, and deployed. Putting the control into users’ hands to make these styling updates will make content generation faster. It will also take work off of developers' plates, so they can build bigger things.
I wonder how much reign and flexibility will be available for styling pages. Will there be guardrails in place to ensure that what is styled meets accessibility standards (font size, contrast, etc.)? What about the ability to govern styling so that someone doesn’t veer too far from brand guidelines? I assume the first versions of Drupal CMS will be pretty unconstrained in terms of styling options, but hopefully future versions will give some controls here.
I am excited for the Drupal Starshot initiative and its potential. It will be a revolutionary addition to the Drupal ecosystem. As someone who helps build some of the most complex Drupal platforms for some of the world’s most ambitious brands, I think this is a good move for Drupal. It will bring more people into the Drupal community and increase global adoption of Drupal. While some sites will stay on this new version of Drupal, many organizations will need to grow their platform as they grow, paving the way for deeper adoption of Drupal.
Want to learn more about announcements from DrupalCon North America? Read our key takeaways blog.
Interested in learning more about Drupal? Contact me today.

The Bounteous x Accolite team recently returned from DrupalCon North America 2024, in Portland, Oregon. The four-day event brought about 1,400 Drupal users to the Oregon Convention Center for keynotes, breakout sessions, and Contribution Day.
The event included several exciting announcements. Here are our six key takeaways from DrupalCon North America.
Drupal Starshot is Coming Soon
Announced during this year’s Driesnote, Starshot is a user-friendly, out-of-the-box Drupal experience. It’s a second official version of Drupal that will make Drupal more accessible and easy to use. It will likely be called “Drupal CMS”, and will be built on top of Drupal Core and common contributed models, and available as a separate download alongside Drupal Core. To learn more about Drupal Starshot, watch the Driesnote. To get involved with Drupal Starshot, register your interest or join the conversation in the #Starshot channel on Drupal Slack.
New Brand Refresh and Marketing Strategies Are on Deck
This Drupal brand refresh includes updated brand guidelines for consistency and a modern identity. There’s also a new marketing toolkit, including messaging guides, pitch decks, etc., which will be available on Drupal.org.
Open Source and AI Have Many Benefits
The Day 2 keynote focused on the benefits of open source AI, including democratizing knowledge by fostering innovation through contributions and software iteration. Ultimately, this helps reduce costs, facilitates access for businesses and researchers, enhances competition, and leads to a richer pool of AI applications.
Drupal 11 Release is Around the Corner
With a planned release around August 2024, Drupal 11 will be a refined version of Drupal 10. Features include: easier content modeling, streamlined content editing, faster real and perceived page performance, Single Directory Components (SDC) for UI component creation, and more.
Drupal Will Reintroduce Project Browser
This initiative is a dedicated effort to simplify the Drupal experience for new and less technical users and will be released with Drupal 11. It will provide an intuitive and user-friendly solution for location and installing modules, and help create a seamless experience for newer users.
Drupal Has Big Plans for The Bounty Program
This program encourages Drupal Association members to contribute to the Drupal Project through experiments. If the experiment has an impact on Drupal moving forward, it will be tweaked (if needed) and iterated upon. To learn more about the program, contact Alex Moreno.
If you were unable to attend DrupalCon North America 2024, you can catch recordings of the Driesnote and other key sessions here. You can also register for Acquia’s recap webinar on May 21.
Contact us for more information regarding Bounteous x Accolite’s Drupal capabilities and solutions.
The Drupal Association announced in June 2023 that support for Drupal 7 has been extended for an additional 15 months from November 2023 to January 2025. While this is welcome news for many IT departments that were scrambling to move off of Drupal 7 by November, it isn’t the reprieve that it first appears to be.
It’s important to recognize that delaying the decision to upgrade to Drupal 7 could have a very real and negative impact on your organization. At the top of this list is security. When the Drupal Association announced that Drupal 7’s end of life was being extended a final time, it also announced that support for Drupal 7 after August 1, 2023 would change in significant ways. Read this article to learn about the top ways security will be impacted by staying on Drupal 7.
Changes to Security Updates for Drupal 7
Not all security issues will be addressed proactively with a security update release the same day an issue is announced. The Drupal Security Team may choose to not fix some moderately and less critical issues rather than report them to the public issue queue for the community to address. Without a patch or update to fix the issue, this can cause vulnerabilities to become publicly known. This, in turn, makes it easier for a site to be hacked or defaced, its users exploited, or their data to be compromised.
Module Implications
After August 1, 2023, the modules used to build and maintain Drupal 7 may no longer receive updates. Modules may be flagged as insecure or unsupported if the module maintainers have not sufficiently responded to requests of the Drupal Security Team. If this happens, the module will not be unflagged or marked as secure/supported ever again.
Say Goodbye to Some Security Advisories
Another security risk with Drupal 7 is that the security team will no longer issue security advisories alerting Drupal 7 site managers about security issues with unsupported libraries that are used by many Drupal 7 sites. This means that a library you are using, such as CKEditor 4, may have a security issue and it would be up to you to determine if your site is impacted and to fix the issue.
Security Shouldn’t be a “Hope for the Best” Scenario
With these changes to the security coverage for Drupal 7, site administrators will need to be more vigilant than before when it comes to securing their sites. Drupal 7 site owners are advised to keep a close watch on the Drupal Security Advisories page and the Drupal 7 Core issue queue for items that may impact their site’s health, security, and reputation. When an issue appears that needs to be addressed, businesses may not have the luxury to wait for a fix to be produced. Be prepared to fix issues that may arise if a security patch isn’t immediately available for Drupal 7. When site security is on the line, one cannot hope for the best.
Ensure Security With Drupal 10
Security issues alone should be motivation to proceed with the migration to Drupal 10. Upgrade to Drupal 10 today to ensure the security and longevity of your website. While Drupal 7’s end-of-life has been extended, it’s crucial to understand that relying on an outdated CMS version can pose serious risks to your organization. With limited proactive security updates and the potential for unsupported modules and libraries, delaying the upgrade could leave your site vulnerable to hacking and data breaches.
Take the leap to Drupal 10 and embrace a modern, secure, and feature-rich platform that aligns with current technology trends. For more information on Drupal 7 and the features you may be missing out on, check out this article.

Many organizations depend on Drupal to build digital ecosystems. As a powerful content management system (CMS), it works well as one of the cornerstones of a composable architecture—but it can also function as its own standalone composable architecture. A composable approach has several benefits, including making it easier and more efficient to build out new channels (e.g., new websites or landing pages). It also empowers the business— especially the marketing team—to create and deliver content to customers where and when it is needed. This frees up developers to work on projects that deliver the most value.
Here, we outline some of the best practices to build out a digital ecosystem using Drupal.
Tips to Build Reusable Front-End Components
Using a tool like Drupal means that companies will benefit from the experiences and recommendations from the broader Drupal community, as ideas are shared and discussed widely. With our own clients and contributions to the Drupal community, as well as considering the enterprise tools available, we’ve identified a number of recurring practices that can help make this process easier.
Use Layout Builder to Create Reusable Components
To build new channels efficiently, composable approaches seek to move building pages and channels out of the developers’ hands and into the marketers’ hands. A great way to do this is to build flexible, reusable front-end components. Drupal is well-equipped in this area. Layout Builder has been part of Drupal core since Drupal 8, and the Drupal community continues to add features and refine the experience to enable ambitious site builders.
Layout Builder allows developers to build components and templates that give marketers greater flexibility to build pages without the need for developer intervention. If a new landing page is needed, a content editor can quickly assemble the page from the reusable components and get it published quickly.
Provide an Enterprise-Grade UX with Acquia Site Studio
While Layout Builder is a great choice for building out reusable components, Acquia Site Studio provides an enterprise-grade user experience, which makes it even better. With Site Studio, marketers can not only build out new content using reusable components and templates, they can update styling to the components as well. Site Studio makes it efficient for developers by providing a user interface (UI) kit that includes components and helpers to get the build started. Acquia Site Studio makes building reusable components a breeze.
Create Efficient Development Processes with CI/CD
Building reusable components is an important aspect of a composable approach, but it is also important to have an efficient development process. A key component to having an efficient development process is creating a continuous integration/continuous delivery (CI/CD) pipeline. CI/CD pipelines make the development process efficient by automatically enforcing coding standards, testing the new code to ensure quality, and creating deployment artifacts so the code is always ready to be deployed.
It has never been easier to create a CI/CD pipeline. All the major cloud-based source code version control providers offer tools to make doing so very easy. Once the CI/CD pipeline is built out, the process is automatically kicked off when a developer commits a change to the code base. If the process detects any issues, the developer gets immediate feedback and can fix those issues. All this automation makes the development process quicker so if there is a new feature or an enhancement to an existing feature that is needed, the development team can deliver it quickly.
Use Composer to Manage Drupal and Dependencies
Another key component to an efficient development process for Drupal projects is using Composer to manage Drupal and all other dependencies, like libraries, modules, and themes and their dependencies. Using Composer makes it easy to ensure all the needed dependencies are installed and ensures that all developers are using the exact same version of all the libraries, modules, and themes. This helps prevent issues where it works in one developer’s environment, but not in another developer’s environment.
Simplify the Development Process with Acquia Code Studio
Acquia has developed tools such as Acquia Code Studio that help developers create an efficient development process. Code Studio includes everything needed to have an efficient development process from a zero-configuration CI/CD pipeline to automatically created feature branches to easy to create merge requests and more. In partnership with GitLab, Code Studio helps keep the development tasks on target from feature request through production deployment. Acquia has done all the heavy lifting to build out a solid, efficient development process so you don’t need to.
Isolate Your Business Logic
Another idea to keep in mind when using Drupal as a composable solution is that business logic should be isolated as much as possible. Business logic in this sense means not only the code needed to implement business processes, but also any data mapping needed to integrate with other platforms. In a truly composable architecture, business logic would be built in the orchestration layer to keep the ecosystem front-end and back-end agnostic. With composable Drupal, Drupal acts as the orchestration layer, but that does not mean the business logic should go just anywhere.
Whether you are implementing a traditional Drupal theme or using Drupal as a headless CMS, the business logic should be out of the theme layer. With a traditional Drupal theme, a good indication that you kept business logic out of the theme is if you can create a drop-in replacement for your theme. Whether you use a traditional Drupal theme or a headless implementation, the code should be narrowly focused on presentation.
Any business logic that is needed should be isolated to and grouped in custom modules. The more centralized the business logic is kept, the easier it will be to update or replace various parts of the system, like platform integrations, in the future.
Future-Prep Your System
Often developers will talk about future-proofing what they are building. However, the future is hard to predict. (Any developer that has been asked for an estimation knows this to be true.) Without being able to predict the future, we cannot future-proof our system. We can, however, future-prep our system.
Isolating the business logic is a great example of future-prepping. By isolating the business logic, companies can minimize the disruption in the system as changes are inevitably needed. Marketing teams may not have a need for an email marketing system, but that could easily change in the future. Building a system that can efficiently adapt to ever-changing business needs can give you an edge.
One of the attributes that I like about the Acquia Platform is that it is both built to be open, yet is also well-integrated. Because of the open nature of both Drupal and Acquia, you can build a best-of-breed system. And, if you already have a platform that is working well, it can easily be integrated into a Drupal-based solution built on Acquia. But, if as your needs grow, you find yourself needing to do more with customer data or need additional help managing your digital assets, Acquia has products like CDP and PIM that can be easily plugged into your existing platform. In short, Acquia’s products make it easy to grow at your pace.
Empowering Organizational Agility through Composable Architecture with Drupal
A composable architecture provides organizations with the agility to react to their ever-changing business challenges. Using Drupal as a composable platform can help you achieve that agility. The key is to put the power to freely create new content and channels in the hands of marketers—so that developers can focus on building more tools that deliver value and make the process of development reliable and efficient.
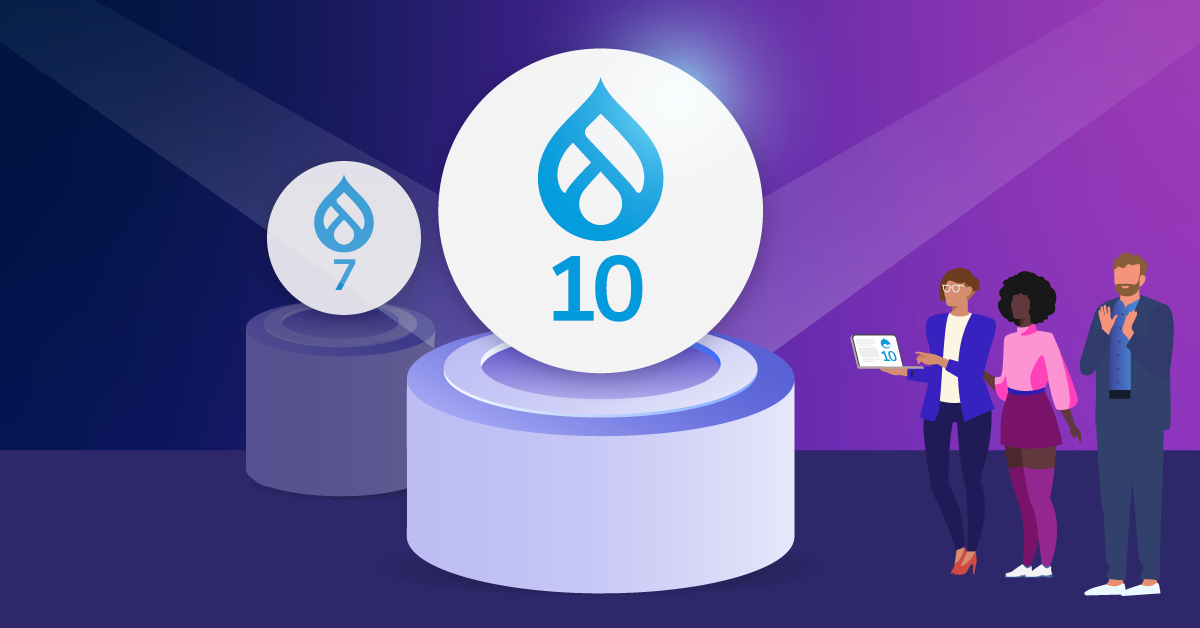
At DrupalCon North America in June 2023, the Drupal Association announced that support for Drupal 7 has been extended for an additional 15 months from November 2023 to January 2025. However, if your website and digital experience platform is important to your company’s objectives to compete and win digitally, do not wait to migrate.
Drupal 7 will be 14 years old when it is finally retired in January 2025. Over the past 14 years, web trends have changed dramatically. Drupal 7 did receive some small enhancements over time, but no major core features were released in Drupal 7’s lifetime. This means that Drupal 7 has been a functional relic since Drupal 8’s release in November 2015! If your organization is using Drupal 7, you are missing out on many innovations that have been added into Drupal since that time. Here, we outline some of the features that modern Drupal has to offer.
Flexible and Modular Architecture Approach
Drupal is now highly flexible and can be customized to meet the specific needs of an enterprise. It offers a modular architecture approach that allows for the integration of external systems as well as adding new features specific to the business’s needs. Drupal can scale to handle high traffic volumes and large amounts of content, making it suitable for enterprise-level projects.
Effortless Integration
Most people see Drupal as simply a content management system (CMS), but in fact, it also offers powerful marketing capabilities. Drupal 10 integrates effortlessly with services to provide functionality like segmentation, personalization, A/B testing, marketing automation, and analytics. When functioning as a core component of your digital experience platform, Drupal can easily tailor marketing campaigns, deliver targeted content, and measure the metrics that matter to engage the audiences you are seeking.
Multichannel Capabilities
Drupal 10 enables marketing departments to deliver consistent and engaging digital experiences across multiple channels, not just web. Drupal’s multi-channel capabilities allow businesses to seamlessly deliver content to websites, mobile apps, social platforms, IoT devices, and more. This empowers them to reach audiences with the right message at the right moment. While all of this is possible with Drupal 7, it is cumbersome to implement and maintain.
Strong Search Engine Optimization
Drupal 10 has features that contribute to strong search engine optimization (SEO). It provides clean HTML 5, semantic markup, and URL structures that can positively impact search rankings. Drupal also offers essential SEO modules such as XML sitemap generation, meta tag management, and redirects, which elevates site visibility in search engines.
Efficiently Manage Complex Content Ecosystems
Drupal excels as a CMS, providing powerful tools for creating, organizing, and publishing content. It offers a user-friendly interface, advanced workflow management, version control, and multilingual capabilities. These features enable enterprises to efficiently manage complex content ecosystems across multiple channels and touchpoints.
With Drupal 10, web teams can create and deliver custom content quicker and easier than ever. Current versions of Drupal embrace new technologies and trends in the digital space. It evolves with the industry, regularly releasing updates and new versions that incorporate the latest innovations. This ensures that enterprises using Drupal can stay ahead and take advantage of emerging technologies and best practices.
Easy Security Updates
Rather than jumping through hoops to implement security updates in Drupal 7, developers can run a single command to implement security updates for your site. This reduces the effort to update the site to keep bad actors at bay.
The ease of updates with Drupal 10 even goes beyond security updates. When Drupal core and contributed modules are updated with new features or bug fixes, they are available to your site using the same command. Starting with Drupal 8 and continuing into Drupal 10, the system uses Composer to manage package and library dependencies. This takes the guesswork out of knowing what underlying code is needed to make your site operate. Learn more about how Composer makes your site more secure and your developers’ lives easier.
Upgrade to Drupal 10 Today
Organizations still using Drupal 7 are missing out on the flexibility, customization options, scalability, and marketing capabilities available in the newer versions. Drupal 10 allows for the management of consistent and engaging digital experiences across various channels, enhances search engine optimization, and enables web teams to deliver content more efficiently. Interested in learning more about the features and benefits of Drupal 10? Check out this article.
Organizations with established workflows and data oversight protocols typically have firm opinions on how those processes should work, look and feel. Replatforming a website or application to Drupal 10 is an exciting opportunity to rethink aspects of your process and business logic, but sometimes you want to just go with what you know.
In a recent project, Bounteous helped a client replatform several sites. In these older platforms, page content was built URL by URL, subjected to a three-step approval process, and promoted to the live site. The client’s expectation was that every page—and more importantly, every asset on that page—would be individually reviewed and approved.
But how does one moderate embedded assets or shared content in Drupal? Items such as media entities and custom block content can be configured to use a content moderation workflow, but the process is independent of the page nodes on which they’re placed. Client stakeholders—site users responsible for reviewing and approving site content—don’t care about Drupal’s data models or reusable content strategies. Stakeholders want to experience their new or updated content exactly as the end user will.
This is a perfectly reasonable expectation, and it aligns with one of Bounteous’ guiding principles: Quality Assurance testing is a proxy for the customers’ experience: test from the end-user’s perspective. Drupal is a magical Swiss army knife, kept polished and sharp by a robust open source community, so with a bit of clever development and care we can meet this expectation. Improvements in Drupal 10 make this effort even easier going forward.
Basic Workflow Setup
Workflows became part of core in 8.9.x. Within a workflow configuration, one can create moderation states, create transitions between those states, enable Content Moderation Notification and create email rules to be triggered by those transitions.
The notification emails may include tokens relative to the content entity being transitioned from moderation state to state. If our entity is intended to be viewed as an independent page, with a URL, then we can include a link to “/node/XXX/latest” and “please review here” in our notification email to our stakeholder.
If the content being moderated is a shared content type, designed to be embedded and viewed in a different page, we would use a different token: we use business logic and entity query results (inspired in part by contrib module Entity Usage) to discover and render links to every URL on which this shared content is found. This shared content may be media entities, custom block content, and even node content in a View.
The stakeholder visits and reviews the updated content in situ—the context in which the end user will experience the content. To ensure that end users do not see these updates until approved and published, we use revision-handling techniques in our render cycle that, thanks to some newly merged work in Drupal 10, are now more standardized.
D10 Enhancements
An entity, with apologies to Gertrude Stein, is an entity is an entity, yes? Entity API allows us to treat custom blocks, media, and taxonomies as if they were nodes – fieldable, translatable, and revisionable. True, but the methods for handling revisions developed at different rates, and are not uniform from type to type. A patchwork of patches and contrib modules (Media Revisions UI, Block Content Revision UI) had sprung up to handle gaps and inconsistencies.
The road from patch to merge for a standardized revision UI was long and twisty and included assists, encouragement, and reviews from some of Bounteous’ own. The machine name of the revision message text field in media entities is revision_log_message, while it is revision_log for nodes and blocks. But today, developers creating their own specific workflow solutions will have a consistent set of methods they can use to get and compare revision ids. Less time on patches and workarounds means more time focusing on their specific challenges.
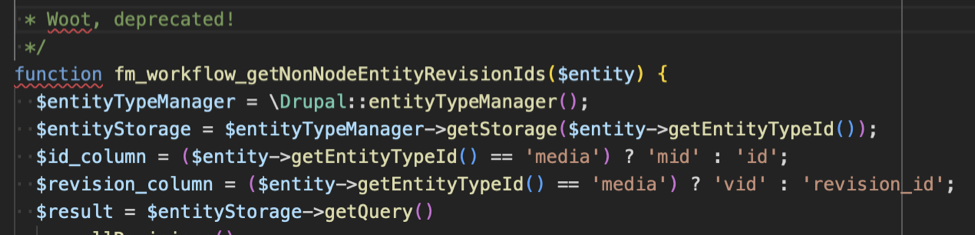
Media
Suppose we have a media entity with a URL alias of “/download-this-month-data” and a file named “/doc/month_01.xls” in a field. A content editor will create a new draft revision, upload a file named “/doc/month_02.xls” into the field, and save this revision as “Ready for Review.” Our stakeholder is sent a notification and asked to review this change on the homepage where we have a “Call To Action” linking to “/download-this-month-data”.
How can we ensure that, when clicking the link, our stakeholder user downloads “month_02.xls” for review, while our customers, our anonymous users, continue to receive “month_01.xls” until the update is published?
We created a RouteSubscriber that would send ‘entity.media.canonical’ type requests to a custom controller. Our controller checks for revisions and permissions.
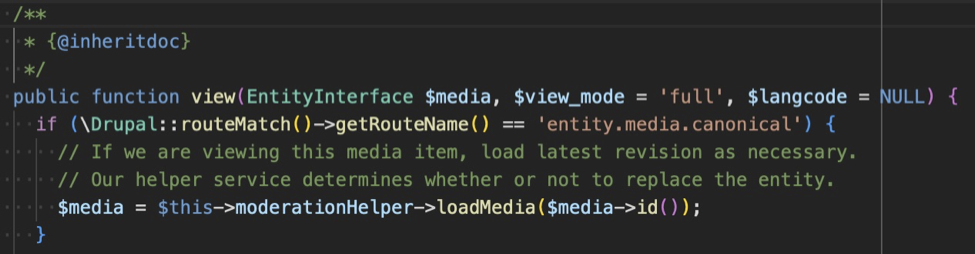
If there is a revision more recent than the default revision and if the user has appropriate permissions, then we load that specific revision. The controller writes a new DocumentResponse directly to the file attached to that revision, including appropriate caching and headers. This nifty work was inspired by Media Alias Display.
Blocks
Suppose a custom block of content has a new draft revision with updated text. For any user visiting a page with that block, the default revision will (by default) be rendered. How do we render that latest revision for an authenticated user? With an old-school hook_alter().
We’re interested in user-generated content blocks as opposed to non-moderated, system-generated menu- or webform- blocks, so we implement hook_block_view_BLOCK_BASE_ID_alter() with BLOCK_BASE_ID = “custom_block”. Again, we check for revisions and permissions.

If we need to override the default block render with the latest revision, we add a pre_render callback to the block render array. The callback function loads the latest block revision, renders the block and overwrites the render array’s content key with the new markup.
Views
Suppose we have a node type that does not have an individual detail view, it is only ever rendered as a listing in a view. When we create a revision for review, we do not want to send the stakeholder to “/node/N/latest”, we want them to review the updates on the view page.

We ensure all the appropriate views were built using Content revisions in the Views UI. The sets node_revision as the base table and builds in all the necessary table JOINs. We implement a custom filter plugin that adds a where clause to the query() method, depending on user’s permissions.
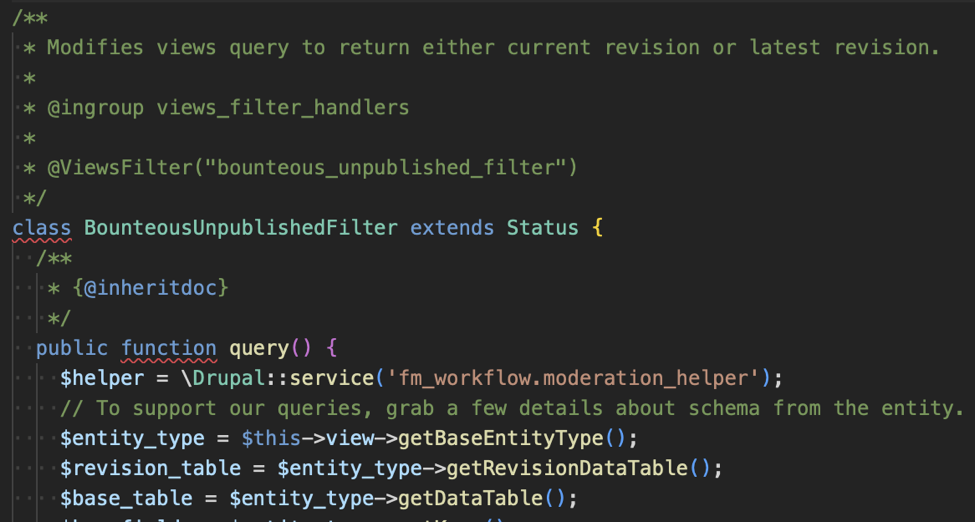
When configured to return revisions, Views UI only allows you to Show: Fields under Formatting. Fortunately, you do still have the option under Fields to render the entire entity using a view mode. Note that this requires a patch which only a PHP unit test away from the finish line. Finally, we add an unpublished_flag class to the row container field in hook_preprocess_views_view_fields() if the row’s entity is not the default revision.
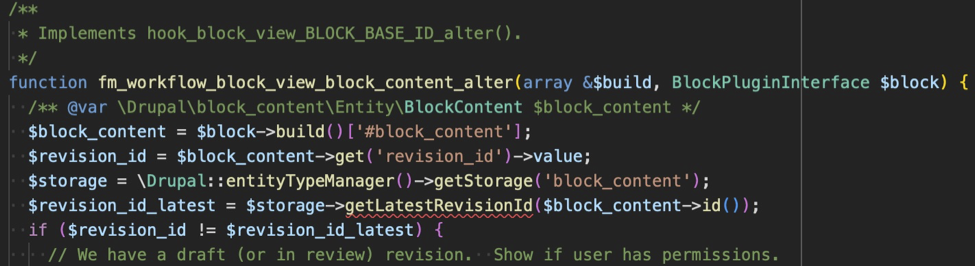
The fun is multiplied when considering entities which themselves reference other entities. For instance, a block of content is placed on a page in a paragraph entity with a Block Field instance. That block_content entity itself references another page node or media entity. Data from that second node or media entity is what we ultimately render on the page as a tile, but we flag that tile (to authenticated users) as unpublished if either the custom block entity OR the referenced entity are unpublished.
Front End Rendering
When we render these entities with unpublished flags, we add a CSS class that signifies to our stakeholder the block or view listing is showing updated or unpublished information. This can be in the form of a colored border or background or overlay.
Another class can implement a floating overlay that offers links to directly update the moderation status of the entity, leveraging implementation of contrib module Content Moderation Link. We recommend enhancing the user experience by inserting modal forms into the process, giving the stakeholder the opportunity to add custom messaging in the Revision Log field, and offering a conditional confirmation page, reiterating that publishing a change to this shared entity will affect pages X, Y, and Z.
Bounteous created custom solutions for most of this work, but we note several interesting modules in the community that are following similar paths, such as Moderation Note, and Content Moderation Info Block.
There are so many content types with so many points of entry to create solutions. Because of this, the continued standardization of an entity-agnostic set of tools for revision handling is a welcome enhancement. When creating a robust workflow process for your site-builders, remember to treat stakeholder users as the distinct population they are. Address their specific needs and empower them to keep site content correct, timely and safe.
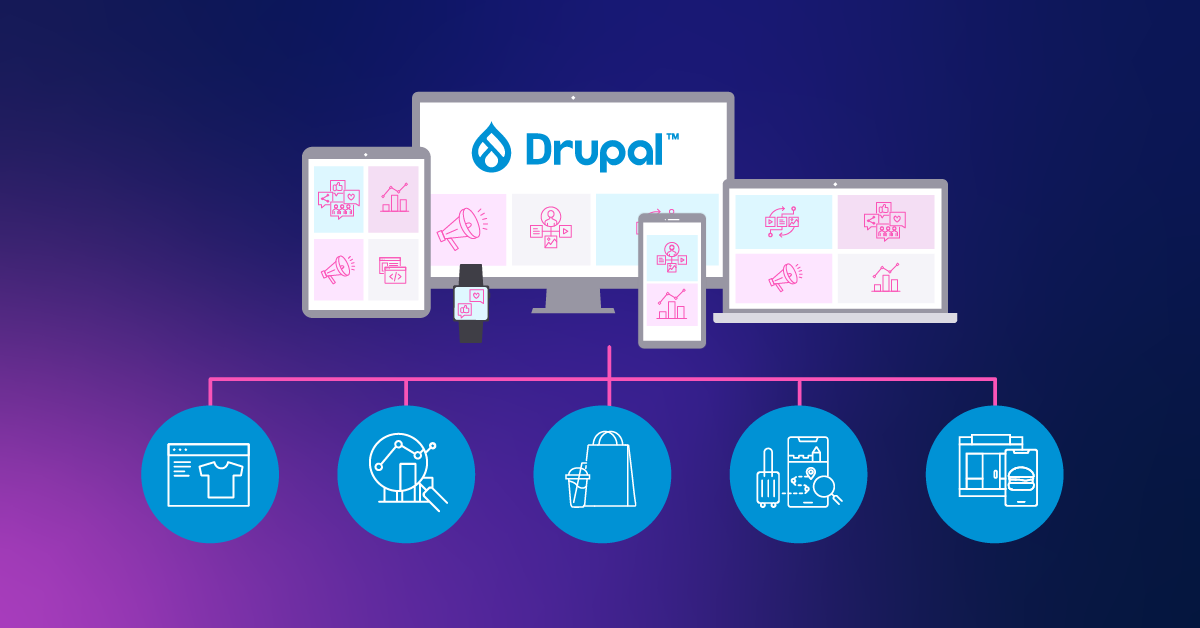
Businesses need to react quickly to changes and the wants and needs of their customers. While this has always been true, it has become increasingly evident since the COVID-19 pandemic hit and the disruption to businesses was massive. Overnight, brick-and-mortar businesses were forced to build or expand their digital footprint. The companies that had built their digital infrastructure with modular and open platforms had a huge advantage over their competitors.
One of the latest trends in the digital experience space is composable architecture. Using a composable architecture provides organizations with the ability to add new channels and add or replace digital capabilities quickly. The speed, agility, and flexibility that composable architectures provide better prepare organizations to adapt to changing technological and consumer trends.
What is Composable Architecture?
A composable architecture is one that uses a modular approach that effectively separates the digital experience channels (e.g. website, mobile app, digital signage) from the back end platforms (e.g. Commerce, CMS, Search). Two of the key principles of composable architectures are: composable architectures are front-end agnostic and composable architectures are back-end agnostic. Being front-end agnostic allows a composable architecture to be omni-channel. Being back-end agnostic allows a composable architecture to be omni-capable. These two principles are the key to the flexibility provided by a composable architecture.
To achieve those two principles, an orchestration layer is used to separate the front-ends from the back-ends. The orchestration layer is responsible for integrating with the back-end systems, applying business logic and processes, and providing an interface to provide the data and content to the front-end applications. To satisfy those responsibilities, the orchestration layer is built using packaged business capabilities (PBCs). PBCs allow the data and content to be retrieved from the back-end systems, processed, and returned to the front-end applications in an organized way. There is no one way to build and organize the PBCs, which provides additional flexibility.
Using a composable architecture results in a system that is flexible and agile. Adding a new channel, platform, or PBC can be done with a faster time to market. The back end developers can focus on exposing more functionality and platforms. The front end developers can focus on composing solutions to best meet the end users’ needs. The architecture is able to adapt to the ever-changing business needs. In essence, composable is headless at scale.
Composability Within Drupal
You may be wondering, if composable is the future, how does Drupal fit in? Drupal has been around for a long time, and during that time, it has continued to evolve. In many ways, as Dries Buytaert points out, Drupal has evolved to be a composable digital experience platform on its own. The goal has always been to allow developers to build flexible systems with a modular approach to allow their organizations to quickly adapt to their customers’ needs.
Drupal was an early adopter of the headless movement. Modules to expose the content via REST APIs using JSON and GraphQL have been available since Drupal 7 and many of these modules are now incorporated into Drupal core. Indeed, there are many recipes and starter kits that make building a headless Drupal site easier.
Being modular is a key attribute of a composable architecture. The ability to build solutions from reusable components provides agility and speed in building a new experience. The Drupal platform is modular. Drupal core comes with a variety of modules used to build most Drupal sites. In addition, the Drupal community has built thousands of modules that extend Drupal core allowing developers to extend the functionality even further. Developments like Project Browser are making it easier to find and use these modules.
One of the key benefits of a composable architecture is the ability to seamlessly integrate different back-end systems to create a best-of-breed solution. To deliver the customer experience that is demanded by their customers, organizations need to bring together data and functionality from a variety of platforms. Third-party integration modules are one of the key areas covered by the extensive pool of Drupal community contrib modules. With these modules, Drupal developers can build a composed solution within the Drupal platform that brings together data and functionality from a variety of platforms.
Part of the promise of a composable architecture is the ability to quickly bring together an experience. Having a low-code/no-code tool available can really speed up the process and this is where the Drupal platform shines. Layout Builder is a Drupal core module that gives editors the ability to build pages using drag-and-drop capabilities with prebuilt components built by the developers. Products like Site Studio from Acquia take low-code/no-code building to the next level. The business is free to innovate at the speed it needs to innovate.
In many ways, Drupal provides a composable solution. Drupal provides out-of-the-box support for a headless website. It’s built with a modular approach, is open and makes it easy to bring together many systems, and provides low-code/no-code builders that make it simple to compose solutions. And while Drupal can provide many of the benefits of a composable solution, it does not quite reach the full potential of a truly composable solution.
Composability With Drupal
A truly composable architecture is a modular solution where the front end and back end are completely separated by an orchestration layer. A composable architecture is more flexible, scalable, and efficient than a monolithic architecture. This results in huge benefits to the organization. As there is a need to add an additional channel to the digital experience, the builders have the flexibility to build it exactly as needed by leveraging the already built components. And, as the organization’s needs change, those components can be updated in one spot to efficiently distribute those changes. As the need to scale arises, the back end systems can be swapped out and scaled up without disrupting the digital experience channels.
Drupal has a long history of being used as a headless CMS. For the better part of the past decade, Drupal has been used to power some of the most innovative and powerful headless experiences. Beginning in Drupal 8, Drupal core provided REST and JSON:API support giving developers the option of using Drupal in a coupled or headless manner. In addition, Drupal provides GraphQL support by installing a community contrib module.
Drupal really excels as a CMS when it comes to complex authoring workflows and complex content modeling. Drupal has a mature feature set that makes building workflows and complicated data models easy. There is great flexibility and power to be leveraged with Drupal.
By using Drupal’s headless capabilities, Drupal can be a key part of a composable solution. Content administrators are comfortable using Drupal and developers can harness the power of Drupal. In a composable architecture, Drupal’s many features can be used while also using other platforms for their strengths. The best-of-breed model leverages the best of all worlds.
Composable architectures are a powerful approach to building headless at scale, and Drupal is a powerful tool that embraces many concepts of a composable architecture when used by itself. But Drupal is not limited to that. As organizations look to unlock the value of all their systems, Drupal can be a key component of a composable architecture.
Check out this blog to learn more about how composable is powering transformative digital experiences.

Every iteration of Drupal brings a multitude of security improvements, accessibility improvements, and a host of new features created by the Drupal community. Drupal 10, released in December 2022, brings impressive UI improvements that give a beautiful refresh to the admin interface and default theme.
Since the launch of Drupal 8 in August 2015, Drupal has continued to evolve and add new features that keep it in lock-step with modern development practices. One of the biggest changes that took root in Drupal 8 is the integration of Composer, a PHP-based dependency manager. Composer is a powerful tool that can be used to install modules, upgrade Drupal, and even check compatibility between modules and dependencies used across your project. Understanding how to leverage Composer to upgrade your Drupal codebase is an absolute necessity. Fortunately, Composer is easy to master.
In this article, we will give a brief overview of how Composer tracks your project’s dependencies in composer.json and composer.lock. We will then discuss leveraging Composer and community-built tools to ensure compatibility between your code and the latest updates. Finally, we will cover using Composer commands to upgrade Drupal and address conflicts.
If you are running an older version of Drupal such as Drupal 7, check out this article for tips on upgrading your website from Drupal 7 to Drupal 8+.
Key Composer Principles
Composer is a PHP-based dependency manager that is used to track and download things like Drupal modules, Symphony libraries, and even Drupal core itself. Composer uses semantic versioning to communicate compatibility between different package versions. A change in the major version (such as from Drupal 9.x to 10.x) means that there are potential incompatibilities that developers may need to address when upgrading a project.
Composer uses a composer.json file to track our project’s explicit dependencies as semantic version ranges. For example, your project may require drupal/core:>=9.4 which tells Composer to install Drupal core version 9.4 or greater. Each one of the modules and themes used by your project will have a corresponding line in composer.json.
Each one of our project’s dependencies will have its own dependencies. For example, the Drupal Commerce module requires the Address module as well as a non-Drupal PHP library used for currency formatting. When we download the commerce module, Composer will also download the Address module and Currency formatting library.
As Composer resolves each of these dependencies recursively, it builds a full list of 3rd party dependencies used across your project (including dependencies of dependencies). The fully resolved dependency tree is then stored in the composer.lock file. This file contains the metadata of each dependency, including the location the package is downloaded from, any PSR-4 autoloading information, and a hash that references the exact version of a dependency. When other developers and CI pipelines run the composer install command, Composer reviews the composer.lock file and downloads all of the listed dependencies to your project.
Assessing Upgrade Compatibility
Incompatibilities can take a few different forms. In the case of Drupal 10, there were 8 modules, and a theme removed from core (some were moved to the contrib space, others deleted). We also see various deprecated functions removed from the core completely. If your project relied on any of these you will need to take action to resolve the incompatibilities.
The Drupal community maintains a module called “Upgrade Status” which can be used to give you a full picture of your upgrade path. This module gives you a series of tools that can be used to scan a Drupal installation for deprecated module usage. It also scans your codebase for calls to deprecated functions, or incompatibilities in info.yml and composer.json files.
# Install the latest dev version of Upgrade Status
composer require drupal/upgrade_status:4.x-dev --dev
One of the most powerful tools that comes with Upgrade Status is called “Drupal Check”. Drupal Check uses static analysis with PHPStan under the hood to find calls to deprecated functions. Drupal-check is a great tool to help find errors in code in a performant manner, and is the type of tool you should have built into your CI pipeline. I would be remiss if I didn’t call out Acquia BLT, which has Drupal Check built in!
Upgrade Status has a dependency on Drupal Check. This means Composer will automatically install Drupal Check alongside Upgrade Status during the composer require command. We can also explicitly require just Drupal Check via a similar composer require command.
# Require Drupal Check explicitly
composer require mglaman/drupal-check
# Run drupal-check
php vendor/bin/drupal-check
Running Drupal Check will output a list of potential code issues for you to check and resolve before performing the upgrade. Any calls to deprecated code can be resolved using Drupal’s change records. Drupal’s codebase will also usually emit PHP notices containing details on how to resolve the deprecation moving forward.
PHP Version Upgrades
Drupal 10 requires a minimum of PHP 8.1, which is a far cry from the minimum of 7.4 required for Drupal 9. PHP 8 brings impressive optimizations and changes to language constructs. Composer allows us to specify PHP version as a project dependency in the same way we require other dependencies. This forces Composer to check whether our packages are compatible with PHP 8.
composer require php:"^8.1" --no-updateWe are also able to require a specific version of PHP to be running on the host machine. This will give developers a heads-up if the PHP version running on their system hasn’t been upgraded to the appropriate version.
composer config platform.php 8.1Most PHP 7.4 code is compatible with 8.x, but it is always a good idea to review backwards compatibility via change notices and the tools outlined above.
Upgrading Drupal Core With Composer
Finally, it's time to upgrade Drupal! Using Composer, we can explicitly require Drupal 10 using the composer require command. This will update our composer.json and add Drupal 10 as an explicit dependency. We also pass the --no-update flag to prevent the full dependency resolution process from running. This gives us a good spot to “save our work” before we embark on the upgrade process.
composer require drupal/core:"^10.0" --no-update This require command tells Composer that the minimum acceptable version of Drupal core is 10.0. The package to place an explicit version requirement on will vary from project to project. If your project was set up using the instructions on Drupal.org, this version requirement would go on the drupal/core-recommended package. You can find the package to place the version constraint on by inspecting your composer.json file.
composer require drupal/core-recommended:"^10.0" --no-update Finally, we can upgrade all of our dependencies by running the command:
composer updateThis command takes the information in our composer.json file and attempts to resolve the dependency tree. As it does this, it will analyze all your project’s dependencies, including PHP version, and determine if there is a way to satisfy all of your dependencies. This process usually isn’t straightforward, and you may end up with conflicts. This is ok! In fact, this means Composer is doing its job properly in spotting conflicts.
The conflict output will be something like the following:
- Root composer.json requires drupal/devel ^4.0 -> satisfiable by drupal/devel[4.0.0-rc1, ..., 4.x-dev].
- drupal/core-recommended[10.0.0-alpha4, ..., 10.0.0-alpha5] require symfony/var-dumper v6.0.8 -> satisfiable by symfony/var-dumper[v6.0.8].
- Conclusion: don't install symfony/var-dumper v6.0.8 (conflict analysis result)
In this case, Composer is telling us devel is causing a conflict with Drupal core on one of their mutual dependencies - symfony/var-dumper. After visiting the Devel module page we can see there is a newer version of devel that is compatible with Drupal 10. We can require the new version of this module, then re-run the update process.
composer require drupal/devel:^5.0 --no-update
composer update
This resolves the version incompatibility for the devel module, and we would continue on to resolve other conflicts posed in the update process. Resolving these conflicts may require a few different approaches. Sometimes it requires using the dev version of a module, other times it might require submitting your own patch to Drupal.org. The Upgrade Status module does a lot of this legwork for us, but understanding and resolving Composer conflicts is an important skill in modern Drupal development.
From here the process is rinse and repeat - run Composer update, analyze conflicts, and resolve with the appropriate approach.
Historically, upgrading between Drupal versions has been fraught with challenges that require extensive development and testing. Since the introduction of Composer and community tools like Upgrade Status and Drupal Check, upgrading has become near trivial. With a little bit of configuration and know-how, Composer can be used to upgrade everything from PHP versions and contrib modules, to Drupal core itself,all while finding incompatibilities and potential issues.
Understanding and using Composer appropriately is the key to successful upgrades and maintenance of modern Drupal projects.
In a modern DevOps world, a large part of the deployment pipeline is automated across multiple tools. Most DevOps pipelines validate, test, build, and deploy code, all automatically. It can be tempting to trust the system to just handle these steps. When something goes wrong, how long does it take you to find out? Does your QA team often wonder why a ticket that is marked for them to test doesn’t seem to actually be available? This is where ChatOps comes in. ChatOps turns your chat messenger into a communication hub for the team and the automated DevOps pipeline. Acquia’s Build & Launch Tool comes with Slack messaging built in. This guide will walk you through a basic ChatOps set up with BLT and Slack.
Getting Slack Ready
To use Slack as your hub for automated messaging, you’ll need a channel that can receive messages via a webhook. There are two schools of thought: some prefer using a separate channel, dedicated to devops messaging; other teams prefer having the devops messages right in with the rest of the team chat. Which is right for your team is largely a matter of preference.
Teams that prefer to have devops messaging in a separate channel usually do so because devops messaging can get repetitive and clutter the general chat with messages, obscuring real discussion between developers. Placing devops messages in their own, dedicated channel allows team members to set appropriate levels of notifications without interfering with the team's normal discussions.
On the other hand, some teams prefer to have devops right in the middle of everything. It’s important to know when things are happening in the repository and when deployments are under way. Having devops messages appear in the main team chat forces everyone to be aware of what’s happening in case.
Regardless of your decision, you’ll need to setup a webhook to receive messages. Slack makes this very easy.
- Create a new Slack app or open the settings for an existing one.
- Select the Incoming Webhooks in the left navigation and click Activate Incoming Webhooks if it is not already enabled.
- Click Add New Webhook to Workspace. Pick the channel you want to send devops messages to and click Authorize.
- You’ll receive a unique webhook URL; hold on to this for later.
Connecting Slack to Acquia BLT
BLT is a wonderful way to automate a large part of your Drupal maintenance on Acquia. It is easy to configure via YAML files and has a large number of built-in scripts that require little to no setup and provide great benefit. Even better, Acquia BLT has a Slack connection built-in, you just have to provide your webhook URL in the configuration file!
Adding Slack communication to your BLT operations is as simple as editing the blt.yml file. Just add this configuration to your blt.yml and push the code to Acquia. Make sure you use your unique webhook URL from the previous section.
slack:
  webhook-url: “https://my.slack.webhook.url/########”
Once this configuration is deployed to Acquia you should start seeing messages in your Slack channel like the message below.

Bonus: Connecting Your Code Repository
Acquia BLT provides chatops for an important part of your devops pipeline. It helps cover that “last mile” where code is actually deployed to Acquia. What about the rest of your pipeline? Chatops can bring in the rest of your code operations as well, truly making Slack the hub for your team's devops pipeline.
Git is the most commonly used version control system and most of the major Git remote providers already have Slack apps. This list includes Bitbucket, GitHub, and GitLab. Connecting each of these apps is generally very simple!
Bitbucket
Bitbucket makes this wonderfully simple. First, install the Bitbucket Cloud Slack app. With the app installed, you can subscribe any channel to any repository with a simple slash command.
/bitbucket connect
This will connect the channel to your repository and open a browser tab where you can select the relevant events in Bitbucket. By default nearly everything is selected, providing a robust view of your repository activity.
GitHub
GitHub also provides a helpful Slack app. Installing the GitHub for Slack app will provide a slash command, subscribing the channel to repository activity.
/github subscribe [repository name]
The GitHub for Slack app will post in the subscribed Slack channel with any repository activity. This will keep your development team aware of any changes or actions required.
GitLab
GitLab doesn’t provide an app integration for notifications but it can use the webhook you generated earlier! To set up the Slack notifications service, follow these steps:
- Go to your project settings and select Integrations.
- Select Slack notifications.
- Select the Active checkbox in the Enable integration section.
- Select the triggers you would like notifications for.
- Enter the webhook URL you created earlier.
- Select Save Changes.
GitLab should now send notifications to the same channel that Acquia BLT notifies!
That’s How It’s Done!
Setting up ChatOps with Acquia BLT is that easy. This messaging will appear for database copies and backups, deployments, and code switches. If you also connected your code repository, you should have a complete picture of your code and deployment activity. Now your team will have a consistently up-to-date awareness of your Acquia application status!
Acquia has been very busy developing new features for Site Studio over the past year, making it an even more compelling answer to Drupal core's Layout Builder functionality. With Site Studio, you get everything you need for site building, whether it’s an atomic design based component library, or more traditional, locked down page structures; Site Studio offers it all. While Layout Builder was a massive addition to Drupal earlier in the version 8.x lifecycle, it hasn’t kept up with the way users look to construct pages. Its setup and user interface is clunky at best and requires a lot of extra additions through other Drupal elements, such as custom block types, paragraph fields, etc. in order to truly be useful to content editors and marketing managers.
The drag-and-drop, low-code solution has been receiving regular updates every few months. The biggest of these changes is the ability to create custom components in code. We’ll discuss that major change as well as some other highlights from Site Studio 6.9. Additionally, we’ll also catch you up on some other new updates from other previous releases that you may have missed. Let's take a look at a few of these enhancements!
Custom Components for Acquia Site Studio 6.9
This feature, released recently in version 6.9 of Site Studio, provides developers the ability to define custom components entirely in code. Prior to this, a developer would need to use the Site Studio backend to drag and drop elements into a layout canvas, and from there configure all the various elements (by adding CSS styles, HTML attributes, etc.) using the Site Studio UI. While this process often works well when building simple components, it can quickly become cumbersome and limiting for more complex components.
With this new update, developers can build custom components entirely in code and the process is simple. You first create a directory in your theme or module where you will store your component. In that directory you create a .yml file which defines what assets need to be included with your component (ie, your CSS and JS), and then you specify what kind of template will be used to render your component. You can choose from rendering via a standard HTML template, a TWIG template, or a JavaScript template. Optionally, but probably recommended, you can add a form.json file to define what the edit form for the component should look like (more on that in just a bit). So your custom component file structure may look something like the following:
/path/to/my-theme/
/custom-components
/card
card.custom_component.yml
form.json
card.html
card.js
card.css
This new functionality is a game changer for developers who feel bogged down by having to work within the Site Studio UI, or who feel they are not able to take advantage of Site Studio to build richer, more complex components. With this new approach, it is now trivial. Check out this example of how to build a React-powered component! In a custom component, the necessary React code can simply be attached as a dependency in the component's definition, just as you would with a React-powered custom block.
Beyond the process of building a component, another advantage to this approach is that component definition is taken out of Drupal config. Exporting Site Studio components to config (as an enormous JSON file) has always been troublesome, if only because code review of the config is nearly impossible (but for other reasons as well). Now, pull requests will include links to markup, JS and CSS that can be reviewed easily and coherently. Furthermore, collaboration between developers on a single component is now possible without exporting and importing config. This really does elevate the experience considerably for developers.
Finally, this opens up the development process to those who are not familiar with Drupal (or maybe even those who do not have access to Drupal). All development can happen outside of the CMS, with the exception of building the form that will be used by content authors. For that process, Acquia has provided a Custom Component Builder where a developer can use the layout canvas to design an authoring form for their component. Once built, the JSON for the form can be exported and added to the component directory. This may be the most cumbersome part of what is otherwise a very slick and exciting new way to build components in Site Studio.
Custom Elements Can Be Containers
Site Studio allows users to create custom layout canvas elements, which is nothing new. Now, we can make custom elements behave as layout containers, meaning users can place nested elements side of a custom element, further making it a powerful feature for builds that require some custom code additions.
Accessibility Improvements
Site Studio comes with a handful of interactive components that can be used out of the box to create things such as sliders, accordions, and even drop down menus. These components include all the JavaScript necessary to power the component. However, in the past we have found that some of these components lack certain accessibility features, and as a result we end up rolling our own custom components and including our own JavaScript plugin (or writing our own JavaScript, if necessary).
Release 6.6.0 included a number of substantial updates to the built-in slider component, addressing a number of accessibility issues. The updates are based on the excellent work by Accessible360 on their Slick slider replacement.
A couple of the more notable improvements include:
- Users can define an `aria-label` for the Slider container, providing a place to include descriptive text for screen reader users.
- Instructions can be provided for screen reader users on the Slider container. This can be very helpful as it provides a way for screen reader users to learn how to navigate the slider.
These two properties are not visible by default, so when adding a new slider, you will need to edit the slider container and then click Properties -> Accessibility, and then check the Accessibility checkbox:

You will then see an accordion item in the slider container's edit form with fields for "ARIA Label" and "Screen reader instructions:"
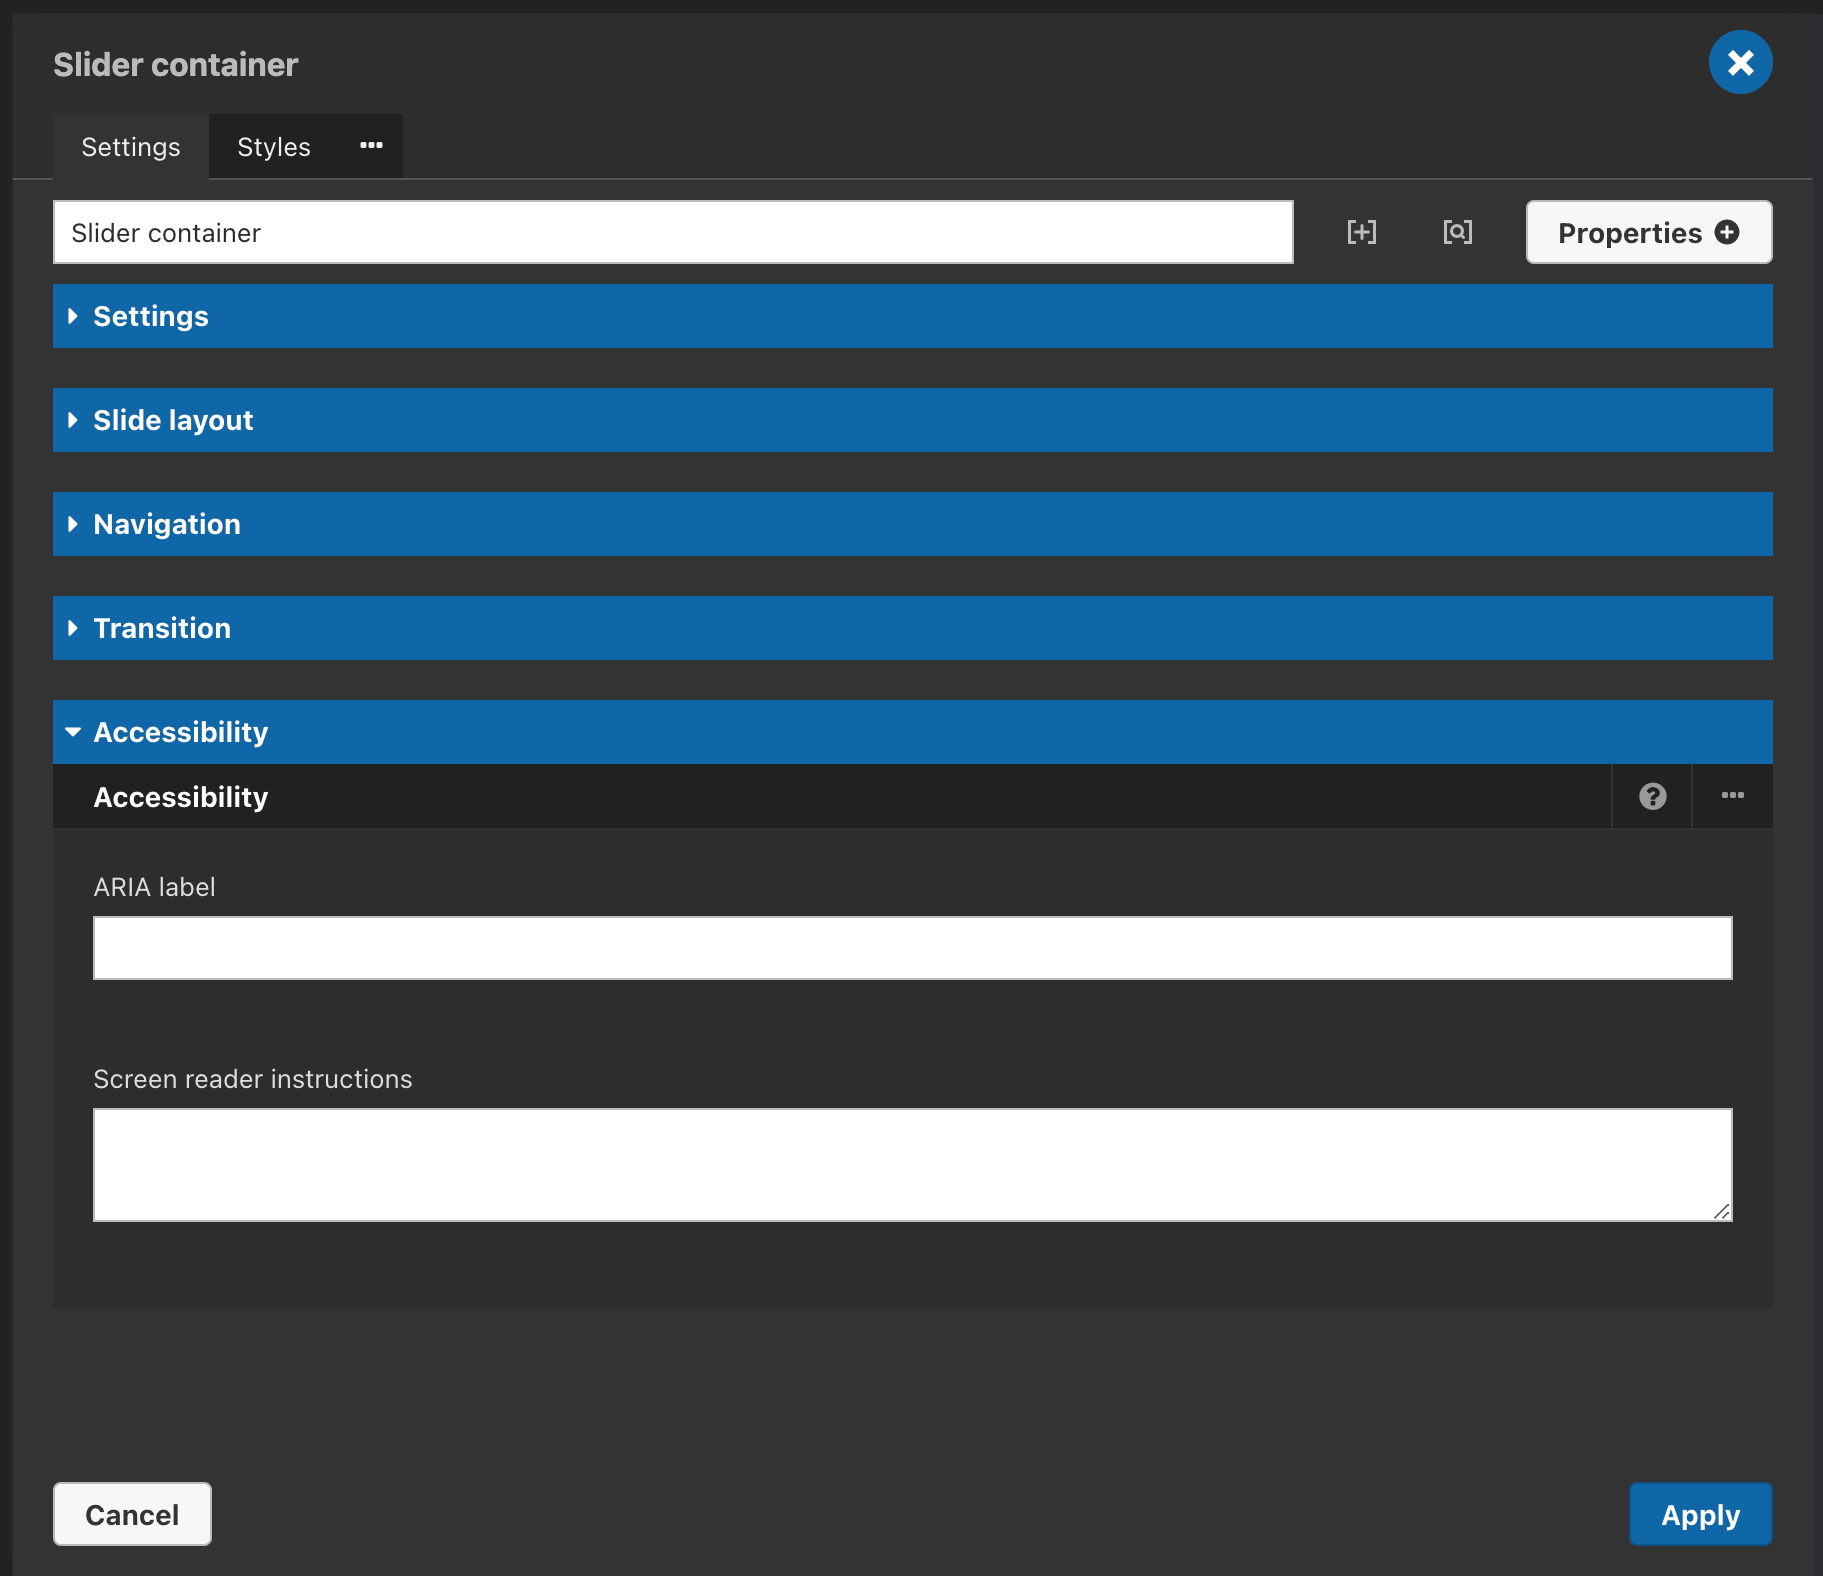
With these changes, site builders can feel confident that adding an out-of-the-box slider will be both functional and accessible, without having to get their hands dirty writing any JavaScript.
Copy Token Button
The layout canvas now includes a button to allow users to copy token values. This sounds like a tiny update, but this is a huge improvement in the user experience for site builders. Previously, you would have to manually type in the name of a token, an operation obviously prone to error.
Undo / Redo Layout Canvas Buttons
Another new feature added to recently is the ability to undo / redo changes in the layout canvas. This feature adds two buttons to the top of a layout canvas allowing you to go back and go forward with your changes. This is another minor change that goes a long way to improving the component building experience. Like with any undo/redo feature, there is a risk of manually deleting data by using the buttons inadvertently.
New UI Kits
Though not strictly a new feature in Site Studio, Acquia is now offering two new UIKits for Site Studio users. Think of these UIKits as Bootstrap for Site Studio. They offer site builders a way to quickly populate a site with pre-built and styled components for things like modals, sliders, tabs, etc. These new UIKits also come in two flavors called the Primitives UIKit and the Sections UIKit. Let's take a closer look at these two and see what the difference is!
Primitives UI Kit
The Primitives UIKit is intended to provide maximum flexibility for site builders and designers. This kit comes with a comprehensive set of content components and layout components that can be mixed and matched and combined to create an endless variety of designs. The components are granular and discreet - think cards, videos, testimonials, stats and sliders. When combined with the Visual Page Builder, content authors have a drag-and-drop interface which allows them to build very complex pages, and they are able to do so quickly and efficiently. This kit is best for sites with varied content that would benefit from the flexibility that it provides. Content editors using this kit would likely benefit from some training in how to combine the various components in the most effective way and would be trusted to do so consistently.
Sections UI Kit
If you want to get a site up and running as quickly as possible, and you do not have highly-customized designs, the Sections UIKit will likely be what you are looking for. Rather than providing a collection of discrete components as in the Primitives UIKit, the Sections UIKit instead provides a collection of pre-built "page sections" that can be mixed and matched as needed. Where the Primitives UIKit includes a "map" component and a "text" component, the Sections UIKit includes a "Text and map section" where the discrete components are already combined into one page section. By stacking page sections on top of each other, content authors can very easily build landing pages full of rich content with very little training.
Acquia has made some significant improvements to Site Studio in the last year. Most importantly, the support for Custom Components is going to be a game changer for a lot of developers, and will significantly expand what kind of sites can be developed using this platform. We look forward to using this new functionality and pushing its boundaries.
Growth and Maturity
Site Studio was already a powerful tool in Acquia’s impressive line of products, but it continues to grow and improve. The addition of the custom components feature alone opens up Site Studio to a much larger potential user base. At Bounteous, we will look to dive in further into these new features and look forward to where Acquia takes Site Studio in future.
As with any Drupal updates, it's recommended to fully test these new features and fixes (as applicable) on your site's development environment before deploying to production. You should also have a backup of any code or databases before upgrading. Version 6.9 of Site Studio is not backwards compatible.
For additional information on Site Studio, check out some of our other posts:
As a developer, building a partially or fully headless Drupal site can feel like a daunting task. There are always more questions than answers when getting started. Like with any new site build, determining the build path in the beginning is crucial to ensure your site is scalable. Acquia offers a site starter kit called Acquia CMS, which is a pre-packaged version of Drupal and an enterprise content management system.
To improve headless applications and make API management and site building easier for front-end developers using Acquia CMS, Bounteous collaborated with Acquia to co-develop a Headless Dashboard module for Acquia CMS. This module is currently in beta but will be able to get you up and running via Next.js with a Headless site with relative ease. Let’s take a look!
Acquia CMS Headless Users
In Acquia CMS Headless, there are two general types of users:
Content Managers
Whom the CMS is built for, manage the structured content that gets served to third party consumers such as node.js websites, front-end apps, IoT integration (e.g. smart displays) and native mobile applications.
Developers
Who build those third party consuming applications. They need to use the CMS to:
- Setup consumer identity, permissions and access
- Setup data models for consumption
- Access API documentation based upon the defined data model of the CMS.
These developers are commonly working with javascript/typescript frameworks such as React, Next, Vue and Svelt and do not need to be PHP or Drupal developers (the technology Acquia CMS is built on).
Accessing the Headless Dashboard
The headless dashboard can be found as a drop-down from the Tour menu item in the admin menu navigation.
Headless Dashboard Overview
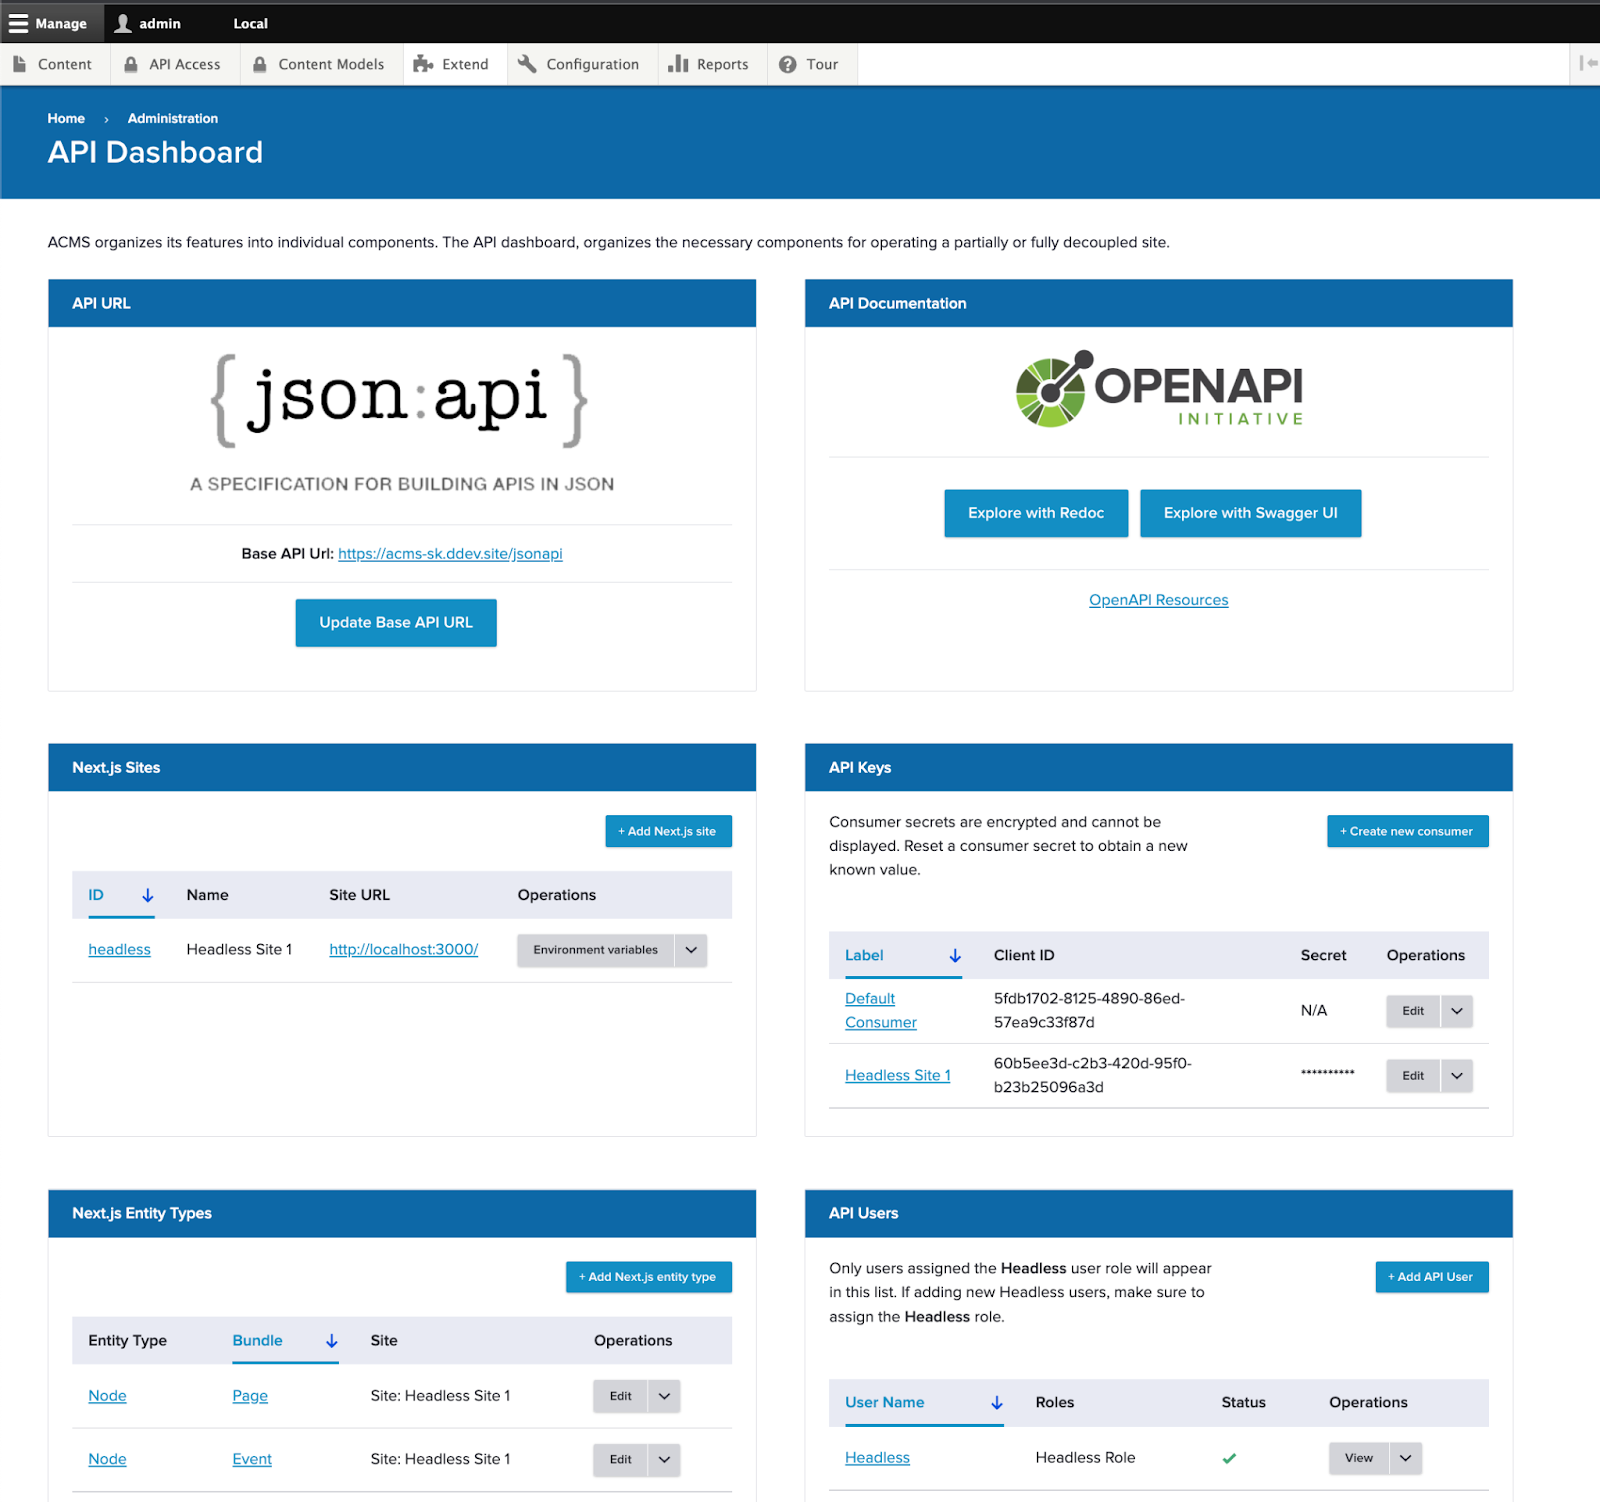
API Endpoint and Documentation
At the top of the dashboard, you’ll see access to the default endpoint: json:api. json:api is a standardized format for communication over APIs. There is wide support for json:api across many languages including drupal-jsonapi-params: A library for building query parameters when connecting with Drupal CMS’s JSON:API.
All of Acquia CMS’s data model can be accessed through the json:api endpoint and you can access the documentation for that endpoint through https://www.openapis.org/: a standard for API documentation. It comes in with two UIs: Redoc and Swagger UI.
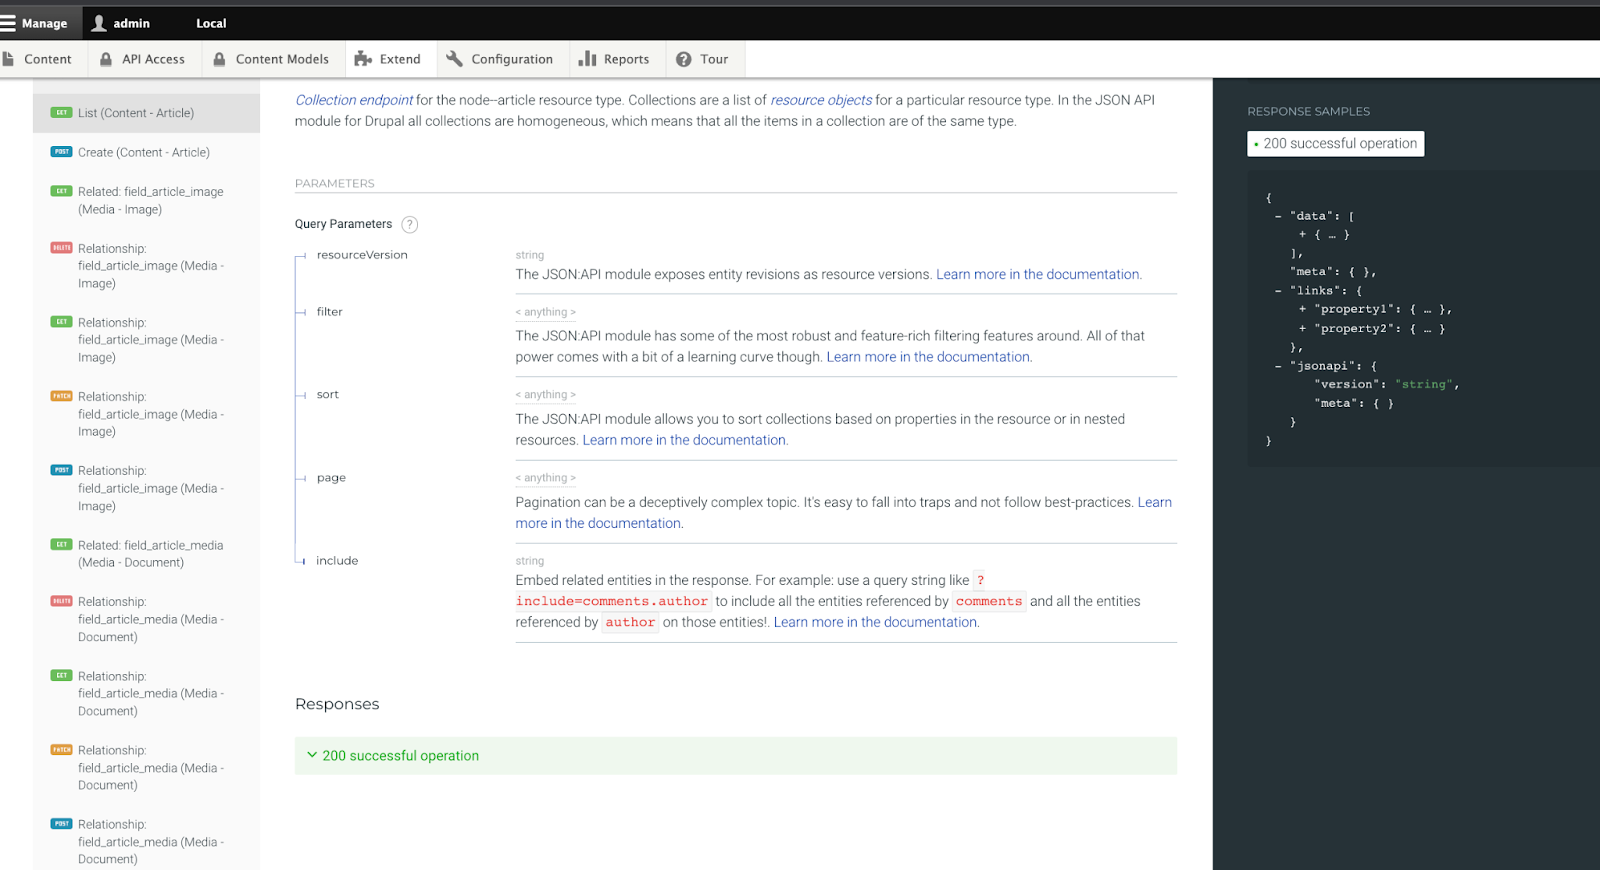
Viewing the article content type from the default content model in Acquia CMS through the Redoc API endpoint documentation inside the CMS.
API Access
With Acquia CMS users and roles, you can customize how consumers authenticate with your API (using API keys) and what parts of the API they can access (using users and roles).
By default, Acquia CMS is setup for OAuth authentication using OAuth consumers. From the API Keys panel in the headless dashboard, you can create new consumers and determine which users and roles a consumer should represent.
Any user assigned the Headless Role, they will also be listed here in the dashboard under API Users. This way it is quick to see all the users that represent your API consuming third party applications.
Next.js sites
Out-of-the-box, Acquia CMS comes ready to integrate with Next.js for Drupal: a library for native integration between Next.js and Drupal over the json:api endpoint. Acquia CMS also has a next.js starter kit here (see tutorial).
Knowing about your Next.js sites helps:
- Know how to route site preview* for a given content type to the right next.js site
- Provide the required environment variables for the next-drupal application.
- Handle content invalidation at the Next.js application when updates occur in the CMS (experimental feature).
If you’re interested in using Next.js, check the Next.js starter kit check box in the Acquia CMS Tour setup. This will precreate the Next.js site, user, roles and configuration ready to integrate with your next.js application.
Get Started with Acquia CMS Headless
If you’re a developer building with Acquia’s headless CMS, the headless API dashboard makes working with Acquia CMS easier than ever. Try it out now!
Visit dev.acquia.com for more information.
Building the best Drupal websites starts with the best Drupal tooling. Nearly all modern Drupal websites are built using a “local environment” which gives developers a place to create exciting new features without affecting the production environment.
Getting a local environment configured and using it to perform daily tasks often requires a plethora of custom scripts and tools built by a DevOps guru. Tools like Drush and Lando make this process exponentially easier, but there is often still a need for custom scripts to simplify the lives of developers. The less time a developer spends on maintaining a local, the more time they can spend developing world-class web experiences.
As the Drupal practice at Bounteous has grown, so has our tooling. What was once a hodgepodge of custom, client-specific bash scripts, have evolved into reusable, pluggable tooling that can transfer from project to project - all built on Acquia’s Build and Launch Tool (BLT).
BLT is a Drupal-specific extensible toolset designed to help you build, test, and deploy your code. It provides a vast array of commands to get you up and running quickly, including commands to configure your local, sync databases, or even run post-deployment tasks like config import. The majority of the BLT can be configured via a single YAML file, allowing you to hit the ground running on any sized Drupal project.
Compatibility with Drupal Sites
BLT can be installed via composer (a tool used to manage 3rd party PHP libraries) and it operates in a similar fashion to Drush. When installed, you are provided a new CLI tool at vendor/bin/blt which is used to trigger BLT commands. This CLI tool requires that your system be able to run PHP scripts, which is also needed for Composer and Drush commands. BLT frequently invokes Drush commands to complete its tasks.
BLT comes configured “for Acquia” out of the box, but it doesn’t require an Acquia subscription to be used. At Bounteous, we use BLT for various clients and side projects, including Drupal sites hosted on custom infrastructure or by other Drupal providers like Pantheon. BLT’s flexibility and pluggability make it the perfect tool for any Drupal site hosted on any platform.
However, where BLT really shines is when it is used in conjunction with Acquia hosting. BLT’s default settings.php file comes baked with Drupal hosting best practices - including memcache and config split settings. It will also recognize when the tool is being used on Acquia hosting and automatically include the appropriate settings needed to connect to the platform. This means configuring your Drupal site for Acquia is as simple as configuring BLT!
Acquia BLT Plugins
BLT is built on Robo, a customizable and extensible PHP task runner. New commands can be easily installed via 3rd party packages, or through your own project’s configuration - blt recipes:blt:command:init will configure this for you. We have implemented custom BLT commands for everything from Acquia Cloud Site Factory (ACSF) management to Acquia Cloud IDE configuration.
Acquia and the larger Drupal community maintain a plethora of plugins that extend and enhance the BLT toolset. There are numerous integrations with local environment tools such as Lando, DDEV, and DrupalVM. Acquia also provides a number of plugins that offer better integrations with Acquia products. For example, there is a plugin for ACSF which provides commands to initialize and validate required settings files.
Acquia keeps a list of plugins in their knowledge base which you can find here.
Installation & Configuration of Acquia Build and Launch Tool
Installing BLT is as simple and easy as installing Drupal’s contrib modules. We won’t cover the initial set-up of a new Drupal codebase (drupal.org has helpful guides on this), but assuming you have an existing codebase, BLT can be easily installed via composer.
composer require acquia/blt
During the initial installation of BLT, a YAML configuration file will be generated in your project root at blt/blt.yml. This file contains important metadata about the project and options that drive much of the behavior of the tool. The following is a snippet from the BLT configuration that drives the bounteous.com website. These settings are used in many places throughout the tool, and give us some basic information about the name of the project.
project:
 machine_name: bounteous
 human_name: 'Bounteous.com'
 # Used for enforcing correct git commit msg syntax.
 prefix: BCE
BLT Local Environment Setup
To work on a Drupal website, most developers use a “local environment” such as Lando or DrupalVm. Most of the common local environments in use by the Drupal community have a corresponding BLT plugin that can be leveraged to quickly configure and boot your local. These plugins are optional but are often handy when working on the initial configuration of a process. In the case of Lando, Mike Madison maintains a composer package that will perform the configuration (including adding a lando blt command) for us.
composer require --dev mikemadison13/blt-lando -W
blt recipes:vm:lando
Once your local environment is configured and booted, you can begin the setup of your Drupal site. There are a few different strategies we can take to set up Drupal with BLT. For existing sites, we typically sync the database from our staging environment to our local environment. BLT also supports installing a fresh site from existing config or from an install profile. The following is the local environment configuration for bounteous.com which we use to sync the database from our dev environment (the @bounteous.dev drush alias) to a local Lando environment.
# This will be used as the local domain for all developers.
 local:
   hostname: '${project.machine_name}.lndo.site'

# Sync db strategy
# drush sql-sync @bounteous.dev @self
# Valid values are install, sync, import.
setup:
  strategy: sync
drush:
# Set our source db.
  aliases:
    remote: 'bounteous.dev'
# optionally disable sanitizing data.
  sanitize: false
This configuration is used during the blt setup and blt sync commands.
BLT Frontend Compilation
No Drupal setup is complete without a frontend build process! BLT offers command hooks that allow you to execute custom commands at various points in the setup process. In the case of frontend hooks, they offer a way to execute our npm commands inside of our theme directly. Bounteous.com uses npm to compile the theme, but we can also use any other CLI tool here such as gulp. We can also specify the directory to run these commands in so that we don’t need to worry about execution context.
command-hooks:
 frontend-reqs:
   dir: ${docroot}/themes/custom/bounteous
   command: 'npm ci'
 frontend-assets:
   dir: ${docroot}/themes/custom/bounteous
   command: 'npm run build'
This configuration is triggered during the blt frontend command.
Drupal Setup
Once you have your local environment running and your blt.yml configuration set, it’s time to run the setup process! This will make any final tweaks to the codebase needed to bootstrap and install Drupal including:
- Running composer install.
- Creating a local settings.php file that points drupal to the appropriate database.
- Running frontend tasks via
blt frontend. - Running a database sync or running a site:install command.
This process can be triggered via the setup command:
blt setupOnce setup has been successfully run, a developer will have a functioning local Drupal site!
Quick & Painless
Acquia BLT offers a quick, painless way to run and maintain a Drupal environment.
What was once the wild west of Drupal DevOps scripts has settled and matured into Acquia’s Build and Launch Tool. BLT offers many commands out of the box that allow us to get up and running quickly on a project. Its configuration and installation are dead simple, its internals are well thought out and easily customizable. BLT has been an integral part of many Bounteous Drupal builds.
For more information on BLT, check out the following:
Drupal 10 will be arriving summer of 2022. Much like the update from Drupal 8 to Drupal 9, this update will be a smooth transition for any well-built and maintained Drupal site. Since Drupal 8, the maintainers of Drupal have implemented a predictable approach to releasing new versions of the CMS. This benefits everyone that builds, maintains, or manages a Drupal site by giving us a clear path for updates from one major version to another.
In many cases, this update is trivial for developers and can be performed with a few simple steps. For site administrators and content creators, it's a seamless transition that brings in new features and enhancements that makes managing Drupal sites easier and faster.
The first beta version of Drupal 10 will be released alongside a beta version of Drupal 9 (either 9.4 or 9.5, depending on Drupal 10's readiness). The release of these together is intentional and reveals the commonality between these two major versions of Drupal. When Drupal 10 drops, it will essentially be the same as the last minor version of Drupal 9, with a few key differences that will benefit site managers and developers.
Deprecated Code Removed
Drupal core code and libraries that have been identified as "deprecated" in Drupal 9 will be removed. Throughout the life of Drupal 9, improvements have been made to the code that runs the framework. When an enhancement is made in the code, there's likely some other code that can be retired.
That retiring code can't be immediately removed as it may break functionality in a site's custom code or contributed modules, so this code is marked as deprecated to communicate that it's being removed in the next major version of Drupal. This gives developers ample time to update their code to be compatible with Drupal 10.
An example of deprecated code in Drupal core in Drupal 9 is the class "NodeAddAccessCheck." This helps determine if a user has permission to add a new Drupal node (content entity) to the site. This is being removed in favor of "EntityCreateAccessCheck" which performs the same function but is used to check for permissions to add any entity type rather than just nodes. This streamlines the codebase and makes writing code that needs to check user permissions more consistent.
Another type of deprecation that Drupal needs to account for is when external code and libraries Drupal uses are going end of life. Drupal leverages the Symfony framework "under the hood" to provide a lot of functionality that's common to almost every website—things like managing cookies, handling and routing incoming requests, and services. This gives us a great starting point for building Drupal core rather than having to reinvent the wheel for each of these components. Drupal 9 uses Symfony version 4, which is slated to go end of life in November 2023. Drupal 10 will use Symfony version 6, which brings the latest enhancements of Symfony to Drupal and will help to keep the system secure.
Some of these may seem like trivial updates to Drupal 10, but these improvements help with site security, performance, and consistency from page to page in the admin UI. Together this makes Drupal 10 easier for content creators and site administrators to carry out their work on the site.
Changes to Some Drupal Defaults
When installing Drupal for a new website application, there are a lot of settings that implement the out-of-the-box look and functionality of the site. When installing a new site in Drupal 9 with the standard installation profile, we are greeted with this frontpage on the site:
This familiar face is the default theme, Bartik, for the site.
The default front-end theme for Drupal 10 is now Olivero which is described as "A clean, accessible, and flexible Drupal front-end theme." It was originally introduced as an experimental theme to Drupal core in version 8.8. The Olivero theme has been available as a stable theme since Drupal version 9.3.
Another visual change to Drupal is a new administration theme, Claro, which is replacing the older Seven theme.
Here is the old Seven administration theme:
Here is the refreshed Claro theme:
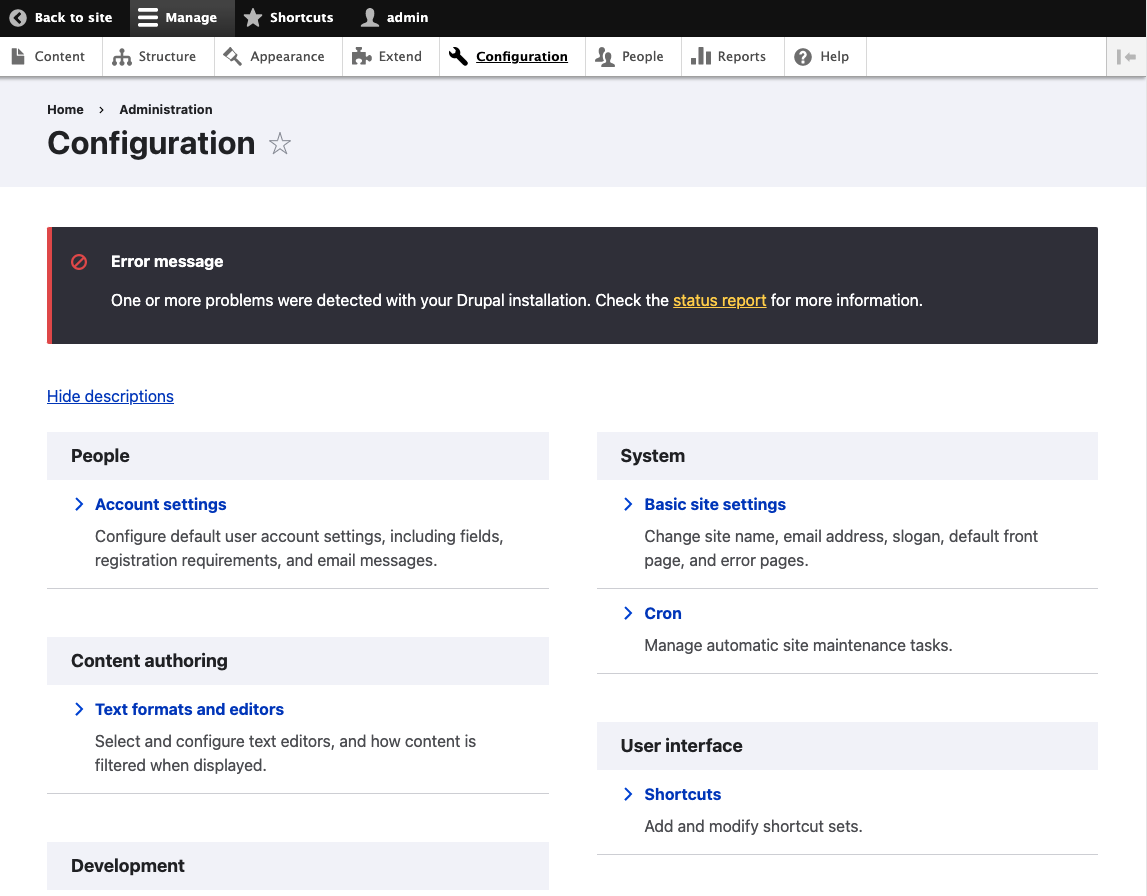
The new default themes in Drupal 10 will provide a better experience for content managers of Drupal sites. Content managers and site administrators will be able to more easily find and do the work they need to do in the back end of their Drupal sites.
Removing Some Core Modules
Drupal 10 core will say goodbye to a few modules that are redundant or not widely used. These modules will be moved to the Contributed Module space for continuity. This move will help make Drupal's core leaner and easier to maintain. According to Drupal core discussions, these modules are likely to be removed from Drupal core:
- Aggregator - Gathers and displays syndicated content (RSS, RDF, and Atom feeds) from external sources.
- QuickEdit - In-place content editing.
- HAL - Serializes entities using Hypertext Application Language.
- Activity Tracker - Enables tracking of recent content for users.
- RDF - Adds metadata to pages to let other systems understand its attributes.
- Forum - Provides discussion forums.
Some of these core modules were enabled by default, but hardly ever used according to usage statistics and user surveys. Clearing these from Drupal core will help remove visual clutter and improve the content management experience for users.
In addition to some core modules being removed, some JavaScript dependencies will also be removed. The changes to the JavaScript that is shipped with core will help make core more secure and easier to maintain. The biggest change will be the removal of some uses of jQuery. jQuery has been a part of Drupal since Drupal 5 (released in 2007). The move to using vanilla JavaScript removes release risks that have come up in the past due to jQuery and jQuery UI's security and release processes.
Saying goodbye to QuickEdit will make Drupal 10 easier for content creators to manage. The QuickEdit module added a pencil icon next to any content field on the site. While this was a nice-to-have feature when it was first introduced in Drupal 7, its usefulness has diminished since the introduction of workflows with content revisions. Once content moderation workflows are added to a Drupal site, the inline editing experience of QuickEdit can't be used as it's not compatible with workflows.
Among the great improvements to the overall system, are some new features that content creators are going to enjoy.
New Editing Experiences
CK Editor 5 will be the default rich text (WYSIWYG) editor in Drupal 10. With it comes a lot of features that will improve the content editing experience. These include Autoformatting where you can add bold with **asterisks**, headings with #, inline code with 'text', code block with ''', and bulleted lists with *.
There are also improvements to the paste-from-document functionality. The new version of CK Editor touts the ability to remove the extraneous markup that comes from pasting from Word or Google Docs. It also automatically uploads images when pasting images from the clipboard, rather than simply adding it as an tag that points to a third-party site.
Drupal's popular page-building tool, Layout Builder is also slated to have improvements that will make managing content on the site better for content creators. The full details of these improvements are not yet available. I hope and suspect that a new layout editing experience will include a modal rather than sticking to the small sidebar that we have today.
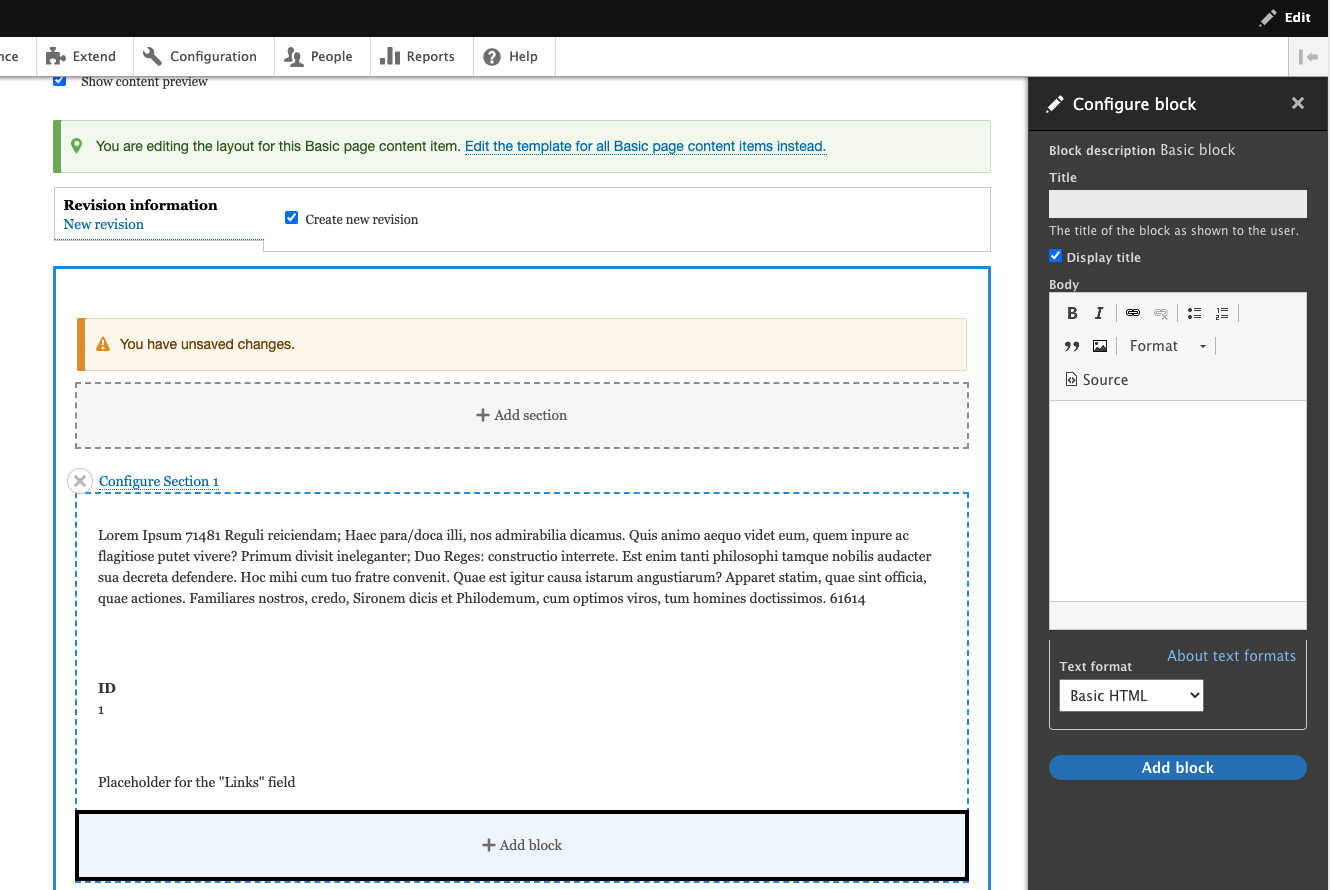
Editing large blocks of text in the sidebar can be cumbersome and confusing, especially when there are more than just a few fields to edit. Improvements to this experience will make managing layouts much easier.
Other enhancements to Layout Builder could include improvements to the interface itself. For some, the Layout Builder interface is clunky, and pending feature requests ask for better ways to move and manage blocks that are placed within Layout Builder.
Foundation for Future Improvements
The release of Drupal 10 clears the path for additional improvements to Drupal that will be built over the next few months and years. Keeping Drupal up-to-date with the latest, fastest, and most secure open source libraries and components give Drupal developers the ability to continually innovate and bring new features to Drupal.
With the emergence of composable experiences and the further intertwining of web and social media in marketing, Drupal 10 continues to pave the way for some great user experiences into the future.
Drupal code reviews are an important part of the software development process. If you've recently started working with Drupal or you are looking to improve your codebase and processes, you may be wondering what you should consider when reviewing changes to your Drupal codebase. We'll describe how to get the most out of your Drupal code reviews by providing a checklist of important steps and criteria for you to return to and reference as you open and review new pull requests.
Creating A Pull Request
A well-formatted and qualified pull request helps streamline the code review process. It's also a good point for an author to pause and consider the change they've made. Before submitting a pull request, the author should consider the change from the perspective of other team members, such as the designer, the reviewer, and the QA team. Reflecting on the change can offer additional insight into the problem as well as reduce cycle time as the change moves through different stages in the development process. Consider if the change meets the requirements in the most efficient manner.
Before Opening A Pull Request
The code review process begins before the pull request is even opened. The author should review the requirements and ensure the change appropriately addresses them. A developer doesn't need to be as thorough as the QA team members but a basic level of testing should be applied, including verification in multiple browsers to catch inconsistencies.
Additionally, this is a good time to help out future developers on the project. Make sure the change meets any coding standards that have been established, is well commented on, and the commits show a clear story. The Coder project provides a set of rules for PHP_CodeSniffer to check and apply Drupal coding standards automatically.
▢ Sync the latest changes from the develop branch
▢ Make sure the change meets the documented requirements
▢ Perform appropriate testing and review in multiple browsers
▢ Run a test build to make sure the project builds correctly
▢ Run any linting or standards tools set up for the project
▢ Ensure that commits have useful messages
Opening A Pull Request
The pull request will set the stage for the reviewer. When opening a new pull request, set the reviewer up for success. Provide any relevant information to establish the context of the change. You don't need to copy and paste the ticket description but provide enough information for the reviewer to understand the change (and maybe a link to the full description). If your commit messages are clear and your repository automatically includes commits in the description, this will help provide a starting point.
Additionally, review the diff before opening the pull request. It's important to make sure no unexpected or unintended changes were included in the change. Formatting differences between IDEs are a common issue. These should be resolved before opening the pull request. When making changes to Drupal's configuration, make sure you didn't accidentally capture incorrect values. If you're using config splits, double-check that split config has been applied to the default and vice-versa.
▢ Review the diff to make sure only intended changes were included
▢ Write a useful pull request description including context, questions, or discussion points
Reviewing With Empathy
First and foremost, a code review is about feedback. It's a learning opportunity for both the author and the reviewer. When it goes well, we all become better developers and the codebase becomes stronger as a result. Keep this in mind when reviewing code and review with empathy. In general, assume good intentions.
The advice included in the section is applicable to all code reviews, not just Drupal reviews. For a deeper dive into positive code reviews, check out these resources:
For The Author
Authors should approach the review as a discussion. Pull requests are an opportunity to discuss your change with other developers on the team. Explain why your approach was used and reference edge cases or other considerations that were factors in the solution. In turn, listen to the reviewer's comments and consider how they might alter your approach.
Remember, you are not your code. Suggestions are meant to be constructive and helpful. Try not to take comments personally. Code reviews are a great way to grow your knowledge and learn new patterns and considerations when developing software.
For The Reviewer
Reviewers should approach the review as a discussion. Code reviews are an opportunity to discuss a solution among peers. Many developers assume the reviewer has absolute authority over the change—try to avoid this trap. Instead, ask open questions to facilitate discussion. Offer explanations for your suggestions and include examples. If you disagree with the approach, pause and consider if your solution is better or just different. Remember you can learn as much from the author as they can learn from you.
Remember, your words have power. Try to stay humble and keep your ego in check while reviewing code. Consider how your comments might be taken, particularly if they are only offered in impersonal text on a pull request. Don't request changes directly unless there is a convincing argument for a different approach. Give kudos as well as critiques.
Ultimately, stay humble and take your time. Make sure you understand the goal of the change and the approach the author chose to take. Consider the change from multiple directions. Acknowledge your shortcomings and note when an author has done something interesting or clever (plus, this can also help fight imposter syndrome on the team!).
Performing A Review
Code review is also a technical discussion of the change. It's important to understand the common pitfalls in order to keep the codebase in good shape. Performing a technical review of the code helps address architecture issues and may reduce bugs before they become a problem.
General Approach
In general, the goal of a code review is to facilitate discussion of changes and make sure the development team is creating the best solution possible. As such, there are a lot of components to consider when reviewing a change. During the code review, we want to understand what the change is accomplishing, verify that the change is doing what it's intended to do, and fits in with the overall architecture.
▢ Do you understand the solution (does the solution "make sense")?
▢ Does the solution accomplish the goal?
▢ Does the change include any unrelated functionality?
▢ Does the solution support the overall project strategy?
▢ Do commits contain appropriate information (ticket number, description of change, additional context)?
Drupal Way
Drupal provides a toolkit for content-based website development. Each tool has an intended usage and sometimes more than one tool may be used to solve a problem. Some of these solutions will be better than others and the best solution may not always be obvious.
Consider the requirements and the intended use of a given system API, configuration, or application layer. The solution should make use of the correct APIs and occur in the correct part of the application. For example, is any front-end work implemented within the theme? Is shared business logic created as a service? Make sure the solution makes use of existing functionality where possible, usually in order by priority: Drupal core, contrib modules, custom code.
▢ Does the solution make use of existing functionality?
▢ Does the solution make the best use of Drupal's tools?
▢ Is the solution implemented in the appropriate application layer?
▢ Does the solution support a content management strategy?
Security
Drupal is a generally secure CMS and extensive efforts have been made by the community to support out-of-the-box security. However, any time custom code or community-contributed features may be involved, the security of the customizations should be considered. The change should make use of the appropriate features provided by Drupal to maintain the security of your application. Reference Writing Secure Code on Drupal.org for more information.
▢ Are Drupal's APIs being used correctly?
▢ Do SQL queries use the Database API?
▢ Are the text APIs such as t() applied to safely escape text and other scripting attacks?
▢ Is content rendered through Twig whenever possible? (Twig automatically escapes rendered content)
▢ Are permissions and access controls implemented properly?
▢ If a new entity or feature is implemented, does it have appropriate permissions applied?
▢ If a new permission is created, is it checked correctly?
▢ If JSON:API or other APIs are implemented, do API endpoints have appropriate access control and data filters in place?
API-first
Code should be written in a composable way using Drupal's API-first approach. Use services, plugins, etc. to create reusable functions that can be repurposed and edited easily. Drupal offers a powerful but complex dependency injection system. Make sure that functionality is accessed correctly to help keep the codebase DRY.
▢ Are the components of the solution appropriately (de-)coupled?
▢ Is dependency injection used correctly and are all dependencies necessary?
▢ Are new components abstracted to an interface, supporting dependency injection?
▢ Is the legacy hook system used when a more modern approach is available?
Documentation
Documentation is important for both future developers working on the project and existing developers who may need to reference a dependency while developing a separate feature. For architecture level changes, make sure patterns, strategies, and other important aspects are documented in an appropriate README. They may also be documented elsewhere but the codebase should at least contain a reference to external documentation.
Comments are also a key aspect of documentation. In particular, PHPDoc comments should be added to files, classes, functions, and properties to support IDEs that may automatically make this information available to developers. Make sure that complex code blocks have appropriate documentation to clarify the processes the code is following.
For example, complex algorithms or code flow conditions should include enough information that a new developer can understand the logic that was implemented. If the change applies a workaround or specific logic changed, reference appropriate documentation, such as a task ticket or external documentation link.
Drupal offers some specific opportunities to document functionality. For changes that don't include custom code, help text and README files should be included to document the functionality. When creating new content types and other entity bundles, include a useful description documenting the purpose of the new bundle. Any custom code should have appropriate descriptions, grouping, and dependencies listed in the module's info file.
▢ Are PHPDoc comments added to each file, class, method, and property?
▢ Are PHPDoc comments correctly formatted and complete (include all necessary properties)?
▢ Are complex code blocks explained with appropriate comments?
▢ Do workarounds or specific logic changes reference appropriate documentation?
▢ Are new variables or configuration values documented in the Drupal UI via help text and descriptions or in a README file included with the module?
▢ Do new modules have appropriate values in the .info.yml file?
▢ Do new modules include a README, if necessary, describing aspects of the module?
Code Style and Standards
Code should follow PHP and Drupal coding standards as well as any team- or project-specific standards the team has agreed upon. Following code standards help with code readability and integration. Code style and standards should generally be enforceable via automated analysis tools such as PHP_CodeSniffer.
Drupal.org provides a helpful guide for configuring this tool under Installing Code Sniffer. Usually, these should be run via Git hooks as well as validated by the CI/CD pipeline at appropriate stages but it's important to make sure that these tools were run correctly. Additionally, confirm that no unexpected but valid formatting changes have accidentally been applied. Examples include a change in indentation or quote style through an entire file.
▢ Does the code generally follow code style conventions established by the team?
▢ Are variables, functions, classes, etc. named appropriately?
▢ Did the automated validation tools run correctly? Did they note any errors?
▢ Does the change include any unexpected formatting changes?
Improve Your Codebase & Processes
For those working with Drupal and looking to improve their codebase and processes, this technical guide is the perfect starting point for your team. Whether you were wondering what you should consider when reviewing changes to your Drupal codebase or how you can make the most out of your Drupal code reviews, this guide provides you with an understanding of how to create useful pull requests and perform code reviews in a way that improves your team, as well as your codebase.
Please feel free to return to this guide as a reference for important review points as you review changes to your Drupal project. Try integrating these guidelines into your code review process to facilitate healthy conversations amongst your development team. By following these important checkpoints, your Drupal codebase will be more secure, more efficient, and easier to work with.

Looking for a way to distinguish yourself among the many Drupal developers out there? Look no further than the Acquia Triple Certification. Representing excellence across Drupal and Acquia, the Drupal Certification exams are for developers, front-end specialists, and back-end specialists that want to demonstrate their advanced expertise.
From "Drupal Grand Master" to "Triple Certified"
Since 2015, Acquia has been using the term "Drupal Grand Master" to acknowledge those who completed Drupal Certification exams for developer, front-end specialist, and back-end specialist.
With help from the Drupal community, Acquia decided to rename this high level of qualification to "Acquia Triple Certified Drupal Expert" or the shortened version, "Triple Certified." This change was made to reflect more inclusive language. Dries Buytaert, Co-Founder and CTO of Acquia said, "The words we use matter. They make a big difference toward eliminating subtle forms of racism, sexism, and more in the technology industry." The technology industry and Drupal are making huge strides towards improving diversity and inclusion within the open source community.
In 2022, Acquia renamed its highest level of Drupal certification, formerly "Drupal Grand Master," to reflect more inclusive language. Learn more about this name change here.
What Is Drupal?
Drupal is one of the leading open source Content Management Systems (CMS) and one of the largest open source communities in the world. Founded back in 2000 by Dries Buytaert as a chat platform for college students, today it stands alone as the most flexible, adaptable system on the market, enabling anyone to create advanced websites and applications.
Based on Drupal’s latest stats, 1.5 million sites, 38 percent of Fortune 50 companies, and more than 23,000 developers use Drupal every day to power the sites we interact with regularly. Bounteous has been using Drupal to build websites for customers since 2009.
The Establishment of the Drupal Certification Program
Just as mentorship is ingrained into the DNA of the Drupal community, it was a driving factor in establishing the "Acquia Triple Certification," formerly "Drupal Grand Master Certification," program. Buytaert saw the need to provide a valuable distinction among the community and thus launched the Acquia certification program in 2014. While extremely resource-intensive to create a global certification program, Buytaert says, "We believe that effort is worth it, given the overall positive effect on our community."
Regularly relied upon for guidance and expertise, Acquia Triple Certified Drupal Experts relish the honor to further the Drupal community. As of 2022, Bounteous has 13 Acquia Triple Certified Drupal Credentials, 8 Acquia Triple Certified Drupal Experts, and over 100 developer certifications—the most of any organization in North America outside of Acquia.
Where does Acquia fit in?
Acquia delivers a cloud-based digital experience platform built on Drupal that enables organizations to build experiences that scale and is also led by Buytaert. A preferred partner of Bounteous, Acquia empowers brands to embrace innovation and create customer moments that truly matter.
Recently named a leader by both Gartner and Forrester, Acquia is committed to facilitating certification programs allowing developers to validate and promote their Drupal skills year after year.
Acquia Certifications
Getting certified is a great way to validate and promote your Drupal skills while helping you stand out from the crowd. Acquia is working towards making it easier to access free training to gain Triple Certification, as well as other Drupal and Acquia certifications. Learn more about how to get Acquia Certifications here.
Acquia Certified Site Builder
The Acquia Certified Drupal Site Builder is a credential intended for professionals who build Drupal sites using core and contributed modules. This exam is designed to validate the skills and knowledge of a Drupal Site Builder.
Acquia Certified Developer
The purpose of the Acquia Certified Developer exam is to validate the skills and knowledge of a Drupal developer in the areas of fundamental web concepts, site building, front-end development (theming), and back-end development (coding).
Acquia Certified Front End Specialist
The purpose of the Acquia Certified Front End Specialist exam is to validate the skills and knowledge of a Drupal developer in the area of front-end development (theming).
Acquia Certified Back End Specialist
The Acquia Certified Back End Specialist exam validates the skills and knowledge of a developer in the areas of building and implementing Drupal solutions using code (module development).
The Ultimate Triple Certified Achievement
To achieve the prestigious Acquia Triple Certification, a candidate must pass the developer, Front End, and Back End Acquia certification exams within a year. Each exam validates skills and knowledge in different areas from fundamental web development to Drupal Core API. This is no easy feat! It is the highest-ranking Drupal certification available, the triathlon of development, and requires expertise in multiple areas of focus.
Why Does This Matter to Me?
Whether you're a developer, a Drupal agency, or an Acquia customer, the Acquia Triple Certifications are a trusted benchmark in the industry. The real-world scenarios included in the exam ensure a breadth of prior experience that helps enhance development. Many companies even require Acquia Certification which speaks volumes to the respect this program has established.
We recommend all Acquia Triple Certified Drupal Experts add this credential to their LinkedIn profile under certifications, or if you already have "Drupal Grand Master" listed, make sure it is updated to reflect the new and inclusive language.
Ultimately, Triple Certified designation allows developers an edge in the development world and provides an enormous amount of credibility in the Drupal community. While no doubt a significant undertaking, the achievement is well worth the investment. With more knowledgeable and engaged developers bettering the community, Drupal’s power increases and in turn supports the companies that leverage Drupal for their digital experiences.
Let’s be honest, PHP is an old language, relatively speaking. It might not be as ancient as COBOL or Smalltalk, but it’s a dinosaur relative to the new generation of programming languages like Rust, Julia, or Typescript. Due to wide adoption and decades of maintaining legacy functionality, updating PHP to include newer features and runtime improvements takes significant time and consideration. The reality is this language is not going anywhere, and there are many benefits of upgrading to PHP 8.
PHP 8 includes improvements that show a clear desire to modernize, as well as capabilities of other popular languages that developers will appreciate. Thanks to PHP 8, Drupal 10 can now use tools that will enable continued growth and enhanced performance. Upgrading to PHP 8 will be beneficial to any site running on PHP–however, as a Drupal developer, I’m particularly excited about how this will impact Drupal 10. I’ll highlight some of the benefits that apply to many sites, but especially how it may apply to Drupal.
To make the most of your PHP upgrade, learn about all of the new and exciting features of this programming language.
Why Upgrade to PHP 8?
Before discussing the features of PHP 8, it’s important to understand why you will want to make this upgrade from PHP 7 to PHP 8. The short answer is that Drupal 10 is requiring a PHP upgrade to enforce requirements imposed by Symfony 6.
It’s also relevant to note that Drupal 10 specifically requires version 8.0.2, not version 8.1. For updates like Fibers and better JIT performance, be sure to use version 8.1 (as opposed to the minimum PHP version needed by Drupal 10). Conversations on this topic are still ongoing, so keep an eye out for updates as new versions of Drupal are released!
New Language Syntax
PHP 8 and 8.1 both introduced changes that can be generally split into three groups: language syntax, new functionality, and execution strategy improvements. Syntax changes give developers opportunities to write code that’s more expressive of what they are trying to do, often with fewer lines of code.
If we can create the functionality we want with syntax we like, that not only benefits the quality of the sites we build but also helps us with the speed at which we can write code. This article will cover some of the most exciting syntax changes, but you can check out the full list of changes for PHP 8 and PHP 8.1.
Help with NULL
Accessing data from within a deeply nested structure can be a hassle. Values at keys within a PHP array or object can be NULL, and they need to be checked for this case since this can cause runtime errors if not properly addressed. The isset function has helped with this for years, but with the advent of object-oriented programming in PHP 7, lots of data accessing is done via class methods, and those do not play well inside of an isset call.
PHP 8 has added a popular solution to this problem with the nullsafe operator: ?-> (See Figure 1). Many other languages already have this operator, and its addition to PHP will allow us to access data more efficiently.
$data = new stdclass;
$data->foo = NULL;

var_dump($data->foo);
// result: NULL

var_dump($data->foo?->stuff);
// result: NULL

var_dump($data->foo->stuff);
// result: ERROR
Figure 1: The Nullsafe Operator
PHP also added special type operators for making custom types that can allow for more specificity in type declarations. One such operator is the union type operator (See Figure 2). In the spirit of taking inspiration from others, this syntax is the same as in TypeScript and Haskell’s type systems. Thanks to this update, a function or class method can now explicitly state if an argument can be exclusively one of two or more types as a part of its declaration.
NULL can be included alongside types in a union type declaration, and when NULL isn't included it cannot be passed as a value to that argument. All of this helps developers better control cases with NULL values and helps reduce runtime errors and bugs.
function func(int|string $foo) {
    var_dump($foo);
}

func(5);
// result: 5

func('bar');
// result: 'bar'

func(NULL);
// result: ERROR
Figure 2: Union Type Operators
Match Statements
Switch statements have been a staple to PHP and several other languages for decades. PHP 8 includes an improved version of this age-old control structure: the match expression (See Figure 3).
Match expressions function similarly to switch statements, but they differ significantly from switch statements in that they are expressions used to resolve to a value, instead of a statement that operates as a control structure that runs lines of code. Because of this, setting the value of a variable with the return value of a match statement when it is declared is now possible.
$bar = 8.0;

$foo = match($bar) {
    8 => 'int 8',
    8.0 => 'float 8',
    '8.0' => 'string'
};

var_dump($foo);
// result: float 8
Figure 3: Match Statements
Pattern matching is an integral concept in many strongly typed languages, such as Rust, Haskell, and OCaml. The addition of match statements to PHP indicates the language is taking inspiration from other languages when making improvements. Though PHP match expressions aren't quite as powerful as similar syntax in other languages, this is still a huge leap forward in modernizing PHP.
The fact that they can return a value and don't need break statements should eliminate many unnecessary lines of code and allow for better readability. For switch statements, the default case was optional and could potentially lead to undesired cases if not handled properly. However, with match expressions, an error will be thrown when no default case is provided, naturally encouraging the creation of more secure code.
Pure Intersection Types
Pure intersection types were added in PHP 8.1 and they provide an interesting way of strengthening the object-oriented type system in PHP (See Figure 4). When an object that is being passed to a function needs to implement two or more specific interfaces, a pure type intersection operator can be used to combine those interfaces into one type.
Instead of having to create a new interface in a separate file, intersection types can be easily created when needed. Having more opportunities to create new types allows developers to be more expressive with their code and improves legibility, which can save time and effort over the long run.
class Bar implements Stringable, Countable {
    function __toString() {
        return 'this is an object';
    }

    function count(): int {
        return 0;
    }
}

class Foo {
    public function __construct(
        public Stringable&Countable $bar
    ) {}
}

$foo = new Foo(new Bar());

var_dump('toString: ' . $foo->bar);
// result: 'toString: this is an object'

var_dump('count: ' . count($foo->bar));
// result: 'count: 0'
Figure 4: Pure Intersection Types
New Functionality
Aside from syntax, new functionality has been introduced in PHP 8 and 8.1 that provides an opportunity for Drupal to improve drastically. Namely fibers and class attributes present new ways to enhance underlying code directly.
Fibers
Another way that PHP has differed from several other server-side languages is through the lack of native support for managing concurrency or suspend execution of code. Using callbacks can allow developers to write asynchronous code. However, there is no API enforced by the language for this functionality; it's managed entirely by other packages. The addition of the Fiber class in PHP 8.1 opens a new world of non-blocking code possibilities.
In the Drupal community, issue threads are getting traction as developers advocate for using fibers to make time-consuming tasks like cache rebuilds, queue runners, and automated cron runs more performant and easier to manage.
Despite some exciting use cases of fibers, we aren't likely to see them used extensively in the everyday development of Drupal. Even the PHP documentation states "Libraries will generally build further abstractions around Fibers, so there's no need to interact with them directly." Fibers are introduced through 8.1, so you might not see it in Drupal 10 core until 8.1 becomes the minimum version needed. PHP is striving to make up for lost time with fibers and we can expect to see revolutionary architectures in future applications thanks to their introduction in PHP 8.
Class Attributes
A huge improvement in Drupal 8 was the Plugin API, which includes a discovery system for finding plugin classes. PHP 8 class attributes can make this process even better. Several types of plugin discovery exist, such as Annotated Class Discovery. This discovery type makes use of a class annotation in a comment before a class definition.
Since class metadata is inside of a comment, a separate library provided by the Symfony framework called Doctrine is needed to parse and use class annotations. With class attributes, this functionality is now a native part of the language. Class attributes allow for much more flexibility in specifying metadata for a class, without the use of a third-party library.
Additionally, they can be used for tasks other than plugin discovery, since attributes can be placed on class methods as well. When used in that context, attributes can specify route handlers, event subscribers, and a whole range of other Drupal functionality. Other object-oriented languages like Java, C#, and even JavaScript have versions of class attributes. The addition of class attributes to PHP 8 is further proof that the language is striving to modernize and provide developers with tools to build better systems.
JIT Compilation
The maintainers of PHP might have added all kinds of new and cool syntax and functionality, but underneath it, all was still the same execution process of language parsing, AST creation, OPcode transpilation, OPcache, and execution inside a VM. Little had previously been done to enhance the step between the traditional Zend VM and the CPU, but with PHP 8 a new door has been opened.
As hardware has gotten exponentially more powerful over time, compilation has gotten quicker and quicker. Because of this Lua, Python, JavaScript, and other transpiled languages have made use of a Just-In-Time (JIT) compilation step that happens after a script has been queued for execution and before it is actually executed.
JIT compilers offer huge speed boosts since all optimization strategies that have been part of compilers, in general, can be applied to scripting languages as well. PHP 8 added a JIT compiler to the language, which will allow it to make huge strides in code performance in the same way that many other popular languages already benefit from.
While PHP will become much more performant with version 8, the web frameworks that use PHP won't see the same kind of speed boost. The limiting factors to server-side processing speed in Drupal will still be the same as they were before: database queries, bootstrapping on request, and other architectural constraints.
Benchmarks against other similar frameworks have shown only a 3-5 percent increase in page render speed, so the same can be safely assumed for Drupal. For functionality requiring complex processing that is written purely in PHP though, the JIT compiler will make a huge difference. Image processing and data analysis can now be reasonably implemented in PHP thanks to the new JIT compiler.
Switching to PHP 8
As always, teams will need to rigorously test their sites with new versions of PHP locally, as well as in higher-level environments afterward. Switching to PHP 8 is possible to do today under Drupal 9 and is fairly easy to do locally, especially if you’re using Lando and Drupal VM. Configuring the PHP version used by an environment in Acquia Cloud is also a relatively straightforward task.
Whether it’s using new syntax, experiencing the speed boosts of the JIT compiler, or trying out new features of the language, PHP 8 has many improvements for developers to be excited about. PHP is continually improving, and keeping up with its growth will make for a better Drupal experience, which in turn will make the life of developers easier as well. I recommend upgrading to PHP 8 and giving all of these new and modern features a try as soon as you can!
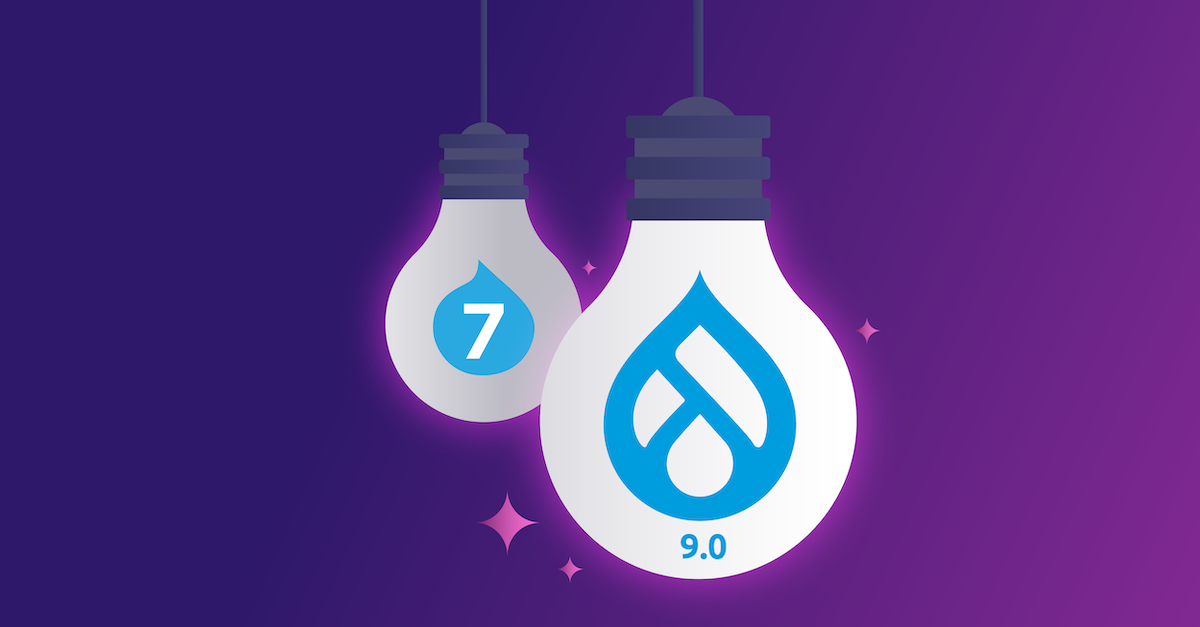
It’s been ten years since the release of Drupal 7. In that time, building experiences for the web and digital marketing needs have grown more complex. The Drupal platform has had to evolve to keep pace with market trends and other content management solutions. This concept of an evolving platform aligns perfectly with "Embrace Change," which is Principle 7 from Drupal’s Values and Principles. There’s a long shared saying in the community stating that, "The drop is always moving." Drupal (the drop) needs to grow to remain competitive and developers need to embrace these changes to take advantage of the latest features and functionality.
When it comes to embracing the latest Drupal offerings, as a community we still have a lot of work to do. Of the over 950K sites reported on the Drupal Usage Statics page for November 21, 2021, roughly 520K of those websites are running some version of Drupal 7. Drupal 8 support ended November 2, 2021, and after an extension due to COVID, Drupal 7 support will end in November of 2023. This means for organizations running any version less than Drupal 9, now is the time to be planning the next steps.
Why Migrate to Drupal 9?
Before jumping into the process of planning and executing a migration, it’s important to understand the value of this effort to your business. This is the perfect time for an organization to evaluate if it makes sense to continue investing in Drupal and understand what they’ll receive from their investment. There are a number of compelling reasons to invest in moving to Drupal 9, but here are some highlights!
Drupal Is API-First
The API-First initiative, introduced in Drupal 8, simplified using REST APIs to pull content out of Drupal and into other systems. This means fully decoupling or progressively decoupling is easier in modern Drupal. Additionally, as composable architectures grow in popularity, Drupal enables developers to quickly surface REST endpoints as JSON in core or GraphQL via contributed modules.
It’s also worth noting the Decoupled Menus initiative aims to prove the model for integrating JavaScript libraries with the RESTful Web Services API. The goals of this initiative are to make the JavaScript developer experience and the process of building decoupled experiences in Drupal rival competing content management platforms.
Drupal’s Continuous Innovation Model
Once you’ve migrated to Drupal 9, future updates (like Drupal 10) will be minor releases. This is due to introducing a continuous innovation model that aims to shorten release cycles, add new features and APIs, and simplify the upgrade path. This development model reduces the total cost of ownership and allows organizations to spend less time maintaining the platform and more time investing in features that will grow the business.
More in Core With Drupal
Panels in Drupal 7 have been replaced with Layout Builder. This enables site administrators to visually configure content in Drupal by node or content type. Acquia customers can take this a step further by using the Site Studio low-code page building tool. Other enhancements include a native media library that enables content authors to upload and reuse media assets, a modernized administrative theme, improved multilingual support, enhanced accessibility features which comply with WCAG 2.0 and ATAG 2.0, customizable workflow tools, and robust configuration management.
Where to Start With Your Migration?
Before any code is written or migrations are run, the first step to any successful platform upgrade should be putting together a plan and defining what success looks like. Many organizations will use these projects as an opportunity to make other enhancements to the website. For example, there may be content on your existing site that is out of date or doesn’t receive much traffic based on your analytics. You may manage a taxonomy structure that has grown unwieldy or content types that can be consolidated or removed altogether. In short, we want to ensure any incorrect assumptions, bad habits, or abandoned features don’t make their way into the new experience.
If it’s been a few years since any visual updates have been made, this could also be a great opportunity to update the look and feel of the website. Moving from PHPTemplate to TWIG and including Layout Builder in core opens up new theming possibilities for developers. This may also be the right time to modernize the look of your site and revisit the information architecture while simultaneously updating the theme layer. As mobile traffic has increased, optimizing for a mobile-first approach that prioritizes performance, responsive assets, and serving the best experience regardless of the device should be part of the implementation plan.
Before jumping in, it’s important to understand if there’s a migration path for any modules in use and identify alternative approaches where there are gaps. This process typically starts with taking inventory of the existing modules and content, verifying and documenting existing functionality, and identifying deprecated code. Though this can be done manually, the Migrate Accelerate tool can significantly streamline this effort for organizations using the Acquia platform. The Acquia solution will recommend Drupal 9 modules and patches based on Drupal 7 and tooling that helps automate the content migration process. There are also some helpful solutions like the static PHP analysis tool, drupal-check, and using the upgrade status module.
The outcomes of this evaluation may reveal that an automated migration may not be the best approach. If the content, information architecture, and designs are changing significantly, it may make more sense to rebuild your site in Drupal 9 instead of porting over lots of content that is no longer relevant. The best approach will vary, but it's important to identify the unique needs of your organization before jumping straight into migrating data.
Migrating to Drupal 9
Due to underlying architecture changes in Drupal 8 and 9, more work is required to migrate a Drupal 7 site. Moving will require migrating both content and configuration to a clean Drupal 9 website. Drupal 9 also uses Composer for PHP package management, which is a shift from managing projects in Drupal 7. You’ll want to be mindful to structure your composer files correctly, but there are some helpful existing composer project templates like the Drupal Recommended Project, opinionated build tools via Acquia BLT, and the Acquia CMS project for Acquia customers.
There are two approaches to migrating from Drupal 7 to 9, using the Migration UI or Drush. Using the Migration UI assumes you want to migrate everything and first requires enabling the core migration modules and any other required modules needed in the new experience. This includes installing and enabling the Migrate Upgrade, Migrate Plus, and Migrate Tools contributed modules.
To proceed with the UI approach, import the D7 database, visit the upgrade path, enter your credentials, and follow the on-screen instructions to run the migration. The core Migrate modules support most nodes, taxonomy, fields, users, content, and user roles. However, themes, custom modules, and views without a contrib migration path will need to be rebuilt. This also assumes the contributed modules used in Drupal 7 have a migration path to Drupal 9. Any modules without a clear upgrade path will require manual or custom migration.
For developers looking for greater configuration options, using Drush provides more flexibility to pick and choose your migrations. After importing the D7 database, you can run the following Drush command to get a list of the available migrations:
drush migrate:upgrade --legacy-db-url=mysql://root:root@localhost/drupal7db --legacy-root=drupal7site/docroot --configure-only
From there, you can run Drush migrate-import (or Drush mim) for the individual migrations you’d like to bring over to the Drupal 9 website. For example:
drush mim d7_user
Lastly, there is a lot of helpful documentation on this process on Drupal.org. There is also a running list of known issues which may be a helpful resource for troubleshooting migration issues. Depending on the amount of content that needs to be migrated and the complexity of the Drupal 7 site, developers should expect some level of trial and error to ensure all intended content was migrated successfully. Stripping down the Drupal 7 site to the bare essentials before starting this process can help greatly streamline this effort.
The Drupal Drop will Keep Moving
The Drupal project celebrated its 20th anniversary in January 2021. The web has changed significantly over that time as we’ve seen internet fads come and go. However, it’s a testament to the Drupal project leads and the developer community for continuing to push the platform forward so that it remains relevant today.
There are some exciting initiatives planned, including making Drupal easier for new users with the Easy out-of-the-box initiative, making it easier to find and install relevant modules with Project Browser, and simplifying the Drupal contribution process with GitLab Acceleration. For any organization evaluating a migration from Drupal 7, this should be the last significant upgrade needed to take advantage of all the new and exciting features now available in modern Drupal.
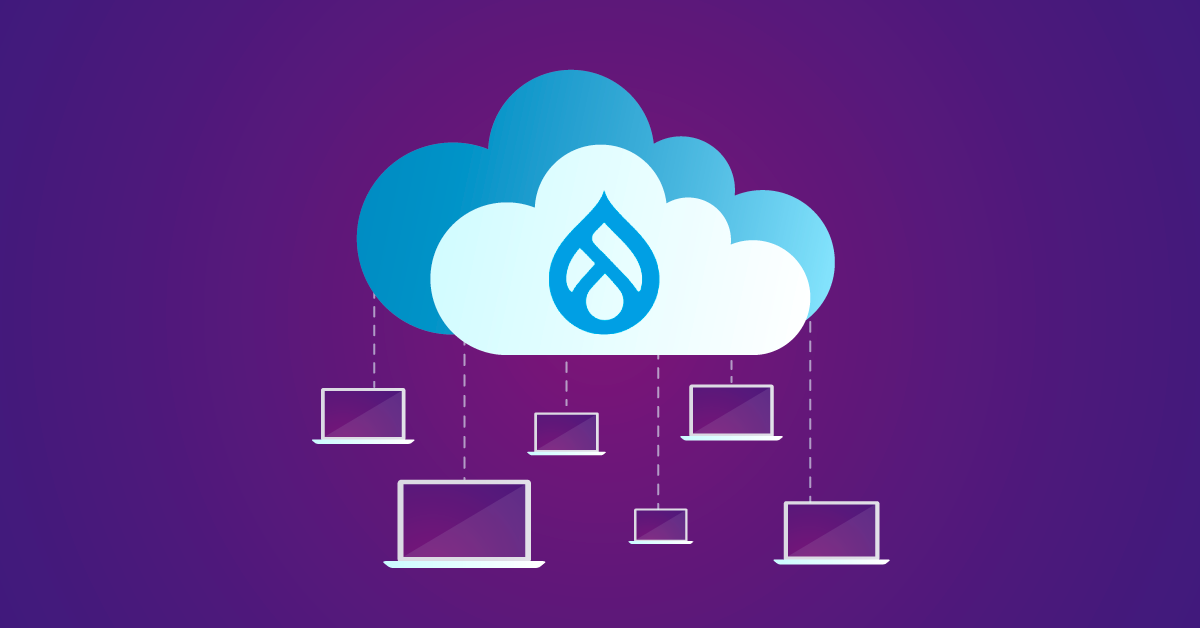
As the Drupal landscape continues to evolve, we have seen some great advancements in how we build and maintain Drupal websites. From the powerhouse of DrupalVM with Vagrant to the agile world of Lando and Docker, each solution has its own strengths—as well as some tradeoffs that can require some level of technical expertise to navigate. Here at Bounteous, we typically use a Sprint 0 to define and implement the toolset that will be used for the project. During this time, we evaluate the needs of the project, as well as any client requirements that may dictate one solution over another.
As we evaluate these options we consider things like maintainability and flexibility. In some cases, client restrictions prevent us from running any type of virtualization. With any solution, there will be some amount of overhead as we onboard developers and support ongoing development. When faced with virtualization restrictions, a natural solution is to create a custom LAMP or MAMP stack on each developer’s machine. This is often costly to maintain and requires a high investment to get started. Fortunately, there is a new option available, designed to give developers the flexibility of a virtualized environment without the technical cost or restrictions.
Enter Acquia Cloud IDE—a web-based development environment designed for Drupal. Depending on your Acquia subscription, your development team will be allocated a specific number of environments that can be created and destroyed on demand. When you create a new IDE, Acquia provides a container-based environment on cloud infrastructure that matches a standard Acquia Cloud server. Each IDE comes allocated with 4GB of memory, two CPUs, and 60GB of disk space. It also comes preinstalled with all the development tools you need for high-grade Drupal—including Composer, Drush, npm, and even ChromeDriver for running automated tests.
Once the environment has been provisioned, a developer is given a link to open their IDE and begin working. The IDE itself is based on Theia, an open-source web-based IDE developed by the Eclipse Foundation. The project is extremely active, with over 5000 commits, 90 pull requests, and five releases this year alone. These are all great signals of a strong project with great backing. The IDE itself is modular, highly customizable, and feels a lot like Visual Studio. It even allows you to load some of the Visual Studio code extensions you are familiar with (in .vsx form). Though you likely won’t need to add anything, Acquia does a good job of preconfiguring the IDE with all the things you need for a Drupal build.
On the first launch of your IDE, you are greeted with a “getting started” page that gives you multiple one-click setup buttons to make your life easier. The first button creates an SSH key in the IDE environment and associates the key with your Acquia account. This key can also be manually added to any external repositories such as Bitbucket or GitHub. Once your key has been added, you can use a second button to clone your Drupal codebase and database directly from your Acquia subscription. From here you have a fully functional, personal development environment and you are ready to write some code! The IDE gives you direct access to the CLI, and even provides a command to enable Xdebug.
Thoughts and Impressions
It’s pretty easy (and warranted) to be skeptical of a solution like this for a development environment. New IDEs and environments mean new ways of working and ultimately friction when it comes to accomplishing work. It’s extremely important for developers to have complete control over their development experience in order to maximize efficiency. I personally rely heavily on keybindings and shortcut commands to deal with some of the limitations my disability creates.
All things considered, I’ve found transitioning to cloud IDE to be mostly painless. I have been able to customize various shortcuts to match the keybindings I typically use (Shoutout to my dotfiles). I do miss some of the more intelligent features PHPStorm offers me like comment generation and fast file switching, but there is nothing that prevents me from writing solid code.
Skepticism included, I am extremely excited about this product and wish I could use it on some of my personal projects. The ability to have an on-demand development environment that takes little to no setup time is a game-changer. Even as someone with deep Unix and DevOps knowledge, I constantly find myself in battles with getting local environments to "just work." As much as I enjoy investigating and resolving issues that come up with Lando or DrupalVm, I’d much rather spend my time building amazing websites. Acquia Cloud IDE makes that possible.
Opportunities for Improvement
No solution is perfect, and running an IDE in a browser runs into some pretty expected problems. Some of the more complicated tasks like file browsing and terminal interaction require communication with the server. This can cause problems like console input lag or slow/finicky code completion. These problems can be exacerbated by unstable internet connections, leading to warranted frustration. This has been a pretty serious and ongoing issue that Acquia is working on fixing.
The other part I wish I had more control over is the setup process. While the IDE makes it easy to clone code directly from your Acquia environment, it doesn't easily allow you to clone from a BitBucket or GitHub repository. It would be great if there were some way to customize the welcome screen and button actions. My goal is to onboard developers as quickly and painlessly as possible, and it would be nice to have greater control over this process.
Final Thoughts
Acquia Cloud IDE has amazing potential and has already proven to be a valuable tool. We are a couple of weeks into using it on one of my clients, and we were able to successfully onboard 12 developers—for many of whom it was their first Drupal project. The ease of onboarding and consistency of environments across both Windows and OSX was a breath of fresh air. I’m excited to continue to use this tool on future projects!

Leading agency delivering transformative digital experiences on the Acquia Digital Experience Platform
Chicago — October 27, 2021 — Bounteous, a leading insights-driven digital experience consultancy, today announced its elevated status as Acquia Global Partner and also received recognition as one of Acquia’s first Practice Certified Partners. Bounteous is being honored as a top-performing partner following a year of record growth and transformational digital experience implementations.
The Acquia Partner Program recognizes companies committed to the highest standards of technical delivery on the Acquia Open Digital Experience Platform (DXP). Partners must not only make significant investments in training and business development, but also deliver high-quality implementations and contribute to Acquia Open DXP. Acquia's Global Level Partnership includes only their top dozen partners and is a highly distinguished group of leading digital agencies.
"This recognition marks our team's incredible growth and deep understanding of product value and familiarity with Acquia Drupal Cloud," said Seth Dobbs, CTO at Bounteous. "Our partnership with Acquia is the epitome of co-innovation. As partners, we believe that we're stronger together and we're thrilled to receive this outstanding achievement."
Bounteous worked closely with Acquia throughout the year to surface opportunities for growth—from product advancements and early adopter programs to joint prospecting, marketing, and deal partnering. These qualifications in addition to the team's ability to deliver transformative digital experiences on the Acquia DXP have earned the organization this distinct qualification.
"We're delighted to be able to award this recognition to Bounteous," said Peter Ford, VP of Global Channels, Partners & Alliances at Acquia. "Partnering with Bounteous to drive unmatched capabilities and digital transformation for our clients helps solidify our standing as the top digital experience platform in the industry. As part of the Acquia Partner Advisory Board, Bounteous continually contributes to new product testing and helps inform the products that makeup both the Acquia Marketing Cloud and Acquia Drupal Cloud. As we look to grow our offerings over time, we're excited to be able to count on partners like Bounteous to help us reach our goals."
About Bounteous
Founded in 2003 in Chicago, Bounteous is a leading digital experience consultancy that co-innovates with the world's most ambitious brands to create transformative digital experiences. With services in Strategy, Experience Design, Technology, Analytics, and Marketing, Bounteous elevates brand experiences and drives superior client outcomes. For more information, please visit www.bounteous.com. For more information about co-innovation, download the Co-Innovation Manifesto at co-innovation.com.
For the most up-to-date news, follow Bounteous on Twitter, LinkedIn, Facebook, and Instagram.
About Acquia
Acquia empowers the world’s most ambitious brands to create digital customer experiences that matter. With open source Drupal at its core, the Acquia Digital Experience Platform (DXP) enables marketers, developers and IT operations teams at thousands of global organizations to rapidly compose and deploy digital products and services that engage customers, enhance conversions and help businesses stand out. Learn more at https://www.acquia.com.

Drupal entered the market as a small content management framework in 2001. First created as a college project by Dries Buytaert to stay in touch with friends, the platform has become a flexible, enterprise-grade solution that powers some of the largest organizations.
I've been part of the Drupal community for over ten years, and it's been amazing to watch the growth of the platform, the vibrant community, and its adoption in the market. This open, API-first solution offers many features out-of-the-box, has a large and active community, and over 45,000 modules that add functionality to the core platform enabling teams to build digital solutions of any size.
Though many are familiar with Drupal, we often hear questions about where Acquia fits into the picture. If Drupal is an open-source platform that anyone can freely use, why do we need Acquia? What benefits does Acquia bring to the table that are not already freely available in the core Drupal platform? Why should we consider Acquia if we're already hosting Drupal internally?
Let's take a closer look at some of the solutions available through Acquia and why Acquia and Drupal together may be the right solution for your digital experience platform (DXP).
Enterprise Hosting Tuned for Drupal
Acquia is probably best known for its enterprise Drupal hosting capabilities. Acquia's high-availability hosting solution is tuned for Drupal and offers a scalable solution for hosting mission-critical websites on the Drupal platform. By default, a three-tier Drupal environment (development, staging, and production) with a drag-and-drop UI is included. Other features like search via Apache Solr, multiple caching layers, a global content delivery network, and Kubernetes-native environments are also available.
For organizations managing tens, hundreds, or thousands of Drupal instances, Site Factory is a powerful solution to build and govern those properties in a unified interface. There are also accelerators to migrate from other platforms or old versions of Drupal, a cloud-native development environment to onboard developers quickly, and CI/CD workflows available with Acquia Pipelines. All of this infrastructure is built on top of the scalable and battle-tested Amazon Web Services platform.
Acquia Content Management System
Drupal has configuration options that allow developers to take the core platform, compile the best community modules, and package those settings into an exportable distribution. Acquia CMS is a distribution of Drupal, which includes the best community modules curated by Acquia to enable teams to launch quickly on their platform.
In addition, Acquia CMS acts as an accelerator to remove some of the repetitive tasks development teams require on every project. Instead, that setup time can be repurposed and invested in building the platform to address business requirements.
Low-Code Page Building
Site Studio is a robust low-code page building solution built specifically for Drupal. Marketing teams can drag and drop components onto the Site Studio layout canvas and build out landing pages in Drupal without development or IT resources. These responsive components are highly configurable and can integrate with core Drupal features like Blocks and Views.
Developers can also create custom Site Studio components in other frontend solutions like React. After the Site Studio components have been defined, marketers and site builders can reuse these elements across the experience to create dynamic Drupal landing pages with localization.
Additionally, teams can utilize Acquia's UI Kit, which provides over 70 pre-built components to help accelerate the page building process. Bounteous is actively using Site Studio with about half a dozen clients, we've written about this product on our blog, and have even highlighted how it enabled our team to launch a new website in a little over a week.
Personalization at Scale
While there are many personalization solutions in the market, Acquia Personalization (formally Acquia Lift) is a no-code solution built to work with Drupal. Acquia Personalization lets teams pull content from Drupal and non-Drupal platforms via APIs to personalize your customers' frontend experience and use data from a unified profile to drive engagement.
Real-time segments can be created based on geography, device, source, past behavior, content interest, or any combination of segmentation criteria. Data can be personalized to the individual with A/B testing, refined over time, and integrated with any system with an API. Once configured, personalization programs can be launched in a no-code personalization UI without the need for IT support.
An Open Customer Data Platform
Acquia added its CDP offering in late 2019 with the acquisition of AgileOne. They have since renamed this solution to Acquia CDP, overhauled the UI to match other Acquia tools, and added forward-thinking features like machine learning models to the product.
Acquia CDP can be used to create a 360 profile with identity resolution to understand the actions and behaviors of every customer. Data can be consumed from any platform with an API, and custom dashboards can be made in their application or exported to other BI tools. In addition, innovative new features like machine learning fuzzy clustering can intelligently add each customer into multiple segments.
True Composable Architectures
While there are many tools available in the Acquia stack, there are thousands of MarTech solutions in the market. One of the most compelling features of the Drupal and Acquia offering is you're not bound by the tools only available in this ecosystem. For example, composable commerce solutions using the Acquia Commerce Framework can be utilized to manage landing pages and product data in Drupal, commerce in Elastic Path or Commerce Tools, and AI-driven product recommendations in Lucidworks.
This is just one example, but there is a lot of flexibility to compile the best solutions and pass data via APIs versus being locked into one platform. It's also worth noting we touched on the topic of creating Drupal platforms with interchangeable services in a recent webinar with Preston So. Picking the best tools for the job with Drupal and Acquia at the center of the stack opens the door to create flexible, feature-rich solutions using best-of-breed tools.
Why Acquia?
Is Acquia required to run Drupal? No. Our responsibility as consultants at Bounteous is to understand the needs of the client and make informed recommendations. As we've seen, there are many features available in the Drupal and Acquia offering, but that doesn't mean it's the right solution for every project.
That said, you can see the true power of Drupal as a platform when you combine it with the robust features and functionality available in the suite of Acquia products. With so many MarTech solutions out there, having products tuned to work with Drupal enables teams to get up and running quickly or pivot as the needs of the organization change.
If we've learned anything from this pandemic, it's that we need digital solutions that are as flexible as they are powerful. A recent customer experience study states 94 percent of organizations have changed their digital CX strategies in the past 18 months. Businesses require the capabilities to launch quickly, pivot gracefully, integrate seamlessly, and scale globally. Acquia is the leading solution for organizations to have those capabilities with Drupal and build their own open digital experience platforms.
In 2021, Acquia acquired Widen, a provider of digital asset management and product information management software. With Widen, Acquia extends its leadership in managing web applications. Widen solutions will make it simple for Acquia DXP users to add brand and product content to any digital customer experience and manage it at scale. The company's focus on managing content and the marketing workflow surrounding rich media and product information complements Acquia's and makes Widen an ideal fit.
We look forward to seeing how Acquia continues to invest in customers and the Acquia Open DXP.
The typical post-DrupalCon slow week — from travel woes to taking some time off, to passing on learnings to the rest of the team. But there’s still some interesting things to note this week :)
The funny bug fixed with one line of HTML
During DrupalCon, Chris “cosmicdreams” Weber spotted a funny edge case we somehow hadn’t triggered during development: after placing a component using Experience Builder (XB), using the component props form to specify values and pressing Enter, no it actually submits the form, because that’s what forms do! But in this case, it is not meant to be submitted: the preview is updated live and saving will (eventually) happen automatically.
I investigated, and discovered the existence of
Thanks to Chris in particular for not just reporting this, but also persevering in fixing this, including writing his very first end-to-end Cypress test! Along the way, half the team contributed either in-person at DrupalCon (Ben “bnjmnm” Mullins and Bálint “balintbrews” Kléri) or remotely (Jesse “jessebaker” Baker, Utkarsh “utkarsh_33”, Deepak “deepakkm” Mishra and I).
The bug fixed with CSS instead of JS and even net-deleting CSS
When placing components and causing the height to change, the UI became jumpy — not good.
Gaurav “gauravvvv” started working on a fix, and in reviewing it, Jesse thought of a different approach altogether … the result: a +8,-53 diffstat that deleted a bunch of JS (one entire file even) and replaced it with a pure CSS solution (fit-content) — even one CSS line less than before!
Research mode: continued
I mentioned last week that a bunch of us were in research mode.
Ted “tedbow” Bowman and Travis “traviscarden” Carden continued research on #3475672: auto-saving, drafts, and all possible ways to achieve that — with Travis overhauling that issue summary in such a magnificently structured way that has rarely been seen on drupal.org. It really helps streamline the discussion!
Similarly, Harumi “hooroomoo” Jang, Xinran “xinran” Cao, and Alex “effulgentsia” Bronstein continued iterating on #3475363: in-UI (JS) component creation Proof-of-Concept using StackBlitz — stay tuned for a demo! :D
Missed a prior week? See all posts tagged Experience Builder.
Goal: make it possible to follow high-level progress by reading ~5 minutes/week. I hope this empowers more people to contribute when their unique skills can best be put to use!
For more detail, join the #experience-builder Slack channel. Check out the pinned items at the top!
Assorted clean-up & bugfixes
Week 21 was September 30–October 6, 2024.
Series Overview & ToC | Previous Article | Next Article - coming soon!
We executed the last field-related migrations in the previous article, but we are not done with field configuration yet. Back in article 17, we used the Migrate Skip Fields module to prevent the automatic migration from importing image and YouTube fields. Today, we are going to use Drupal recipes to create media types and manually add media reference fields where needed.
Drupal recipes
The Recipes API,introduced in Drupal 10.3, allows installing modules and themes, importing configuration and content, and altering existing configuration. Recipes can also depend on other recipes, making them composable and highly flexible. Another benefit is the potential to replace installation profiles. This not only saves time but can bring consistency across different projects. In fact, Core's standard installation profile was replicated as a set of recipes. We are going to use a couple of those recipes to add media types to our Drupal 10 project.
Drupal recipes can validate that configuration elements are in a known state before the recipe is applied. Once a recipe is applied, the imported configuration is handled by the site itself. Any updates should follow standard configuration management practices.
Take a look at the core/recipes folder in Drupal 10’s docroot to better understand the anatomy of a recipe. Each one is contained in a folder with a required recipe.yml file. They can optionally contain config and content folders to import configuration and content respectively. We could certainly write a whole series on Drupal recipes, but for now we are going to focus on what is applicable to our example project.
Technical note: Recipes are a first-class Composer project type: drupal-recipe. They can be required as any other Composer package.
Applying a Drupal recipe
Drupal Core provides a built-in script for applying recipes. Starting with Drush 13, a recipe command is available. When executed from a Drupal 10 docroot, any of these commands can be used to apply a recipe:
php core/scripts/drupal recipe /path/to/recipe_folder
drush recipe /path/to/recipe_folder
We are going to use the Drush approach since applying recipes from the host into the Docker container requires some extra arguments. For reference, refer to this documentation to apply recipes when using DDEV.
First, we will apply a recipe to use images as media entities. From the Drupal 10 folder in your host machine, run the following command:
ddev drush recipe core/recipes/image_media_type
If things go as expected, you will see a message indicating that the Image media type applied successfully. This should create an image media type, add an image field to it, and configure the default and media_library view and form modes. Visit https://migration-drupal10.ddev.site/admin/structure/media/manage/image/fields to see how things were set up.
These changes required adding new configuration to the site. Remember to export and commit the changes as with any other configuration change. If the recipe failed to apply, refer to the troubleshooting section below.
With one recipe applied, we will now do another that will allow YouTube videos to be embedded. From the Drupal 10 folder in your host machine, run the following command:
ddev drush recipe core/recipes/remote_video_media_type
When applied, the recipe will create a remote_video media type, add a plain text field to it, and configure the default and media_library view and form modes. The text field is used to store a link to the remote video URL. YouTube and Vimeo are supported out of the box. Visit https://migration-drupal10.ddev.site/admin/structure/media/manage/remote_video/fields to see how things were set up. As you would expect, the site configuration has been updated. Export the changes and commit them to the repository.
With media types already created, we are going to manually add media reference fields where appropriate. Per the site audit document referenced in article 3, these are the fields to add:
- In the
Articlecontent type, add a media reference field to images. - In the
Venuecontent type, add a media reference field to images. - In the
Sessioncontent type, add a media reference field to remote videos. Add this field to theResourcesgroup.
This is a site building exercise readers should be able to do on their own. Refer to the code repository for the final configuration.
Troubleshooting recipe application
Recipes verify that included configuration does not exist or that existing configuration matches the recipe definition exactly. This check is also performed for dependent recipes.
In the case of existing configuration, the check is based on machine names. Any variation will prevent the recipe from applying. For example, the image_media_type recipe depends on the large image style. If we update its label from Large (480×480) to Large 480×480 px, the following error will be triggered when trying to apply the recipe:
In ConfigConfigurator.php line 47:


 The configuration 'image.style.large' exists already and does not match the recipe's configuration
Our label change might not be meaningful, but what if we had made changes to the image effects used in that image style? We certainly would not want to lose those customizations! As a general rule, recipes would not overwrite any configuration element if its current value differs from the recipe definition. Instead, a validation error is yielded. This might seem limiting. What is the point of using recipes then?
Remember that recipes are meant to be starting points. You can install a site from recipes. When there is no existing configuration, no conflicts can arise. That being said, applying recipes on existing sites is a valid and useful feature. In addition to those provided by Core, there are contributed recipes that you can use on your projects today.
Note: As of Drupal 10.4, recipes can opt out of strict comparisons with existing config. At the time of publishing, a strict comparison is still the default. Changing to making the configuration comparison lenient by default is being discussed in this issue.
Should we use recipes in migration projects?
It depends on your project requirements and the desired content model.
In our case, our Drupal 7 project did not use the Media module, but we still wanted to use media entities in Drupal 10. Recipes are available for creating media types modeled after the standard installation profile. No need to reinvent the wheel here!
Even so, put on your site builder hat as we take a deeper look at the implications of using these recipes.
Our example Drupal 7 project is arguably very simple. It is based on the standard installation profile and there are not many customizations. No custom image styles or text formats, nor changes to those provided out of the box. Only one custom role (Editor) and no WYSIWYG configuration. We could definitely use many Core recipes modeled after the standard installation profile, but should we?
For the sake of the example, consider image styles. Drupal Core provides a migration for image styles from Drupal 7. If we were to use it, the migration will overwrite any image style to match its Drupal 7 definition. In the case of Core image styles, Drupal 10 uses a WebP converter. That feature did not exist before. Since we are not customizing the Core image styles, and we do not have any custom one, for our example project it is better not to migrate image styles. That way, we take advantage of the optimizations that come with WebP in Drupal 10.
If you have custom image styles, use the upgrade_d7_image_styles migration from the ref_migrations folder. In this case, the image style migration needs to happen after applying the image_media_type recipe. Otherwise, updates to existing image styles will make the configuration validation fail and the recipe would not be applied. While this might seem like a chicken and egg problem, good planning goes a long way into determining the correct order to apply recipes, migrate configuration, and do manual configuration changes.
Technical note: Most source plugins for upgrading from Drupal 7 connect directly to the database to fetch data. Drupal 7 allowed some configuration to be defined in code, either by modules or features. When that configuration is in its default state, only the code representation exists. The database would not hold a reference to it. That is the case for the image styles in our example. Checking the status of the upgrade_d7_image_styles reveals there are no records to migrate, but we know that image styles do exist in Drupal 7. Those present only exist in code. For them to exist in the database, you would need to overwrite them. This also happens with views, field groups, and other configurations that can be represented in code. Take this into account if a migration reports no records to migrate or the total count is lower than expected.
To answer the question posed at the start of this section, it is ok to use recipes when they can be cleanly applied. If subsequent migrations might overwrite configuration elements created by the recipes, make sure the new configuration is truly what you want. If we export and commit configuration changes after every step, git should show us if anything was overridden. Keep in eye on functionality that did not exist in Drupal 7 and could be lost. That should not stop you from using the migration. If anything, manually apply the configuration that was overwritten by the migration.
Today, we've covered the basics of the Recipes API, how to apply recipes, and used them for creating media types. In our upcoming articles, we’ll walk through migrating user roles, permissions, and text and input formats to your new Drupal 10 site.
Join us THURSDAY, October 17 at 1pm ET / 10am PT, for our regularly scheduled call to chat about all things Drupal and nonprofits. (Convert to your local time zone.)
We don't have anything specific on the agenda this month, so we'll have plenty of time to discuss anything that's on our minds at the intersection of Drupal and nonprofits. Got something specific you want to talk about? Feel free to share ahead of time in our collaborative Google doc: https://nten.org/drupal/notes!
All nonprofit Drupal devs and users, regardless of experience level, are always welcome on this call.
This free call is sponsored by NTEN.org and open to everyone.
-
Join the call: https://us02web.zoom.us/j/81817469653
-
Meeting ID: 818 1746 9653
Passcode: 551681 -
One tap mobile:
+16699006833,,81817469653# US (San Jose)
+13462487799,,81817469653# US (Houston) -
Dial by your location:
+1 669 900 6833 US (San Jose)
+1 346 248 7799 US (Houston)
+1 253 215 8782 US (Tacoma)
+1 929 205 6099 US (New York)
+1 301 715 8592 US (Washington DC)
+1 312 626 6799 US (Chicago) -
Find your local number: https://us02web.zoom.us/u/kpV1o65N
-
- Follow along on Google Docs: https://nten.org/drupal/notes
Under certain uncommon site configurations, a bug in the CKEditor 5 module can cause some image uploads to move the entire webroot to a different location on the file system. This could be exploited by a malicious user to take down a site.
The issue is mitigated by the fact that several non-default site configurations must exist simultaneously for this to occur.
Solution:Install the latest version:
- If you are using Drupal 10.2, update to Drupal 10.2.10.
- Drupal 10.3 and above are not affected, nor is Drupal 7.
All versions of Drupal 10 prior to 10.2 are end-of-life and do not receive security coverage. (Drupal 8 and Drupal 9 have both reached end-of-life.)
This advisory is not covered by Drupal Steward.
Reported By: Fixed By:- catch of the Drupal Security Team
- Lee Rowlands of the Drupal Security Team
- Benji Fisher of the Drupal Security Team
- Kim Pepper
- Wim Leers
- xjm of the Drupal Security Team
- xjm of the Drupal Security Team
- Dave Long of the Drupal Security Team
- Juraj Nemec of the Drupal Security Team

Drupal is one of the leading Content Management Systems (CMS) and one of the largest open source communities in the world, with more than 1 million passionate developers, designers, trainers, strategists, coordinators, editors, and sponsors.
As an open source community, organizations and individuals have many ways they can support the community, contribute thought leadership, and advocate for the principles of open source technology. Bounteous and team members have been Drupal users, contributors, and creators for more than a decade and have found several ways to help contribute to Drupal’s continuous innovation.
As advocates of open source software, we also strongly believe in the guiding principles of the Drupal community: collaboration, education, and innovation. Below, we’ve outlined some ways that companies and organizations can contribute to the health and success of Drupal—from hosting community events and volunteering to sponsoring Drupal conferences. We wouldn’t be where we are today without the support of this community and we’re honored to give back in as many ways as we can.
Conferences & Volunteering
One way to contribute to the Drupal community is through attending, volunteering, and speaking at Drupal conferences. With local conferences or “camps” around the world, it’s a great way to share knowledge and expertise with the Drupal Community.
Drupal team members at Bounteous have spoken around the world, at conferences such as DrupalCon North America, DrupalCon Europe, Design4Drupal, Florida DrupalCamp, and MidCamp. We’re also annual sponsors of the Drupal Association and DrupalCon North America, as well as MidCamp.
Events help spread ideas and sharing ideas can benefit everyone. While most Drupal Camps are regional events that happen in-person, we feel strongly about enabling access to thought leadership and helping to educate all those in the community. We’re especially excited about the Drupal Recording Initiative that helps capture Drupal conference presentations and publicly share recordings with the larger Drupal community. If you haven’t taken advantage of these recorded sessions, check out Drupal.TV for many recorded events.
This year’s conference schedule has seen radical shifts, with regional events like MidCamp as well as the national DrupalCon conference shifting to entirely virtual events. While this has certainly been disruptive and changes the experience for attendees, we’re optimistic about the ease of access to information that these virtual events enable, providing extensive opportunities for those who wouldn't be able to attend in person. We’re also excited about new ways to connect and share educational resources using digital formats to their fullest potential.
Conferences, whether online or in-person, always require volunteers and are a great way to connect with other Drupalists. In 2020, a few members of the Bounteous team helped organize MidCamp, making it the first conference in the space to go completely virtual and at the same time meet accessibility needs of all attendees, ensuring a quality experience for everyone.
Open Source Contributions and Insights
Drupal wouldn’t exist without its diverse group of passionate volunteers to move the project forward. With such an inclusive and supportive community, it’s no wonder how such a strong content management system has been sustained for so long and why people keep coming back.
In addition to the events and meet-ups that we host, we also encourage our team to contribute code to the Drupal project, building time into our roles to account for contributions of all kinds. Some team members provide code patches to Drupal core, while others have created and currently maintain Drupal contributed modules and themes.
It’s not just developers who contribute to Drupal. There’s always a need for project managers, bug reporters, QA testers, people to help write documentation, and so much more. At Bounteous, this means getting more people involved than just the Drupal team and using mentors to introduce people to open source concepts and offer ways to make an impact.
Interested in learning more about Drupal migration paths, embedding external JavaScript, or automating Drupal deployment? We, like many others, frequently post about Drupal on the Insights section of our site, featuring Drupal tutorials and resources, and covering the latest advancements in the industry. You’ll find a wealth of Drupal information online, created and shared freely. If you haven’t subscribed to the Weekly Drop, sign up to receive frequent updates and regular posts.
Drupal and the Drupal Association
Behind the scenes, the Drupal Association is responsible for being the caretaker of the Drupal open source project by managing drupal.org, coordinating the promotion of Drupal, facilitating the Drupal Security Team, and many other activities which ensure that the Drupal project remains strong.
Many may know of the Drupal Association through their annual DrupalCon conferences, which is a huge part of raising both awareness and funds to support Drupal and the Drupal Association. These international educational events are jam-packed with curated panels, sessions, keynotes, trainings, and contribution days. Both sponsor and community-supported, these events attract Drupalists from all over the world, with an emphasis on education and collaboration, with sessions and speakers selected from hundreds of submitted topics.
In addition to the yearly conferences, individuals and organizations can become Drupal Association members. The funds contributed go directly to supporting the efforts of the Drupal Association and promoting the open source Drupal community to the world.
Companies can choose from three partner programs: Supporting Partner, Hosting Supporter, or Technology Supporter. Whether you work at a Drupal shop or use Drupal for personal projects, consider joining the Drupal Individual Membership program which comes with a host of benefits.
Sustaining the Drupal Association | COVID-19 Impact
As a company, we are committed to supporting #DrupalCares, which is raising money for the Drupal Association in this time of uncertainty, and continuing to fund the Drupal community—from contributing to Drupal software and volunteering within the open source community to dedicating resources to ensure growth and financial success.
In this time of need, Bounteous has pledged its 2020 sponsorship of DrupalCon North America to support DrupalCon Global (July 14 - July 17), and we look forward to working with the Drupal Association to make the virtual event a huge success.
We encourage everyone in the Drupal community to come together and find creative ways to help the Drupal Association and each other.
- Consider making a donation to the Drupal Association.
- Other DrupalCon sponsors can consider this year's sponsorship as a contribution and pledge their support to DrupalCon Global.
- Individuals can consider becoming a member, increasing their membership level, or submitting an additional donation.
Together, 28 individual @Bounteous employees are donating $2,575 to #DrupalCares. We bundled our donations to receive a match from the Bounteous Charitable Fund. Our donation, its match from Bounteous, and @Dries & Vanessa Buytaert brings an impact of $7,725 for @drupalassoc!
— Scott W (@NodeLoophole) April 17, 2020
In this article, I’ll show you how to build a system to keep track of your company assets using Drupal. This system allows you to easily create and manage an equipment list with resources such as laptops, phones, monitors, or desks that are assigned to employees. It’s ideal for remote or hybrid companies, where control over issued equipment is crucial. Read the blog post or watch an episode of the “Nowoczesny Drupal” series (the video is in Polish).
Why implement a system for the equipment list?
Companies, especially those that use hybrid or remote work or have multiple offices, need to manage business assets. When employees are assigned different equipment, over time, it can be difficult to keep track of who has what devices, what has been returned, and what needs to be replaced. With a Drupal-based system, we can easily monitor each employee's inventory and identify which equipment is unassigned and can be reused.
It is also worth mentioning that this system can be built as a standalone Drupal installation, or such functionality can be added to an existing system, such as part of a company's intranet system.
Let's now move on to a step-by-step explanation of how to build such a system using Drupal as an example.
Creating data types in Drupal
We'll start by creating the data types that will further be necessary to create the views of equipment records.
Equipment types and parameters
To begin with, you need to create the types of data that will be stored in the system. Drupal makes it easy to define different types of equipment, such as laptops, phones, or monitors. We can also assign appropriate parameters, such as RAM or screen size.
The creation of data types is done through the "Structure" tab in the Drupal admin panel. We create the equipment type as a taxonomy and the equipment parameters as further taxonomy terms that can be assigned to equipment.
Examples of equipment types:
- Laptop
- Phone
- Monitor
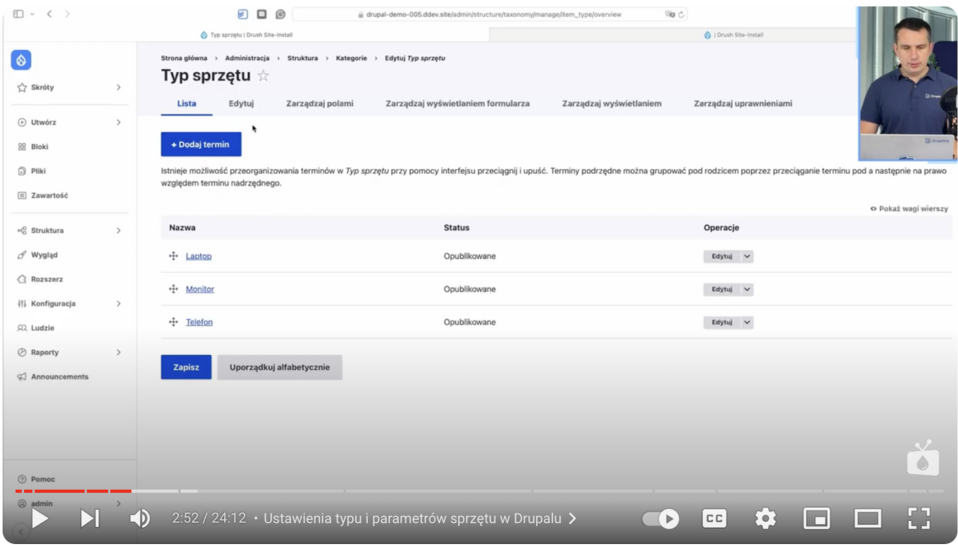
The second thing we’re going to specify are the parameters of the equipment. Examples of the parameters we use are:
- RAM
- Monitor size
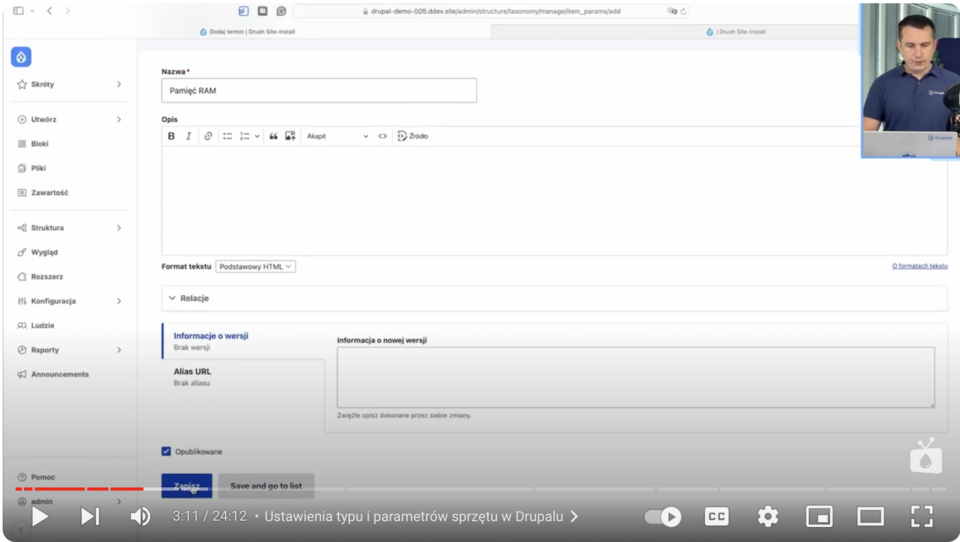
The next step will be to add an item that will determine the above parameters, such as the size of the monitor (13 inches and 16 inches) or the size of the RAM (16 GB and 32 GB). To do this, we expand our list by adding more partitions.
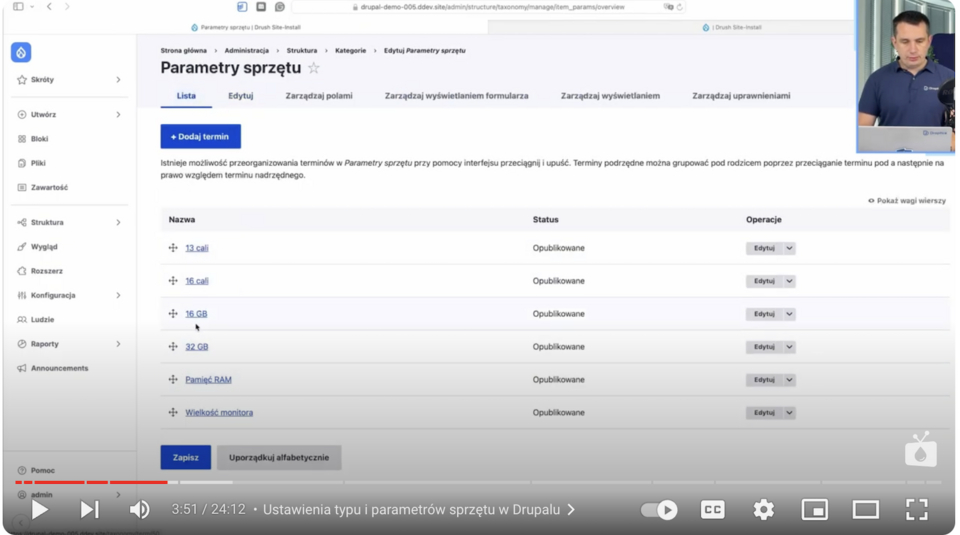
Next, we sort our items so that the appropriate parameters are under the appropriate data categories.
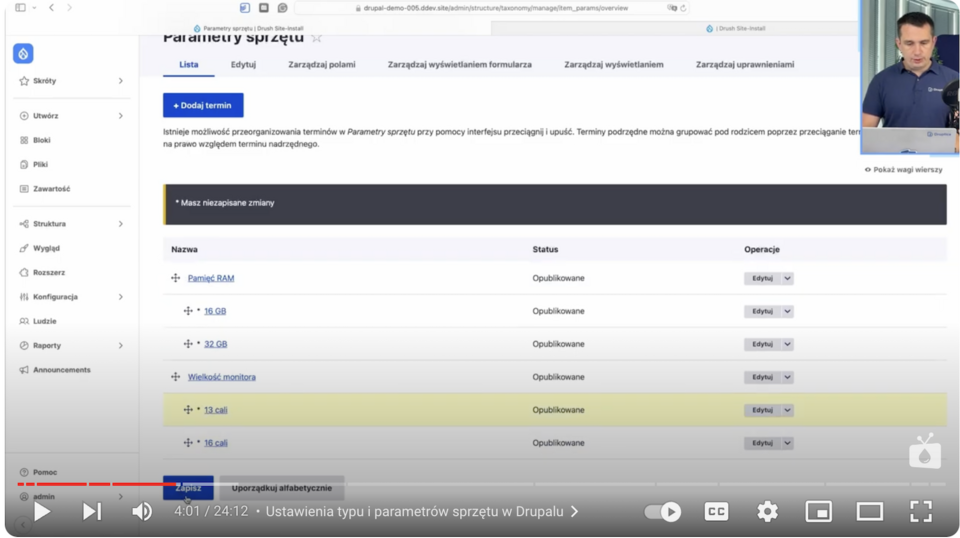
This allows you to accurately describe each piece of equipment and organize all the information.
Creating equipment entities
The next step is to create an entity that will store all the information about the equipment. In Drupal, we create a new content type - "Equipment".
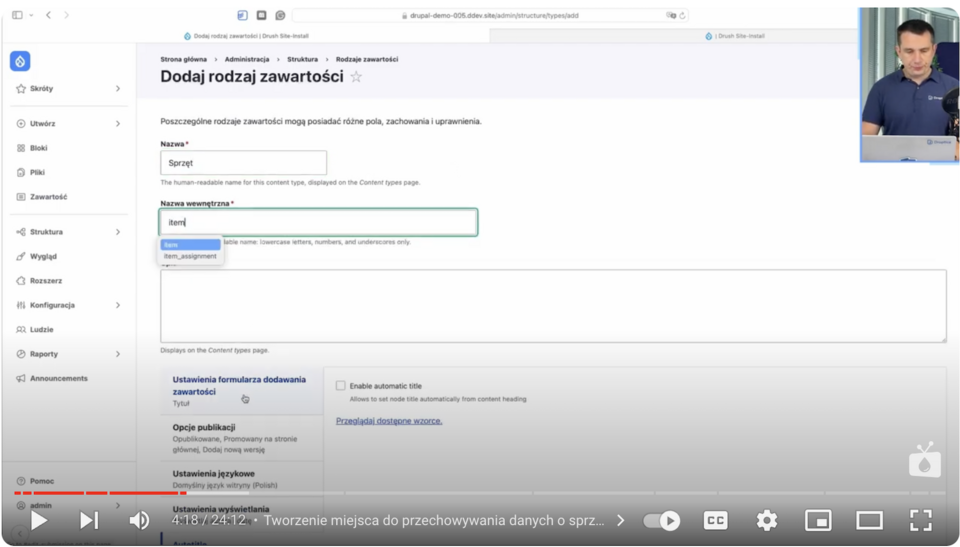
Then, in the "Manage fields" section, we click "Create a new field" and select the type of field we want to add. For parameters, we refer to the things we added earlier, that is, we add a "Reference" field to the equipment type and its parameters.
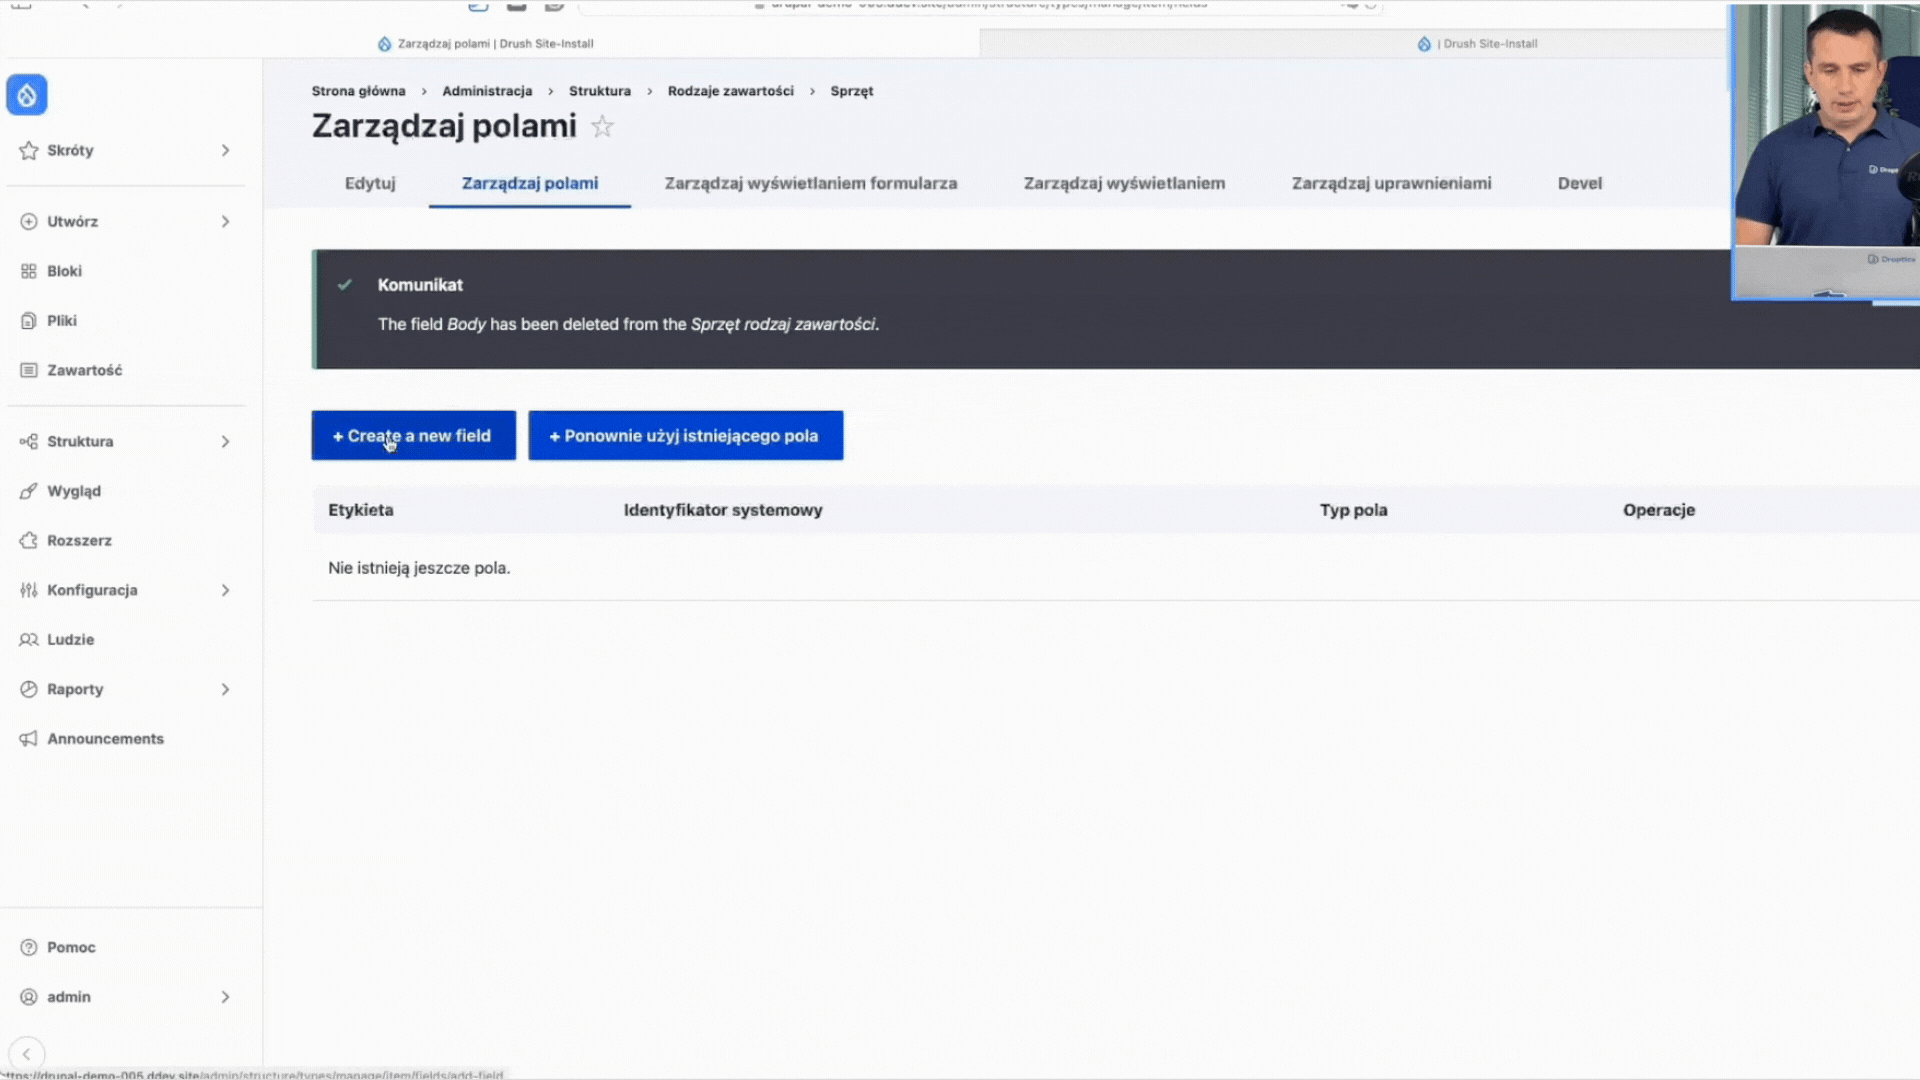
It’s important to change the allowed number of values in the parameter reference to "unlimited". This will allow you to add more than one parameter (e.g., RAM, screen size) to a given hardware.
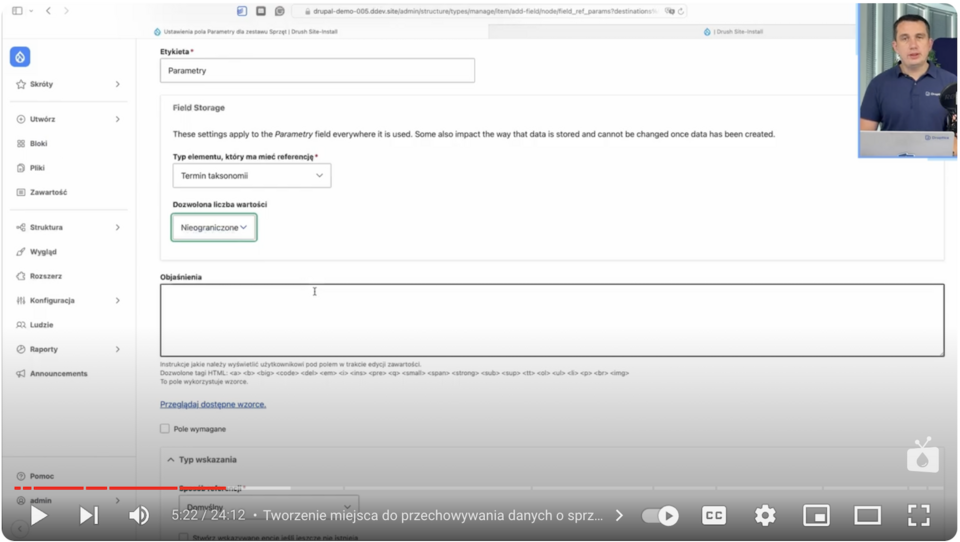
Similarly, we’ll create a "User" field.
We can add several fields to this entity, such as:
- Equipment name - text field
- Type of equipment (laptop, monitor, phone) - reference field
- Parameters (RAM, screen size) - reference field
- Assigned user - reference field
- Serial number - numeric field
- Purchase date - a field with a date
- Purchase price - numeric field + suffix
- Invoice (possibility to attach PDF file or photo) - file upload type field
These fields can be added as needed as text, numeric, file upload, and date fields, as seen with the specific examples above. You can also use suffixes (e.g., adding PLN in the field with price) and several other additional specifications.
Here you can immediately see how many types of fields there are to use in Drupal for different data structures or types of content, and how quickly they’re built. Each of these fields can be customized to meet the specific needs of the company, making the system more flexible.
After creating such structures, we see a form with data to be filled in.
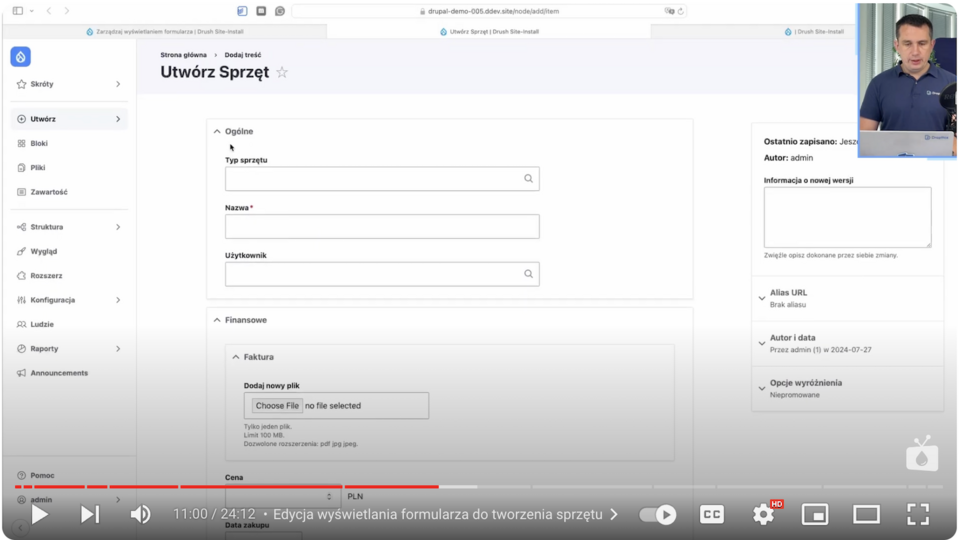
Create views to manage equipment and business assets
To make the form display aesthetically pleasing, we need to improve it by creating views.
Categorization of information
Our form has several types of data that we can group. We’ll create three groups of equipment data:
- General (name, type of equipment, user)
- Financial (price, invoice, date of purchase)
- Other (parameters, serial number)
Once saved, we’ve categorized data, making the form more readable. You can also customize these fields according to the needs we have in the company.
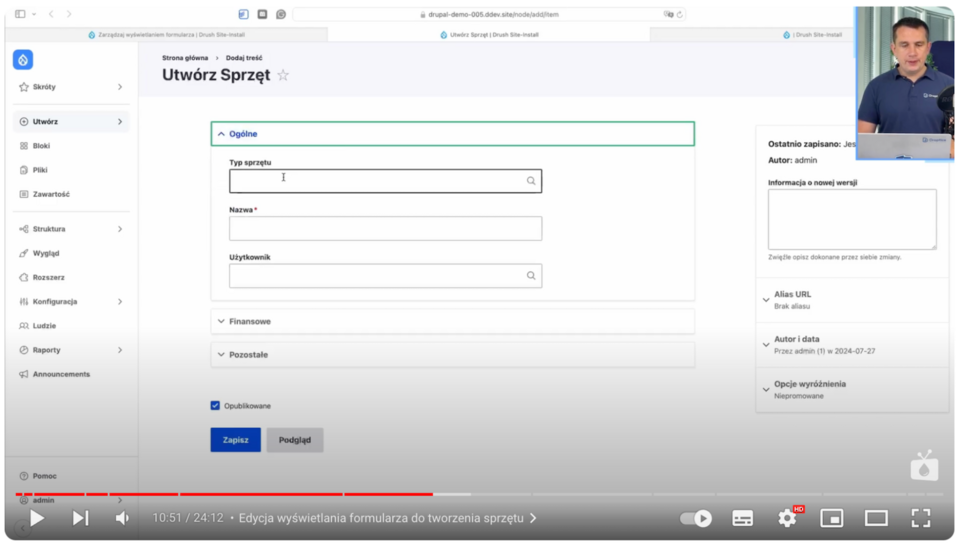
Now, we’ll make one more modification - we’ll change the field for selecting the type of equipment to select2, which will allow us to choose the types of equipment our company has listed earlier.

This gives us an interesting drop-down list that will allow us to easily select types of equipment, not only by clicking but also by typing by name, which is useful, especially when there are a lot of them.
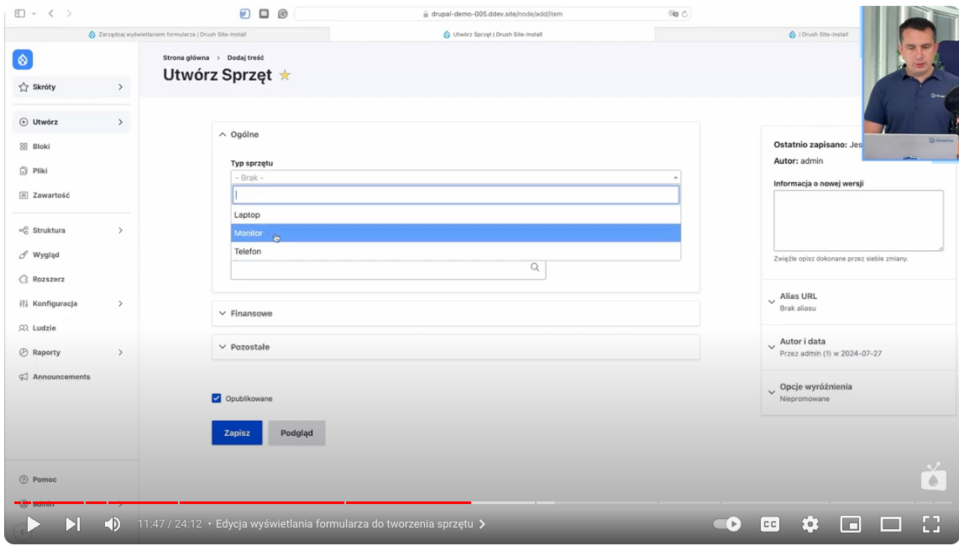
Another modification will be to change the field in "Parameters." We’ll replace the autocomplete with a field of type Hierarchical select.

This will give us the ability to select the type of parameter with a value assigned to it accordingly.
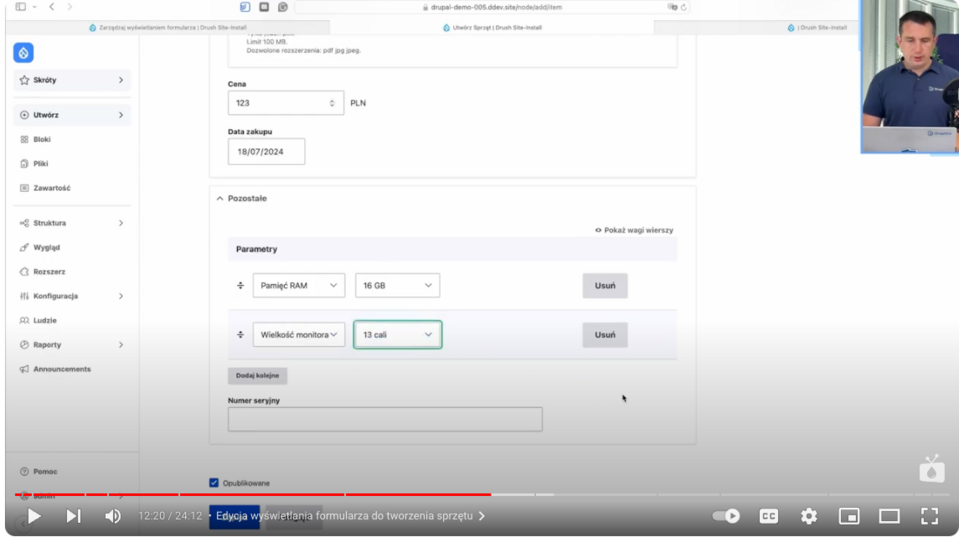
You can see here that you can modify these widgets freely, even after creating them, gaining a convenient interface for managing hardware data.
After filling in the fields and saving the data, the view of each equipment will contain the following columns:
- Equipment ID
- Name
- Type of equipment
- Parameters
- Purchase price
- Edit option
- Assigned user
This gives the person managing the list of equipment a complete overview of available resources and can easily add new company assets or edit existing data if necessary.
Views of business assets
Now, we’ll work on equipment views.
We’ll go to "Structures" and then click "Views." We’ll add a name, which is "Equipment." We’ll change the content to "Equipment," go to "Page Settings" and click "Create Page." We add a title, path, number of elements to display, and save. Now in the "Format" section, we change the display of elements to "Table."
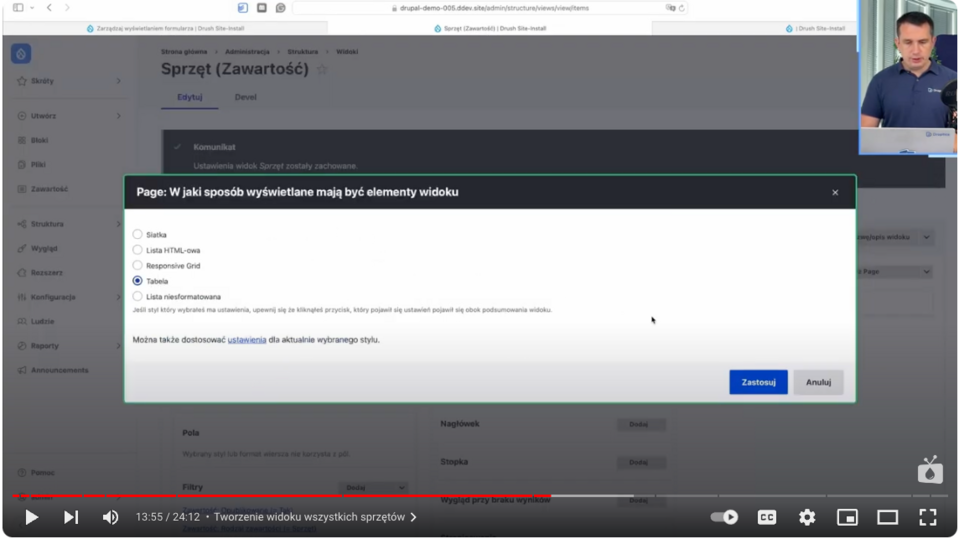
In it, we’ll add some fields, such as ID, equipment type, parameters, price, and link to edit. I leave the rest of the options as default, but of course, you can edit it as you like.
The next step is to set the order of the data in the table, we want to have the ID and equipment type at the beginning and the edit option at the end. In this step, we also add a link to add new equipment (as a header) and full sorting. We get such a user-friendly view:
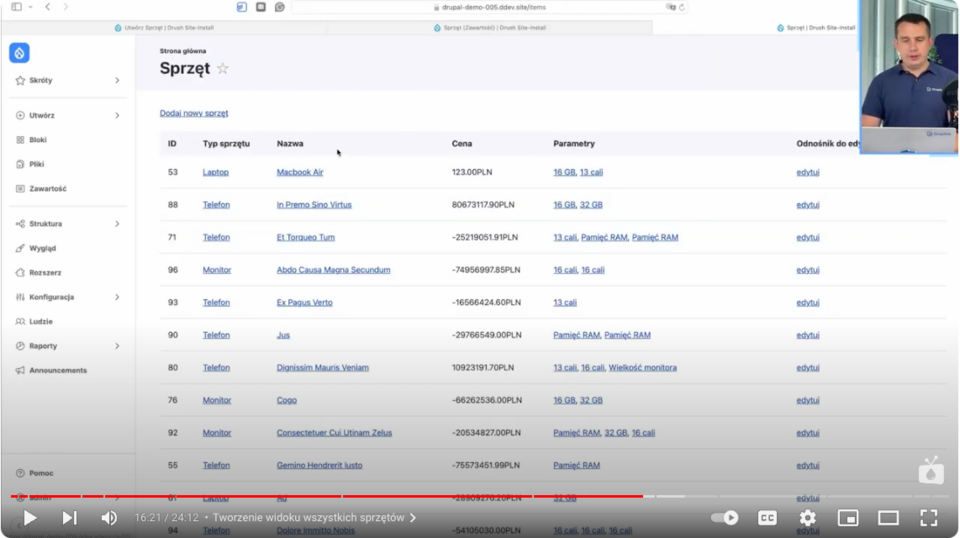
As we can see, Drupal allows advanced personalization of equipment addition forms, making it much easier for users and data entry becomes more clear and organized.
Filtering and sorting data of the equipment list
We’ll now add a data filtering option. To do this, we’ll go to the filtering configuration option and add criteria - “Filter by name.”
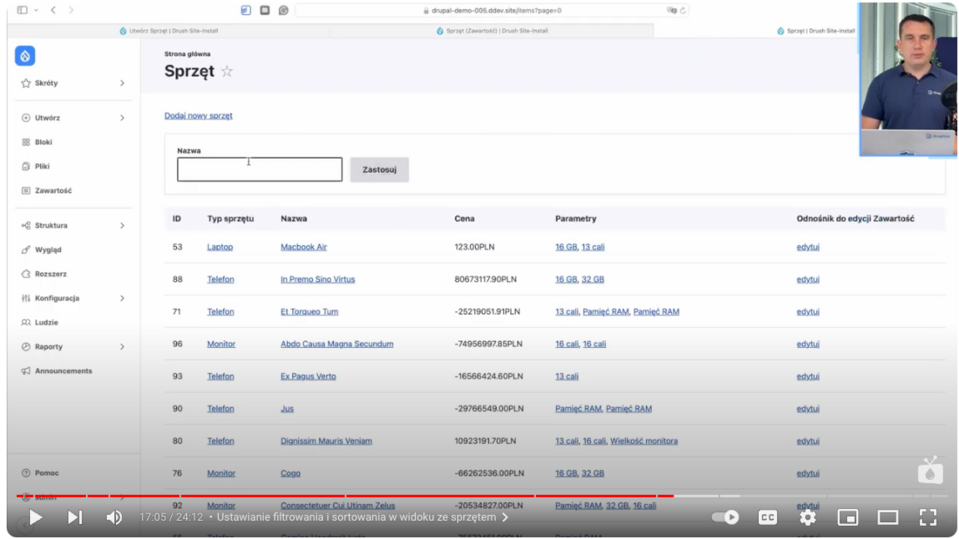
Next, we’ll look at adding the ability to sort the data by specific criteria, e.g., by price, ID, and name. This can be done in the display method settings:
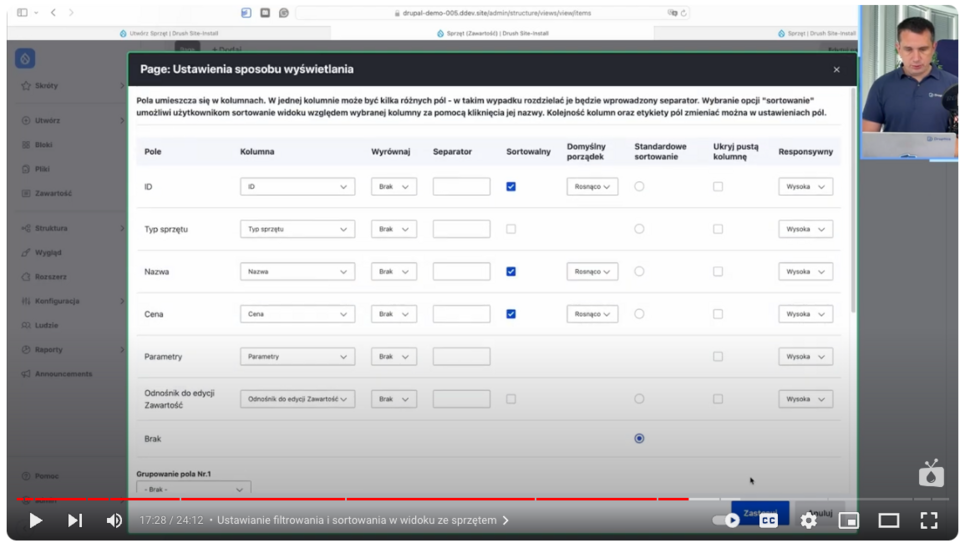
As a result, table headings have become clickable, making it possible to sort them ascending or descending:
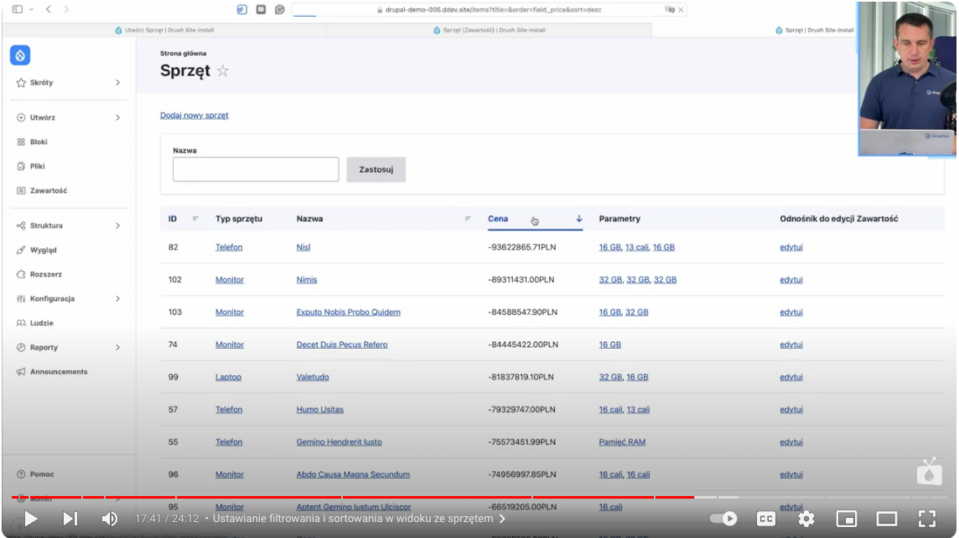
This allows the user to easily search for equipment by name, price, or other parameters. Introducing the possibility of sorting columns (e.g., by price or purchase date) significantly improves the convenience of using the system.
Create advanced views of the equipment list
Drupal allows you to further develop the system by creating more advanced views, such as:
- Equipment not assigned to the user - the view allows you to identify business assets available for release.
- Equipment without invoices - a list of equipment that lacks attached invoices, which can help you organize your documentation.
- Equipment with the parameters we specify.
To do this, copy the current view and rename it, for example, to “unassigned equipment.” Then, we add a filter to the "user" field and set it as empty. This gives us an easy view of the equipment, which is in the company and not assigned to anyone.
So we have two views:
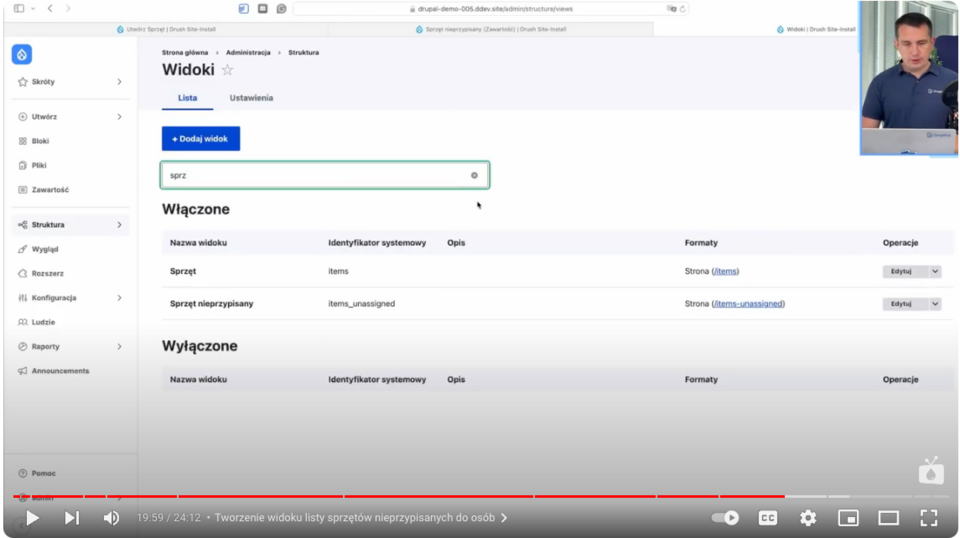
Thanks to Drupal's flexibility, it can be cloned at will, changing settings and creating further views, such as equipment without invoices or with specific parameters to suit the needs of the company or individual departments, such as IT administration or accounting.
Equipment list with company assets - summary
Setting up a company's equipment inventory system on Drupal is a task that can be done relatively quickly and without a lot of expense. Drupal offers tremendous possibilities for tailoring the data structure and functionality of the system to the specific needs of the organization. With simple tools such as content types, views, and advanced forms, we can build a system that streamlines the management of resources in a company.
Eventually, such a system can also be integrated with other applications, exposing data in JSON format or importing it from CSV files. All this makes Drupal an excellent choice for companies that want to keep effective records of equipment.
If you're wondering if Drupal is the right technology for your business, it's a good idea to schedule a free consultation, to discuss possible solutions.

Senior Backend Engineer
Always looking for a challenge, Marc tries to add something new to his toolbox for every project and build — be it a new CSS technology, creating custom APIs, or testing out new processes for development.
October 15, 2024
For higher ed institutions and nonprofits, Localist is a powerful resource that provides a valuable means of centralizing your organization’s events into a single branded calendar. However, integrating that event data into a Drupal website in a seamless way can pose a significant challenge.
At Four Kitchens, we recently completed a custom module for a client that can regularly import events from Localist into their higher ed site. After finishing the project, it dawned on us that the Drupal community could benefit from our work. In keeping with our commitment to sharing knowledge with our community, we rebuilt it as a contrib module, so it’s available for your organization, too.
During this rebuild, there were several lessons that we thought were valuable to share to aid other developers who also build custom modules.
Setting functional goals
Before we get into the challenges and lessons we learned, let’s talk about what this module does and how it can help your organization import event data from Localist.
The Localist platform offers an API, but it requires time and development resources to create a custom Drupal module that satisfies your organization’s data requirements. This module simplifies the work needed to import event data from Localist into Drupal by using Drupal’s plugin architecture. Fundamentally, this module uses Drupal’s migration APIs to handle all of the heavy lifting. However, we needed to add custom plugins and functions to handle the Localist API specifically.
Additionally, migrations in Drupal are usually a one-time import — for example, migrating data from an older Drupal 7 site to a newer Drupal 11 site. With event data, importing needs to happen regularly, so this module is designed to import data roughly every hour.
Finally, we decided to build a UI, include optional installable examples (using Drupal’s new Recipes initiative!), and include a code generator that guides a developer to quickly get started building their own event migrations required to import the data.
The information imported from Localist is then stored in fields on a Drupal content type to display however you’d like. If your organization already uses Localist to manage events, you can now display that information in a consistent way on your own website.
Shifting a custom solution to a community contribution
Transforming a client-specific module into a contrib module for the wider Drupal community required extra work, but those efforts are true to our values of sharing knowledge and enabling others to benefit from our research.
Remember the last time you went searching for a module to perform a specific functionality, found it, and installed it? Not only did that experience save you development time, but it also showed the power of the open source community.
Shared modules provide ready-made solutions to common challenges, allowing developers to focus on innovation rather than reinventing the wheel.
Challenges and lessons in developing a community-ready module
When building a custom module, you develop with many assumptions in place because the config and code are already in place for a known environment. When building for the community, you have to consider a multitude of scenarios and edge cases. You have to factor in how the module may be used, how it may interact with other modules, and other unknowns.
Additionally, sometimes there can be some very client-specific requirements that don’t make sense for a contributed module. For the client we originally built this for, we built in special functions to handle the formatting and styling of the event dates. To translate this module into a contrib module, that functionality had to be removed, as we can’t make those same assumptions for everyone. We just want to ensure the baseline functionality is in place so your team can then build off that foundation — ultimately saving you time.
Of course, these modifications work both ways. Your organization may need this type of contrib module, but perhaps its functionality doesn’t align with your website’s requirements. Four Kitchens can work with your organization to tailor the module to your needs. Just let us know how we can help.
 Localist contrib module
Translating a custom module for broader use
Rebuilding this custom module to a contrib version required extra time, planning, and testing to suit the broader Drupal community’s needs. It ultimately helped us learn that in the future, we may want to flip the script and try to develop a contrib module first, and then override in our own code to customize per client. In this way, the base functionality is available to all.
If you are a developer who creates custom modules, think about the goals of your module and ask yourself if your idea would also benefit the community as a whole. Building a contrib module from the get-go may be far more efficient than taking a custom module and turning it into a contrib module later.
Below, we’ll share some examples of a few changes we made as part of the rebuild of the Localist module and the reasoning behind the change. We hope this helps other developers think outside the box and determine if a contrib module may be a better idea as a starting place.
The value of contributing to the Drupal community
Contributing to the Drupal ecosystem through contributed modules benefits the entire Drupal community. By making our work available to others, we collectively elevate the capabilities of the platform and empower developers worldwide.
While this specific rebuild required a bit of extra time, it fosters a culture of knowledge exchange and mutual support. Each contribution, no matter how small, adds to the platform’s versatility and appeal.\We hope that by sharing our experience of moving a module from custom to contrib, we empower other developers to consider building contrib first to give back to the community, collaborate with others on additional features, build more robust and better documented modules, and hopefully save a little time in the end.
Making the web a better place to teach, learn, and advocate starts here...
When you subscribe to our newsletter!
In this blog post, I'll share how you can easily and quickly create charts in Drupal using Twig's Charts and Charts modules. This guide will be especially useful for publishers, but also for anyone who would like to have a similar feature in their CMS. I invite you to read the article or watch an episode of the Nowoczesny Drupal series (the video is in Polish), where each activity is shown step-by-step.
Installation of Charts and Charts Twig modules
To create charts in Drupal, we only need one module. We don't need to install any additional libraries to display these charts. All we need is the Charts module. It can be further extended with the Charts Twig module.
Installation is simple and no different from other Drupal modules. You simply need to download the Charts or Charts Twig module, if you want to use Twig for our charts and install it on our website.
As we download the module to the Modules Contrib directory, it will appear in the list of all modules.
And here, as you can see, I already have Charts modules and other submodules installed, which add libraries for us to display given charts. Popular libraries such as HighCharts, Chart.js, and Google Charts are also available.
In the remainder of this article, I’ll show the configuration of the charts in question and, most importantly, how such charts are created.
Four methods of displaying charts with the Charts module
With the Charts module and Charts Twig, we can show charts in four ways.
The first and most popular way is to generate such a chart using the Views module.
The second way is to insert a block specially created for this purpose with the Charts module. There, you manually add the data you want to be on the X-axis or the Y-axis. As a result, this chart appears.
The third way is to add a field to an entity, such as content type. This field will also have the ability to manually insert the data you want to appear on the chart axes. We can also upload this data from a CSV file using the upload option.
The fourth way, which is provided by the Charts Twig module, is to generate a chart using the PHP code, Twig. We can, in some preprocess, get the data, for example, from some API, put it into Twig, and display it on the chart.
Of these four ways, in Views, that is, the Views module, and in Charts Twig (that is, PHP, data from some API) we can show the data dynamically, and with a block or field - the data is presented statically, manually is provided. And once they are provided, they "sit" there.
Configuring the Charts module in Drupal
What does the configuration of the Charts module look like? It’s uncomplicated. We go to the Extend tab. If we don't know what link to use to configure a particular module, in this case, we choose Charts, and here is such a Configure button.
And here, you can set either default or advanced values for all newly created charts.
Let's say I want it to be HighCharts and that the graphs are always linear. It’s worth noting that these are not rigid settings. Each of the ways of displaying charts, i.e. the above-mentioned Views, Block, Field, or Charts Twig, can change these settings, of course.
How to create a chart in the Charts module?
I’ll now show four ways to add a chart in Drupal.
Method 1. Create a chart with stock prices using Views
I prepared myself a content type - Stock Price. It doesn't have a reflection on actual stock prices, but the idea is to see how the stock price changes over time in this case, and show it on a chart.
What does this content type look like? The structure of the content type is Stock Price. Go to the Manage Fields section.
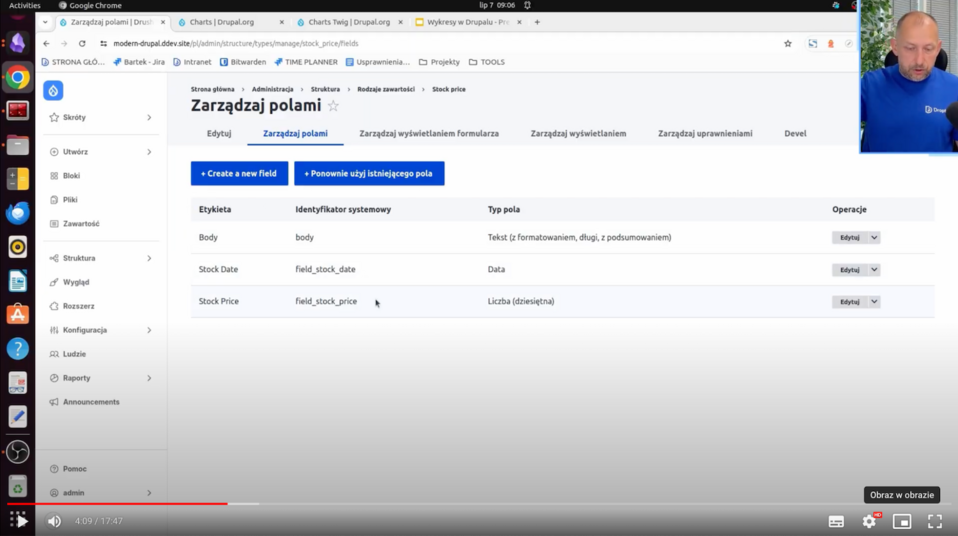
Here we have Stock Date - the date will show up on the X-axis, and Stock Price - the change in this price will show up on the Y-axis. All this will create such a cool graph of the price over time. How to do it most simply? Just by using the view.
Structure -> Views -> Add new view
I am adding a new view. I’ll call it Stock Price. It’ll create some pages with the Stock Price address. I save and change the settings for myself so that, for example, it shows me fields. For now, it’ll add a standard Title.
I’ll want to display the price and the date, which means I'm adding these two fields that are just in this type of content.
And at this point, all the contents showed me. I need to add a filter - Content type. I choose Stock price and click Apply. All the stock prices appeared to me here. I don't want the title, because I don't want it on the chart, so I just deleted this field. And with that, I have all the data I need, i.e. the date and the price.
I'll still set it by date. In the sorting criterion, I'll add Stock Date, select Sort Descending, and click Apply. The other filter, i.e. the date of addition, I’ll remove, I don't need it in this case. I will save this data.
I see that there is a date from the latest to the earliest, together with the price of the shares in question.
And now how to display it on a graph? Very simply. I change the format from Unformatted List to Chart, give Apply, and then I have all the settings visible above in the general settings, i.e., Highcharts, Line, etc.
I set which field should provide the data - Stock Price. Next, I have settings related to the X, and Y axes and labels. I leave as is standard, apply and a chart shows the date and price of this stock. You can also see how it changes over time - there is a downward trend.
What do the other charts look like? You can test it in the settings. You can still choose a Bar, for example, which is a bar chart.

It's less visible when it comes to stocks, but you can experiment with different types of charts. In the case of Charts.js, the line is a little thicker. You can generate such a chart very quickly.
Method 2. Display the chart in Drupal using the block
The second way you can display charts is with Block. How to do it? In a very simple way. You need to create the appropriate block.
Structure -> Block layout
In this section, for example, we need to select something like Charts block in the Place block content.
This is the type of block that is provided just by the Charts module. Just do Place block and further we find the same settings, that is, the data type of charts (let's say linear), and manually we can enter what is on the X axis and what is on the Y axis.
I enter data 5, 3, 8, 4, 13 so that it is ascending. I’ll also restrict myself to a given block so that it appears to me only on the main page, I save and it is in the content. I move it to the very top - the block displays correctly. You can see the X-axis and the Y-axis together with the values - ascending, which is the way we wanted it.
Method 3. Generate Drupal charts using Fields
The third way is to create a field, for example, in the content type.
How to do it? Very simple. First, we need to have a content type for which we want to add the field. I’ll add it to some existing content types. It will be an article.
Structure -> Content Types -> Article
I go into the Manage Fields operation and I need to add a new field that will display this chart for me. I click Create new field, select the chart, then click Continue. I have to name myself this chart - field_charts - and I save the settings. With that, this field is already added and all I have to do now is add an article.
Create -> Article
We already have the Chart field.
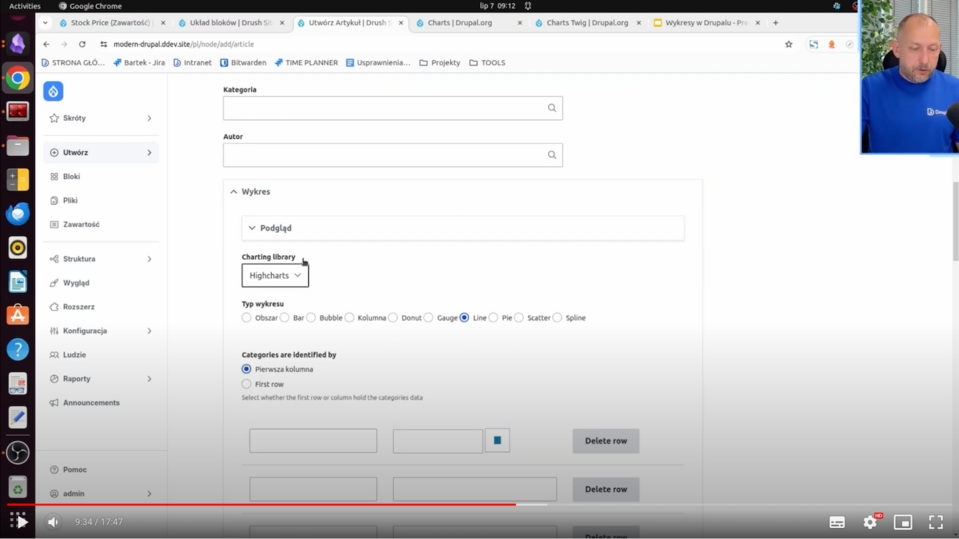
In the same way, as it was in the case of blocks, we also choose the type of a given chart and manually insert data. Here (as in the block) there is also an option to import a CSV file precisely with the data based on which a given chart will be displayed.
Method 4. Create a chart in Drupal with Charts Twig
The fourth way to display a chart is to using Charts Twig. For this, we need to have the Charts Twig module installed. I already have it.
I also already have a custom module created that will display the block for me. I’ll load Charts Twig in it with dynamically added data that will appear on this chart.
I will now move on to PhpStorm, where I created a custom DCharts module. You can generate such a module with Drush or add it manually. This is a very simple module that creates for me only a block.
Here there is a class for the block and build, which is a method that determines how the block should be built. She here just gives the information that all the content is in the Twig file - sample_chart and still passes custom data, date, and x-axis. There are sample data "10, 20, 30" from the Y-axis and labels that will be on the X-axis.
What does it look like from the Charts Twig side? It's very simple. I set the Title, I set the series, that is the variable that will be loaded into this Charts function.
The Charts function is available in Twig only after installing the Charts Twig module.
The date variable is one of the most important ones because it determines the very dynamic data that can be loaded from PHP. She comes from SampleChartBlock. Here, it is hardcoded "10, 20, 30,” but you can see that there is an option to load this data dynamically using some API, for example. Download the data from the API and display it here.
In Sample-chart.html.twig there is already a firing of this function itself. You can see the name of this chart, its type, series, and the data on the X-axis and title.
In fact, this is enough. With this, there is already a block available that will display this data to us.
To display this block, then, of course, you need to go to the block layout page and place the block in the content somewhere. It’s called SampleCharts. This is the same name that was used in PhpStorm in the name of this block.
I click Place block. There is no configuration here because the data comes from PHP. I save the configuration. The chart will probably appear everywhere now because I didn't give any restrictions.
There is SampleCharts - this is the block title. The Chart Title is the data that comes just from Twig. On the X-axis we have the "A, B, C" data, and on the Y-axis we have the data I put in there, which is "10, 20, and 30."
Additional examples of charts
I will also present some charts that are reflected in real life, e.g., on pages for publishers.
I have already prepared such views that present:
- The number of articles added per day,
- The number of articles added per day by category,
- The number of articles added per day by author.
These charts reflect reality for publishers and editors who want to know how progress is going in creating content by given authors or in given categories.
You can also see exactly how and what is being added. For example, by category - you can see that June 24 was a strong shot when it comes to articles on Drupal:
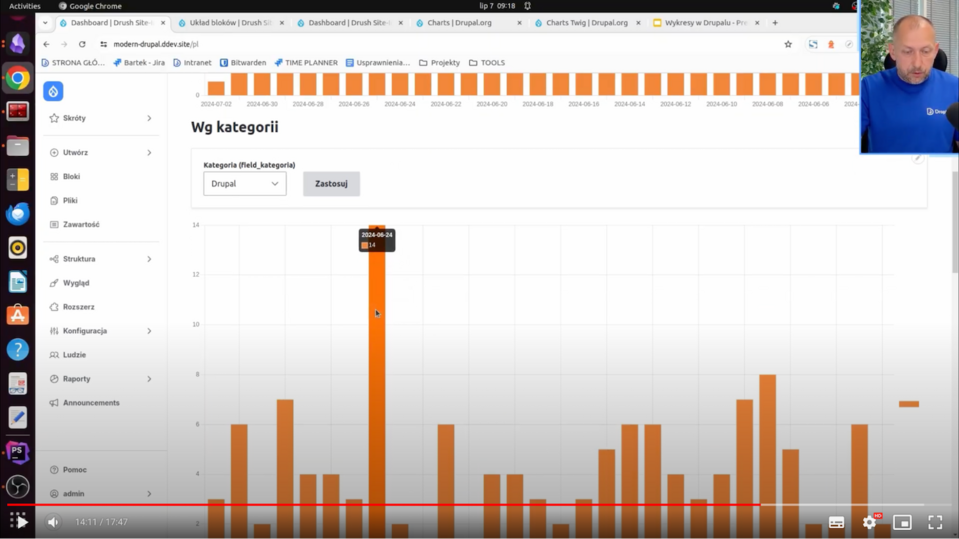
Of course, you can also change this category for yourself, for example, to Safety, and then you can see how the articles were distributed just in this category.
The charts displayed by the author work on a similar principle. We can see which authors and what kind of occupancy they have when it comes to creating and publishing articles.
What do these views look like? They are a little more complicated than this stock price view. I'll show it using the first chart as an example.
On the X-axis is, of course, the date of creation of a given article, i.e., there is Created content. The second value, on the other hand, counts the number of articles on a given day. In this case, the Content: ID field is used, but you can also use the Content: title field because here, it's just that this is the field that is used for the count.
In this case, the Count function, or count, is still used, and next to it is the Aggregation Settings. The aggregation type has the translation Number, but this is simply a Count.
Aggregation functions are available when the Aggregate switch is enabled.
This way, we can count the quantities of given content. They just show up on the graph.
What would it look like without the chart? I choose Unformatted List.
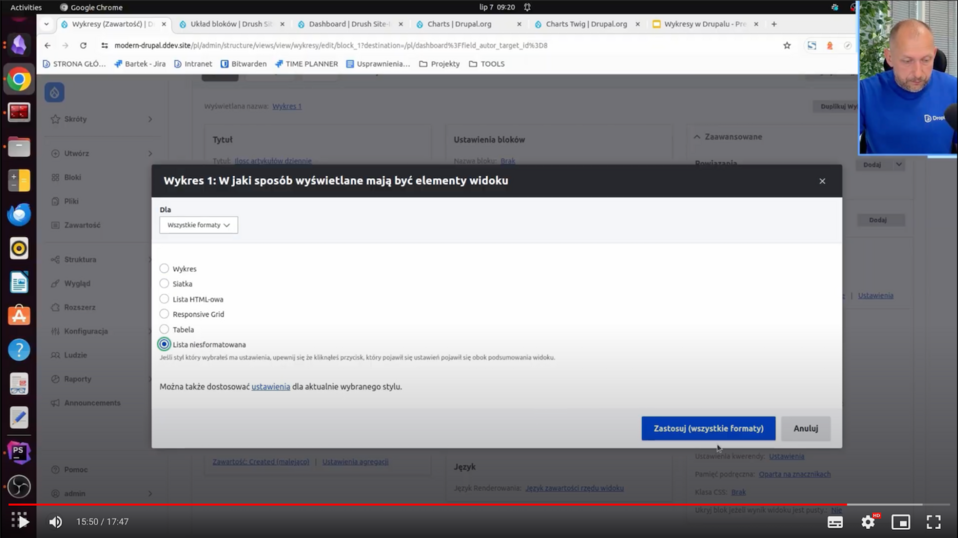
Then you simply see the numbers that count up for a given article - on July 2, there was one article, on July 1 - twelve, and so on. This counting is possible when aggregation is enabled. I will now go back to the older settings with the chart.
Here you can see which data you want to display on the Y-axis - this is the ID-count, which is the number of these articles.
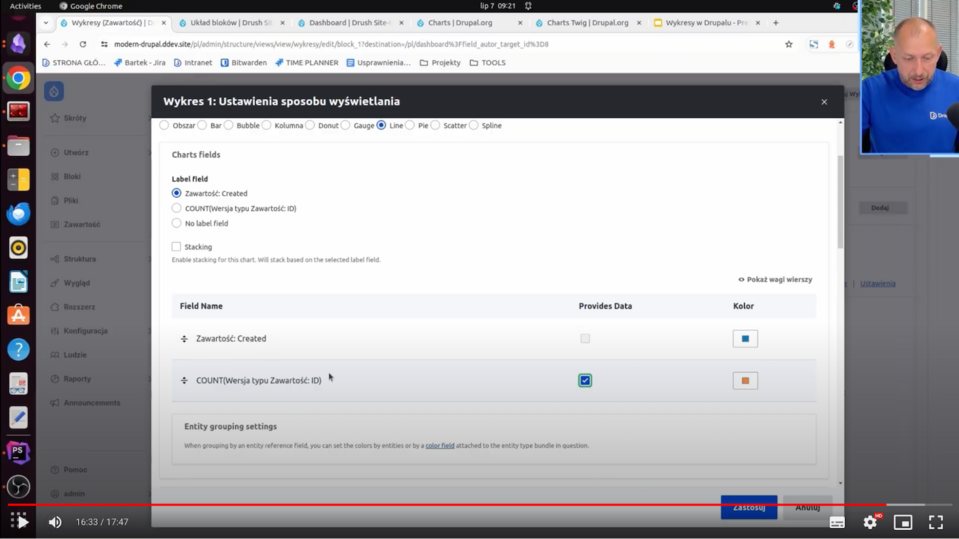
And here you can see how this type of chart has changed:
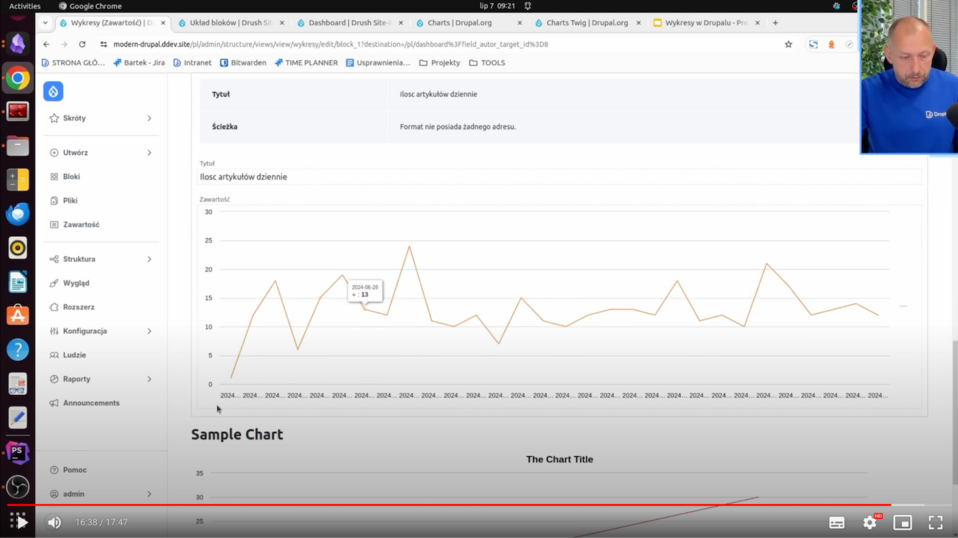
It’s so less friendly but also has some reflection of the data.
The other charts, namely the number of articles by category and the number of articles written by a particular author, are done in virtually the same way. With this, you can see how we can just clearly show the different data that can be applied to real websites.
Drupal Charts with modules - summary
Thanks to this article, you now know all four possible ways to add a chart to your website on Drupal - using the Views module, block, field in entity, and Charts Twig module. If you need assistance with setting up charts or any other type of technical work, we have a CMS development service for publishers, and we can help you.
Today we are talking about Freemium Drupal Modules, The WordPress hub-bub, and Drupal, Now with AI with our hosts. We’ll also cover FullCalendar as our module of the week.
For show notes visit:
https://www.talkingDrupal.com/471
Topics
- Freemium Drupal
- Wordpress controversy
- Drupal CMS and AI
Resources
Guests
Hosts
Nic Laflin - nLighteneddevelopment.com nicxvan
John Picozzi - epam.com johnpicozzi
Aubrey Sambor - star-shaped.org starshaped
Martin Anderson-Clutz - mandclu.com mandclu
MOTW
Correspondent
Martin Anderson-Clutz - mandclu.com mandclu
- Brief description:
- Have you ever wanted an interactive calendar to display your Drupal events with drag-and-drop rescheduling, and without using jQuery? There’s a module for that.
- Module name/project name:
- Brief history
- How old: created in Sep 2010 by ablondeau, though I’ve been behind the most recent releases
- Versions available: 7.x-2.0 and 3.0.0-beta2 versions available, the latter of which supports Drupal 10 and 11
- Maintainership
- Actively maintained, latest release was this morning
- Security coverage, though technically the 3.0.x branch will have it once it’s stable
- Test coverage, minimal but on the roadmap
- Documentation - does have a user guide, but created for the D7 version, so newer documentation is needed
- Number of open issues: 337 open issues, none of which are bugs against the 3.0.x branch
- Usage stats:
- 3,388 sites, though the vast majority of those are for the D7 version, since the 3.0.x branch is very new
- Module features and usage
- No jQuery!
- Lots of configurability plus some extras specifically for Drupal
- Drag-and-drop to alter events
- Option to require confirmation
- Can display toast-style notifications when updates are save
- Double-click on a day or time to create an event at that time
- Can display events from different content types, even if they use different fields to store dates, and yes, even different kinds of fields, so a mixture of core and Smart Date fields will work
- You can set default colors and output type (block or the newer, list-item display), and the ability to override color based on content type or a taxonomy reference
- This module had been essentially dormant for over 4 years, but I decided to work with Jürgen Haas on reviving it after a similar and popular project called Fullcalendar View was not only marked as “Minimally maintained” and “Maintenance fixes only”, but the project page directed users to contact the maintainer to pay for a premium version, in order to use the current version of the Fullcalendar JS library, or to load events via AJAX, which as been an often-requested feature because Fullcalendar View has had common reports of performance problems on sites with lots of event data.
- Worse, the maintainer has closed as “won’t fix” issues that had community-provided patches, because he only wanted to provide said improvements in the paid, premium version
- In my work on the Events recipe for Drupal CMS, I knew that having a solid calendar would be important, and I didn’t feel good about relying on a module that seemed to be pushing users more and more towards a paid model. I’m grateful to Jurgen and everyone who worked on FullCalendar before us for creating such a robust and extensible code base
The Drupal Association has published this guest blog on behalf of HeroDevs.
The official end-of-life (EOL) date for Drupal 7 is January 5, 2025. However, as outlined in the PSA issued on June 7, 2023, the Drupal Security Team announced a change in their support strategy that would take effect before the official EOL date. Starting August 1, 2023, they implemented a reduced support structure for moderately critical Drupal 7 issues.
Why the Reduced Support Structure Matters
When a Drupal 7 module is marked as unsupported, it means that no further updates or security patches will be provided. This situation can leave your site vulnerable to potential security risks and negatively impact performance. As highlighted in the PSA, the Drupal Security Team follows a structured process: they first notify maintainers and provide them with a two-week window to respond and address the issue. If maintainers do not act within this timeframe, the module may be marked as unsupported, and support will cease altogether. This can create significant challenges, particularly for sites reliant on these modules.
HeroDevs’ Proactive and Comprehensive Approach
At HeroDevs, we understand the urgency of this issue. We’ve proactively stepped in to bridge the gap by forking and maintaining modules that are no longer supported by their original maintainers, with Drupal 7 Never-Ending Support. Our approach means that even as official support dwindles, your modules continue to receive the necessary updates and fixes. By taking over security maintenance, we help keep your site secure and operational, allowing you to focus on what matters most without worrying about vulnerabilities or disruptions.
Forking and Maintaining Unsupported Modules: HeroDevs has already begun forking and maintaining modules that have been dropped by their original maintainers in the last year. This approach makes sure that essential functionality remains intact and that any emerging security vulnerabilities are promptly addressed. By doing so, we help maintain the security and integrity of your site even as support from the Drupal community wanes.
Guidance for Custom and Legacy Modules: While custom modules and unique code are not covered under the standard SLA, HeroDevs provides guidance and support to help you integrate and maintain these solutions. We collaborate with you to ensure that your custom developments are compatible and functional with our Drupal 7 NES offering.
Maintaining Compatibility and Functionality: Beyond just security patches, HeroDevs works to test the compatibility of your modules with the evolving web landscape. We address compatibility issues and provide a seamless experience for developers working with legacy systems. This comprehensive support approach helps you avoid disruptions and maintain smooth operations.
Conclusion
As the Drupal 7 ecosystem transitions into its extended support phase, HeroDevs is committed to delivering robust and proactive support for unsupported modules. Our dedication to maintaining security, functionality, and compatibility means you can rely on us to safeguard your Drupal 7 site and navigate the end-of-life transition with confidence. With HeroDevs by your side, you can focus on planning your migration or upgrades while we handle the challenges of unsupported modules. Contact us to learn more about Drupal 7 NES.
Developers are the backbone of innovation, writing the code that powers our digital world. Automation can be a game-changer, transforming how developers work, collaborate, and innovate. By taking over repetitive tasks and streamlining processes, automation boosts efficiency. It allows developers to focus on what truly matters—solving complex problems and creating impactful solutions.
Without automation, teams get bogged down by manual tasks, leading to wasted time and increasing chances of errors. Repetitive processes drain energy and slow down progress, preventing developers from focusing on more valuable work. The lack of consistency also leads to errors and uneven results, ultimately hampering productivity and quality.
What Can Be Automated?
Automation can touch various aspects of the development lifecycle, transforming how tasks are executed and enhancing efficiency. In the following sections, we will explore specific areas where automation can make a significant impact:
Enhancing Code Quality And Consistency
Automating code quality checks is fundamental to maintaining high standards across development projects. Tools like PHPCS, PHPStan, eslint, and stylelint automatically enforce coding standards and detect potential issues before code is committed.
We integrate these tools with our CI pipeline using GitHub Actions, ensuring that code quality checks are performed consistently and automatically. This not only improves the immediate output but also helps in upholding a reference baseline that guides our developers throughout the project lifecycle.
Streamlining Debugging Processes
Debugging can be time-consuming, but automation tools can streamline this process significantly. For instance, using XDebug integrated with DDEV enables developers to set up efficient debugging environments quickly.
This integration allows for seamless identification and resolution of code issues, enhancing developer productivity and reducing downtime. By utilizing these tools, we maintain a consistent reference baseline, minimizing deviations that could lead to larger issues down the line.
Automated Testing For Reliability
Automated testing is essential for ensuring the reliability and performance of software applications. At Axelerant, we employ various automated testing frameworks such as Cypress for visual regression testing, Appium for mobile applications, and Behat for behavior-driven development.
These tools help us maintain high standards of quality while reducing the manual effort involved in extensive testing. By aligning automated testing with our established baselines, we can ensure consistency and reliability across all projects.
Simplifying Onboarding And Offboarding
Automation plays a critical role in streamlining onboarding and offboarding processes. For example, automating the onboarding process can reduce the time required by up to 83%, saving valuable resources and improving employee satisfaction.
These automated processes ensure that every new developer starts with the same foundational setup, promoting consistency and efficiency from day one. This allows developers to focus on their core responsibilities without unnecessary delays, enhancing their overall experience and productivity.
Take a quick DevEx Assessment here
Accelerating Development Workflows With No-Code Tools
No-code and low-code automation tools enable developers to create and manage complex workflows without extensive coding. These tools provide visual interfaces for building workflows, integrating various applications, and automating repetitive tasks.
They are particularly useful for rapidly creating and implementing automation solutions, which enhance developer efficiency and foster innovation. By integrating these no-code tools into our established development standards, we ensure that the solutions developed are consistent with our broader project goals and standards.
Continuous Integration and Deployment (CI/CD)
Implementing CI/CD pipelines automates the process of integrating code changes, running tests, and deploying applications. This automation ensures that code changes are tested and deployed efficiently, reducing the time to market and allowing developers to focus on feature development and innovation.
CI/CD pipeline, powered by GitHub Actions, exemplifies how automation can streamline these processes. By grounding our CI/CD practices in a solid reference baseline, we ensure that every iteration of the software builds upon a stable foundation, reducing the risk of regressions or inconsistencies.
Empowering Developers Through Intelligent Automation
Intelligent automation combines AI and machine learning to handle more complex tasks that go beyond simple repetitive actions. For instance, Axelerant leverages AI-driven tools to automate business process discovery, enabling developers to focus on high-value tasks that require human intelligence and creativity.
This empowerment not only enhances productivity but also empowers developers to take ownership of their work. By integrating intelligent automation with our established reference baselines, we ensure that these advanced tools continuously align with our evolving project standards and objectives.
Wrapping Up
Automation is a key enabler in optimizing Developer Experience by reducing manual effort, enhancing code quality, and accelerating development workflows.
By integrating automation tools and practices into our development processes and grounding them in solid reference baselines, we at Axelerant are committed to providing a superior Developer Experience that fosters innovation, efficiency, and job satisfaction.
Explore how Axelerant’s Developer Experience Services can help you implement automation solutions tailored to your unique needs, ensuring your projects are delivered with excellence and consistency.
The shift to remote work has revolutionized how development teams operate. While it offers unparalleled flexibility and access to global talent, it also brings unique challenges that can impact productivity and satisfaction. Elevating Developer Experience (DevEx) for remote teams is crucial for maintaining high performance and engagement.
Teams can overcome these challenges by focusing on improving communication tools, automating workflows, and providing access to streamlined developer platforms. Key areas include setting up efficient CI/CD pipelines, offering seamless onboarding, and ensuring consistent access to essential documentation and tooling to boost overall efficiency and satisfaction.
The Importance of Remote Developer Experience
Companies that invest in elevating remote DevEx can expect higher retention rates, better collaboration, and more innovative solutions. By prioritizing DevEx, organizations can drive business success through more engaged and productive teams.
Take a quick DevEx Assessment here
Best Practices to Elevate Remote Developer Experience
Implementing Robust Communication Tools
Effective communication is the foundation of any successful remote team. Utilizing reliable tools like Slack or Zoom ensures seamless interaction. These platforms support asynchronous and/or synchronous communication, which is crucial for maintaining connectivity across different time zones.
However, excessive meetings and constant communication can lead to distractions and reduce productivity. Establishing clear protocols, such as limiting meetings to essential discussions and encouraging asynchronous updates, helps avoid over-communication.
Integrating communication tools with other development tools through an Internal Developer Platform (IDP) can further streamline workflows, reduce cognitive load, and enhance efficiency by minimizing unnecessary interruptions.
Utilizing Advanced Version Control Systems
A collaborative development environment is vital for remote teams. Implementing robust version control systems like Git helps manage code changes efficiently, ensuring all team members can work on the same codebase without conflicts.
Platforms like GitHub, GitLab, or Bitbucket facilitate seamless collaboration, real-time code reviews, and continuous integration/continuous deployment (CI/CD) pipelines, making it easier for developers to work together and solve problems collectively.
CI/CD processes not only enhance collaboration but also support deep work by reducing the need for manual interventions, allowing developers to focus on complex problem-solving tasks.
Maintaining Comprehensive Documentation
Maintaining comprehensive documentation is crucial for remote development teams. While tools like Confluence and internal platforms provide a centralized repository, it's the processes and culture in place that ensure documentation is regularly updated and remains accessible.
Establishing clear ownership, regular review cycles, and fostering a culture of collaboration encourages team members to contribute and keep the documentation current.
An Engineering Handbook serves as a valuable resource for best practices, coding standards, development workflows, and project information. It helps remote developers stay aligned and maintain consistency, which reduces errors and improves overall project quality.
Establishing Streamlined Feedback and Review Processes
Effective feedback and review processes are vital for motivating remote developers and ensuring continuous improvement. Regular performance reviews allow teams to discuss progress, set goals, and address challenges, fostering both individual and team success.
Clear performance metrics, combined with constructive feedback, help align developers with project objectives and personal growth. Recognizing achievements through virtual awards, shout-outs, and incentives such as bonuses or additional time off further boosts morale.
Periodic check-ins ensure that developers stay engaged, enabling timely adjustments and sustaining long-term productivity and motivation.
Providing Continuous Learning and Development
Professional development opportunities are crucial for keeping remote developers engaged and updated with the latest technologies. Offering online training programs, webinars, and workshops through platforms like Coursera, Udemy, and Pluralsight helps developers enhance their skills. Establishing a mentorship program where experienced developers guide newer team members fosters a culture of continuous learning and growth.
Pair programming, even in a remote setting, can be an effective way to facilitate knowledge-sharing and collaborative problem-solving, helping developers learn from each other in real-time. Additionally, providing access to documentation, tutorials, and development sandboxes encourages experimentation and skill enhancement.
Ensuring Effective Tooling and Development Environments
Providing remote developers with the right tools and development environments is vital for productivity. Utilizing cloud-based Integrated Development Environments (IDEs) such as Visual Studio Code or AWS Cloud9 allows developers to access their workspaces from anywhere.
Standardizing development tools and automating environment setups with tools like Docker ensures consistency and reduces setup time. Continuous Integration/Continuous Deployment (CI/CD) pipelines automate testing and deployment, streamlining the development workflow.
Building a Secure and Efficient Infrastructure
A secure and efficient infrastructure is fundamental for remote development. While security measures such as VPNs, two-factor authentication, and encryption are essential for protecting sensitive data, they can often make the developer experience cumbersome.
It's important to strike a balance by implementing modern security solutions that are both robust and user-friendly, ensuring safety without compromising ease of use. Utilizing cloud-based services and infrastructure as code (IaC) practices with tools like Terraform ensures scalable and reproducible environments.
Investing in reliable hardware and software tools, including high-speed internet, powerful laptops, and necessary software licenses, equips remote developers with the tools they need to succeed and deliver high-quality work.
Why Investing in Remote DevEx Pays Off?
Investing in the remote Developer Experience is not just about making developers happy; it's about driving business success. Elevated DevEx leads to higher productivity, more innovative solutions, and a better bottom line. Companies that prioritize DevEx find that their teams are more engaged, collaborative, and capable of delivering high-quality work, even in a remote setting.
How Axelerant Can Help
At Axelerant, we understand the unique challenges of remote development. Our comprehensive DevEx services are designed to create a supportive and productive environment for your remote developers.
From setting up robust communication frameworks and advanced version control systems to providing comprehensive documentation practices and continuous learning opportunities, we cover all aspects of elevating remote DevEx.
By partnering with us, you can focus on building innovative solutions while we take care of optimizing your Developer Experience. Contact us today to learn how we can help your remote teams thrive.
This is the fifth article in a series of articles about the Batch API in Drupal. The Batch API is a system in Drupal that allows data to be processed in small chunks in order to prevent timeout errors or memory problems.
So far in this series we have looked at creating a batch process using a form, followed by creating a batch class so that batches can be run through Drush, using the finished state to control batch processing and then processing CSV files through a batch process. All of these articles give a good grounding of how to use the Drupal Batch API.
In this article we will take a closer look at how the batch system processes items by creating a batch run inside an already running batch process. This will show how batch systems run and what happens when you try to add additional operations to a running batch.
Let's setup the initial batch operation.
Setting Up The Batch
The setup for this batch process is similar to the batch processes on the other articles. This will kick off a batch process that will process 1,000 items in chunks of 100 each.
$batch = new BatchBuilder();
$batch->setTitle('Running batch process.')
  ->setFinishCallback([BatchClass::class, 'batchFinished'])
  ->setInitMessage('Commencing')
  ->setProgressMessage('Processing...')
  ->setErrorMessage('An error occurred during processing.');

// Create 10 chunks of 100 items.
$chunks = array_chunk(range(1, 1000), 100);

// Process each chunk in the array.
foreach ($chunks as $id => $chunk) {
  $args = [
    $id,
    $chunk,
    TRUE,
  ];
  $batch->addOperation([BatchClass::class, 'batchProcess'], $args);
}
batch_set($batch->toArray());
The key difference here is that we will also be passing in a flag to the arguments that will cause the original batch processes to initiate a new batch process whilst the batch is running.
With that setup we can look at the batch operations.
Adding To The Batch Operations
The parameters we set up for the batchProcess() method has an additional $addBatch flag that is set to TRUE for all of our initial batch operations.
During the normal run of the batch process method we look at this flag and then initiate a new batch process using the BatchBuilder class if it is set to TRUE. The main difference here is that we set the flag to FALSE in the inner operations so that they don't initiate additional batch runs (which would cause an infinite loop).
The rest of the batch operations is the same as in previous articles where we are just rolling a dice to decide on the outcome of the operation to simulate issues.
When we call batch_set(), Drupal will make a call to batch_get() to see if a batch operation is already running. If it is then _batch_append_set() will be called, which will append the new batch run directly after the one that is running. This means that we can setup and initiate a new batch process during the run of the current process without interrupting or disrupting the current operations. The new operations will be run at the end of the current process.
Here the is section of the batchProcess() function that runs the additional batch creation and batch_set() operations. As you can see it is just calling the exact same BatchBuilder code that we normally use to start batch processes, except this time it is being called within the processing method.
public static function batchProcess(int $batchId, array $chunk, bool $addBatch, array &$context): void {

  // -- Set up batch sandbox.

  if ($addBatch === TRUE) {
    // For every "original" batch run we add another chunk of numbers to be
    // processed. This simulates generating an additional bach run inside an
    // existing batch.
    $batch = new BatchBuilder();
    $batch->setTitle('Running batch process.')
      ->setFinishCallback([BatchClass::class, 'batchFinished'])
      ->setInitMessage('Commencing')
      ->setProgressMessage('Processing...')
      ->setErrorMessage('An error occurred during processing.');

    // Add a new chunk to process. Sending the third argument as false here
    // means we don't start another batch inside this.
    $args = [
      $batchId + 1000,
      range(1, 100),
      FALSE,
    ];
    $batch->addOperation([BatchClass::class, 'batchProcess'], $args);

    batch_set($batch->toArray());
  }

  // --- Continue the batch processing.
}
After this batch operation has been completed we will have processed 2,000 items. This is the original 1,000 items from the first batch and a 100 items from the additional sub-batch processing runs.
The fact that the additional batch runs are performed after the current run means that their finished methods are also run separately. This does cause a strange effect where you get 11 messages printed out once this operation has finished (1 for the initial batch run and another 10 for the additional batch runs). This causes the batch finished page to look like this.
You can turn this off by ether not printing a final total message or by not passing a finish callback to the inner batch setup. I have left this in the example to show clearly what is going on.
This batch addition is a useful part of the Batch API as it means that any batch operation will be performed, even if Drupal is currently running one.
How Is This Useful?
I'd imagine that some of you are reading this and thinking "why would you do this?". Well, this technique does seem somewhat esoteric, but it does have its uses. Adding additional batch operations is very useful if you do not know what the "finished" state would look like or if you are performing recursive operations. This means that you can't preload the batch with the known elements, and using the Batch API finished parameter wouldn't be applicable either.
Any batch process that requires a recursive process can be setup in this way with the initial seed being only the tip of the known processes that will be performed during the operations. The recursive nature of the operations means that you don't know for sure at the start of the batch process how many items you need to process until you have processed them.
For example, I was recently tasked with importing thousands of links from a sitemap index file. A sitemap.xml file is a file that lists the available links on a site in an XML document, but can also an index file that links to other sitemap.xml files, which in turn can also be index files.
The user would enter the sitemap.xml index location and this would trigger a batch process that would trigger additional batch processes for every additional sitemap.xml index file found in the index. Some of these sitemap.xml files were also index files and so we needed to kick off additional processing runs to process those files as well. All of the links in the sitemap.xml files were then saved to a database table for later analysis.
Here the the important part of the batch process method that parses the sitemap.xml file and then either creates an additional batch operation or saves the link to the database. The library in use here is the Sitemap Checker PHP library that I wrote prior to using it in this task. Using this library really sped up the development of this task since it had most of the sitemap parsing code built in. The "Link" entity here is a simple custom entity that stores information from the parsed URL.
$client = \Drupal::service('http_client');

$sitemapSource = new SitemapXmlSource($client);
$sitemapData = $sitemapSource->fetch($sitemap);

if ($sitemapSource->isSitemapIndex()) {
  $sitemapIndexXmlParse = new SitemapIndexXmlParser();
  $sitemapList = $sitemapIndexXmlParse->parse($sitemapData);

  $batch = new BatchBuilder();
  $batch->setTitle('Importing processing of sitemaps')
    ->setFinishCallback([BatchLinkImport::class, 'batchFinished'])
    ->setInitMessage('Commencing')
    ->setProgressMessage('Completed @current')
    ->setErrorMessage('An error occurred during processing.');

  // Initiate new batch to process the items in compressed sitemap.
  foreach ($sitemapList as $key => $sitemapUrl) {
    $args = [
      $key,
      $sitemapUrl->getRawUrl(),
    ];
    $batch->addOperation('\Drupal\link_audit\Batch\BatchLinkImport::processSitemapsBatch', $args);
  }
  batch_set($batch->toArray());
}
else {
  $sitemapParser = new SitemapXmlParser();
  $list = $sitemapParser->parse($sitemapData);

  foreach ($list as $url) {
    $context['results']['progress']++;

    $link = Link::create(
      [
        'label' => $url->getPath(),
        'url' => $url->getRawUrl(),
        'path' => $url->getPath(),
        'location' => $sitemap,
      ]
    );
    $link->save();
  }
}
This process could be further improved by adding additional operations that write entries to the database instead of performing the write operation here.
Using this technique meant that the batch run could process the 40,000+ links without knowing before hand how many links were available to process, and did so without timing out or running out of memory. The batch process just churned through the sitemap.xml files until it had run out of either sitemap.xml files or links to process.
Conclusion
In this article we looked at setting up an additional batch processing run whilst a batch process run was already underway. Whilst it isn't advisable to use this technique in every batch process there are some use cases that make this a useful part of your batch toolkit.
Using this additional batch run technique is good if you have a recursive operation to perform. I have found that this normally involves API or web calls of some kind where the eventual outcome (other than there being no more items to process) isn't known at the start of the operation.
The important part to understand here is that any additional batch operations you create will be appended to the end of the current batch run. This means that you can't alter the current batch run once it is underway, with the caveat being that if you throw an exception your batch will stop entirely. Not being able to alter the batch operations makes sense if you think about the underlying data structure. The Drupal Batch API is built upon the Drupal Queue API, which means that once the queue is in place it isn't straightforward to fiddle with it (at least not without making direct database queries, which I don't advise doing).
All of the code for this module can be found in the batch addition example module on GitHub. You can also see all of the source code for all of the other modules in this series in the Drupal batch examples repository.
In the next article in this series we will take a look at how the Batch API is used within Drupal itself to perform potentially complex tasks.
Pages
About Drupal Sun
Drupal Sun is an Evolving Web project. It allows you to:
- Do full-text search on all the articles in Drupal Planet (thanks to Apache Solr)
- Facet based on tags, author, or feed
- Flip through articles quickly (with j/k or arrow keys) to find what you're interested in
- View the entire article text inline, or in the context of the site where it was created
See the blog post at Evolving Web